Tuesday, August 17, 2010

tuesday...again!

OK, as promised, here's the tutorial for using up those scraps of paper and making your own background using them!

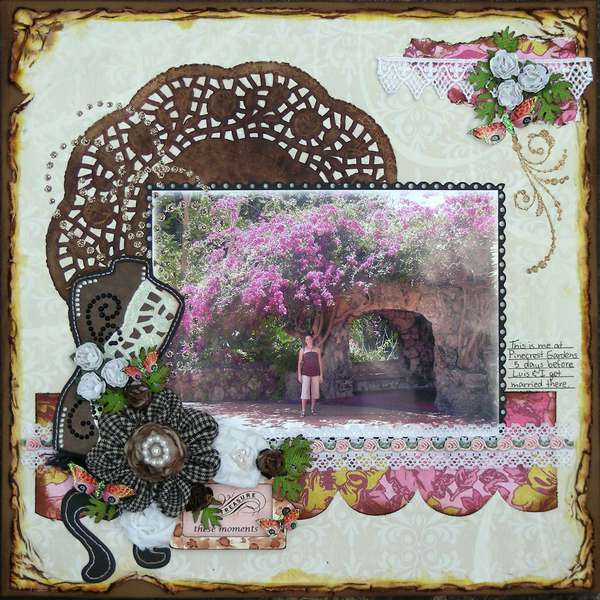
Again, here's my finished layout:


Some days ago, I used the light blue paper with the cream flowers to make my new glasses layout. Here it is if you missed it:


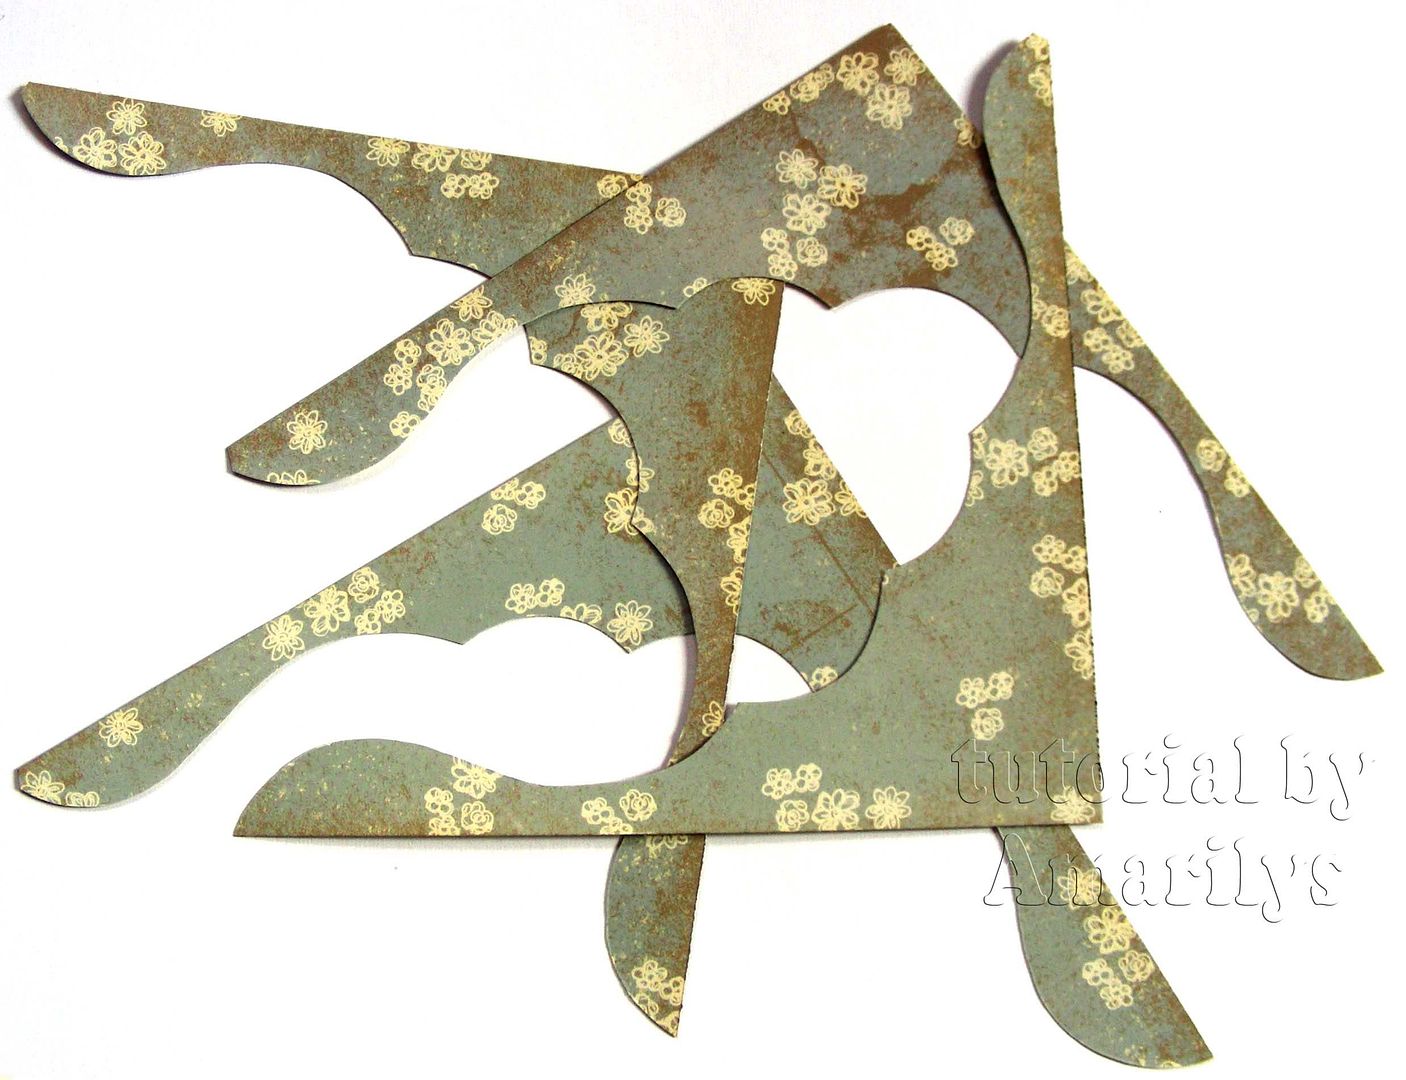
I made my own die cut background for this previous layout (I do this often) and saved the corners. For this new layout, I used these corners to make a new die cut paper using the opposite part of the paper.

Here they are:


To make them look a little better, I distressed them using an old pair of scissors:

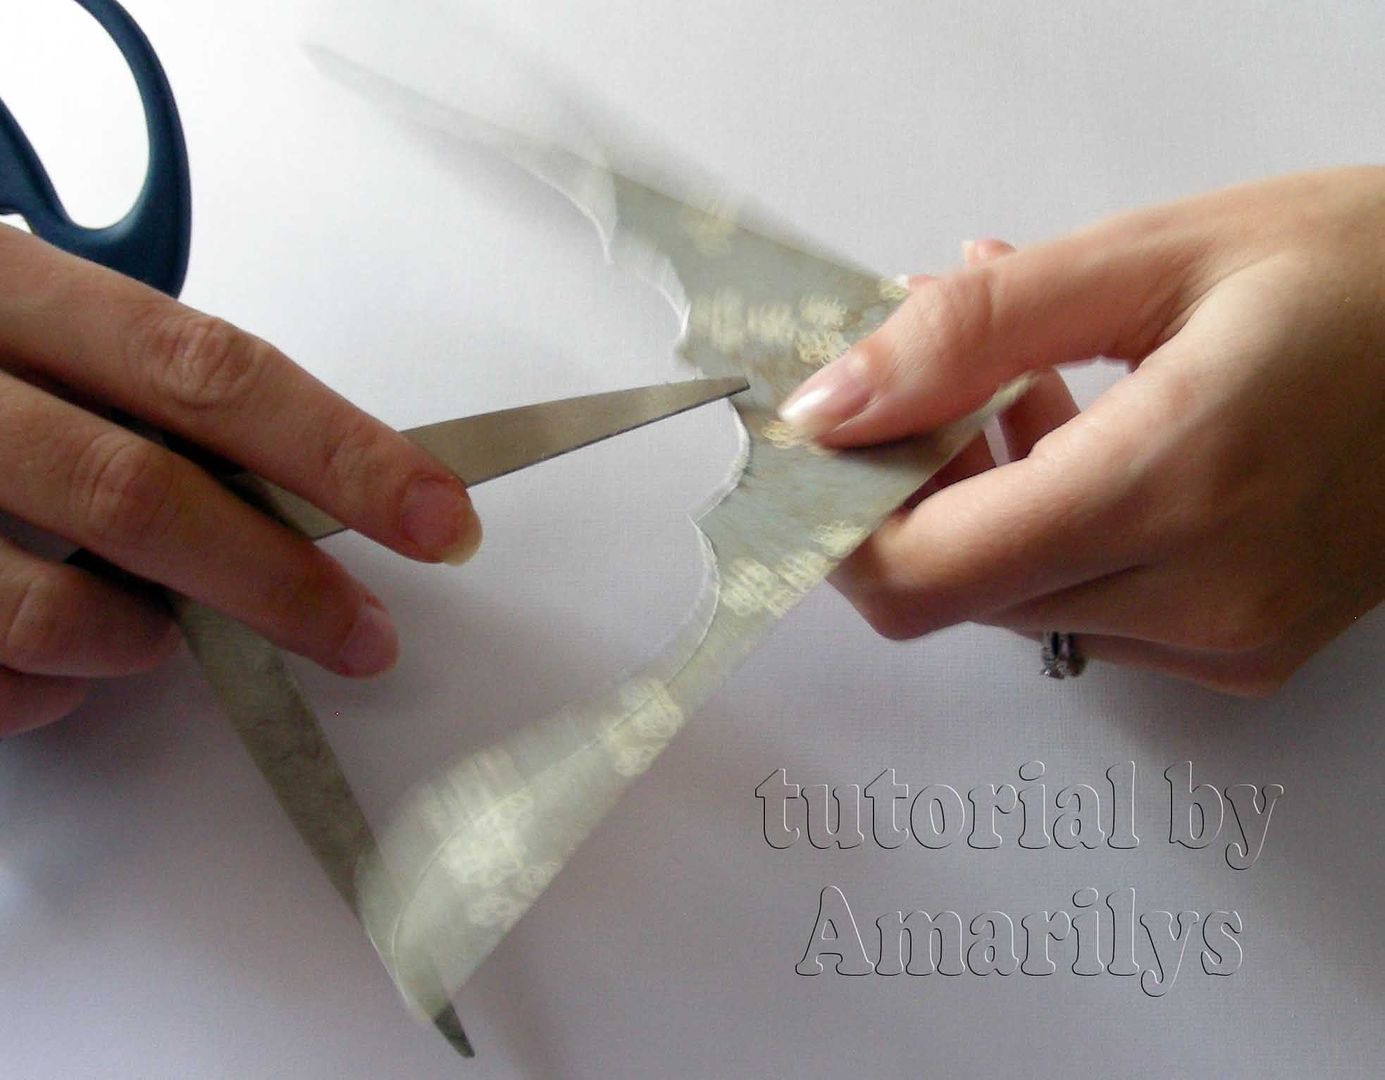
Sorry about the blurry picture but I was distressing at full speed!

I inked them and wet their edges to break up the paper fibers and scrunched the borders just a little bit. When they dried, I inked them again:


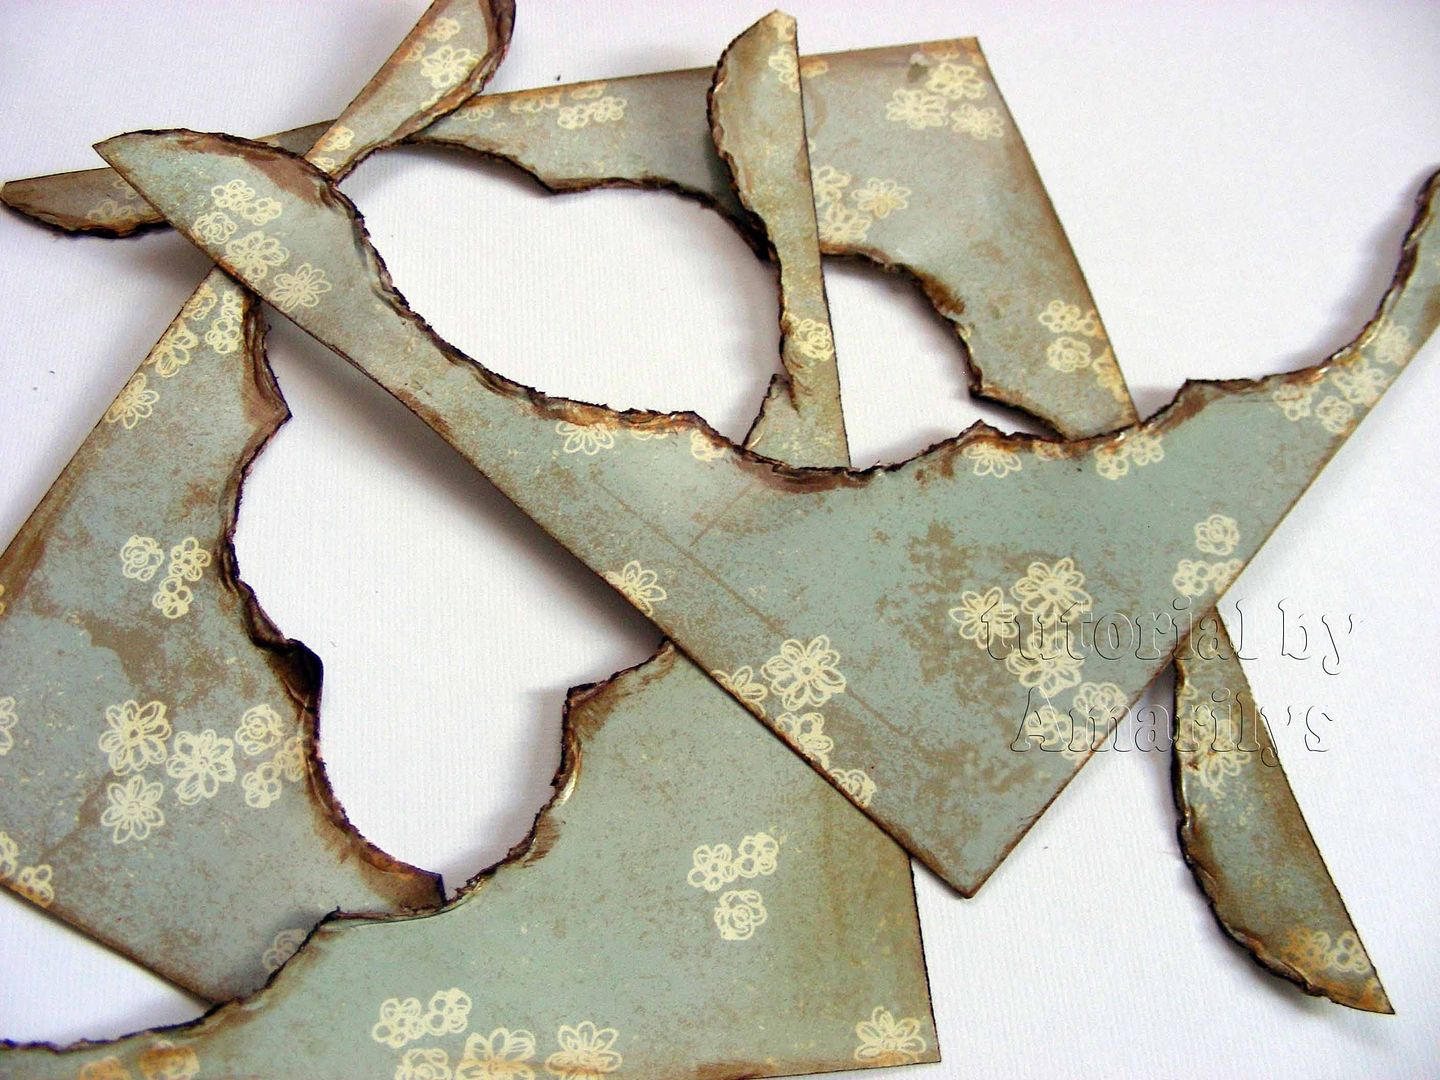
I then glued all the corners on my background (made of scraps too!):


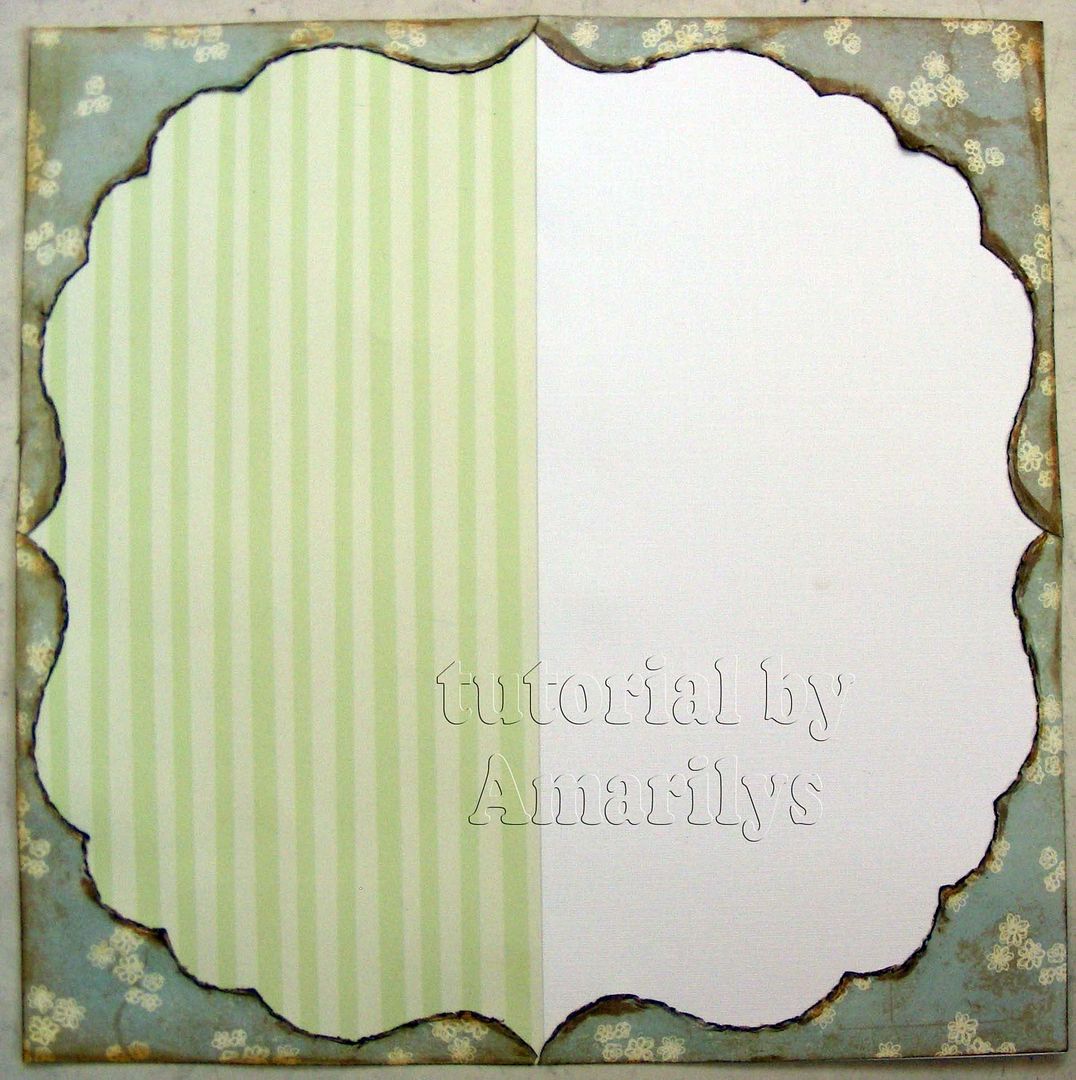
To finish it off, I added 3D paint dots to the border so that you can't see where the pieces meet. Here's the finished layout again so you can take a look:


Thanks for stopping by and I hope that you too can recycle those scraps into something beautiful!

tuesday...

Ok, so I have some tips for all of you who are trying to use up your scraps of paper. I was inspired by Pat's Leftovers Layout Challenge over at sb.com and came up with an ingenious (that's what I think anyway) way of making your own background paper out of leftover papers, commonly known as scraps. I only used scraps of paper to make this layout.

Here's my finished layout:


Again, I handmade all the embellies in this page. The round 2 flowers that are similar (just a different size) are Rebecca's Fabric Flowers Tutorial and the other round flower is Wendy's No sewing fabric bloom. Rebecca has a similar tutorial but only asks for 5 petals instead of the 7 that Wendy uses. Because I like to be different, I used 8 petals. :)

The little bees I've been making them for over a year to sell on eBay and this is the first time that I made them for me. I think that they are adorable! I handmade all the flower centers with pearls. The large flourish I also made using my own tutorial. I hand-stitched the box around the pictures, which I turned black and white in photoshop because they looked too busy and didn't quite match Color Combos Galore combo challenge for this week. Here are this week's colors:


The layout is also based on Aphra Bolyer's sketch for Sketch Inspiration. Here's the sketch which I followed pretty well.


Here are some close ups of the layout:


Because it will get hard to find the tutorial (sorry, didn't mean to ramble in this post but I wanted to make sure that I gave proper credit to everyone), I'm going to do a separate blog entry for the tutorial. Don't miss it!

Monday, August 16, 2010

monday...again! :)

OK, so I've been working on this layout for days now (3, I think) and I just finished it.

Here it is:


As I said before, I loved The Color Room's Palette for this week (TCR#19) and I made a layout and a card from it!

This layout was done for many challenges, which is probably why it took so long!
1. TCR #19


2. Pages in Time
Barbara's Aug. Pretty Punch Challenge and Lacee's Romantic Style Challenge.

-For Barbara's Challenge I used Martha Stewart (MS) doily lace for the picture mat, a corner punch (MS optic dot) for the little clock in the bottom left corner using the tutorial that Barbara linked in her punches group, and a MS butterfly punch for the yellow butterflies.

-For Lacee's Challenge I used the blues/creams and hint of silver colors that she requested. I also included typical embellies-all handmade by me- in a romantic layout: lace, pearls (both handmade with 3D paint and button center for the handmade flower) and flowers.

3. Swirlydoos Swirly Challenge
Now, I had so much fun with this Swirlydoos challenge!

I cut out the brown swirl with my pazzles and handmade all the white pearl swirls with 3D paint. I also handmade the journaling box which has swirls as well!

In this layout, I used Robin Schelin's water distressing tutorial for all 4 layers. The flowers are handmade, which I love the handmade touch that they add to the layout as well as the feminine touch. All the tutorials to make these flowers are linked a few entries down.

Thanks so much for stopping by my blog!

monday...

I have a layout and a card that I have to share with you.

The first one is a layout inspired by The Color Room's palette #18.


This will be my first page in my anniversary album. I took this pic of the boat when we were going back to it from Nassau, Bahamas. Like I said before, the colors are based on TCR#18. The two smaller scrap papers are actually digital paper that I printed and inked. Love how they look in the page! I handmade both blue flowers and the little envelope which holds our inboard card (I can't find my husband's so mine is the only one there for now). The flourish is a cut-out with my pazzles. I think the silver stickles are too much but I can't figure out a way to get rid of them without breaking the layout so they will stay! lol

I used Robin's water technique on my background paper and absolutely love how it looks! It reminds me of the ocean. Below are a few close ups so you can get a better idea of the embellies.


I also want to share a card that I made today based on this week's TCR#19 palette.


Again, everything here is handmade-the flower, butterflies, clock, and leaves. I used a template by Rebecca Ludens provided to us in by Colorful Creations for their blog challenge: to use the template and make a card.

Here's a close up picture of the card:


Thanks for stopping by and come back a little later because I have something else to share with you today! :)

Thursday, August 12, 2010

thursday...

Well, I'm happy to say that things on my end are getting back to normal. We moved into a rental house with my family for now since my husband and I plan to move to Washington State when he graduates next year.

Everything has been put away and I'm happy to say that we have no more boxes at home. This, of course, means that I can scrap again!

Below is the first layout that I made in the new house.


This is a picture of me at Pinecrest Gardens, the park where I got married last year, 5 days before the wedding. I thought that the flowers looked gorgeous and I wanted a picture there.

I handmade every single embellie that you see here. I made the flowers out of fabric except for the tiny roses, which are made our of paper. Here's the tutorial for the fabric flowers. Lisa used sheer fabric but I used a piece of plaid fabric that I had left over from a project. For the tiny white roses, which I think look just like Prima's, I used a video by Kathy tutorial while searching youtube.

The treasure part of the title is a rub-on that I've had forever and I printed 'these moments' on the cardstock to finish my title. The doily was actually white and I misted with walnut ink to make it brown. I used Robin's water distressing technique for the background paper and I love how it turned out! This layout is also inspired by Gabi's (Gabriellep from sb.com) work. If you haven't been to her gallery, I recommend you do!

The mannequin tag that I used here I made for a group challenge in Pages in Time. Here's the template that Helene provided for the group. I traced the template into a scrap brown paper. I used a doily (or a piece anyway) for the right side. The tiny white roses I handmade with the tutorial above(don't they look like Prima's?) and the swirls & stitches are also handmade.

Here's a close up of the tag before I attached it to the page:


Thanks for stopping by and hopefully, I'll start posting more often soon!