Thursday, April 28, 2011

thursday...tip/technique on using double sided paper

Today I have a quick tip for those of you who love double sided paper but hate the fact that you can't use both sides on one layout so you end up buying two pieces of the same paper. I know that you are out there somewhere because I'm the same way!

We are going to be working with the background layer. Here is my finished layout.


(for close ups, supply list and my layout write-up, please go to this post)

For this layout, I used a Girl's Paperie double sided paper in a light pink and cream color. I LOVED both sides of it so I decided to use them both in my engagement pictures layout.


I cut out a rectangle using my paper trimmer in the center of the sheet and flipped it over. To hide the seams, I used a sheet of brown cardstock and punched around the page. I sandwiched this between the two layer of the same paper for a finished look.


Here is a picture of my background ready for me to add my pictures and embellies.

I hope that you enjoyed this quick tip!

Tuesday, April 26, 2011

tuesday...Step by Step custom bling using the i-Rock

Hiya Bloggers! I hope that you had a Happy Easter!
Today I'm going to show you how to make your own bling shapes using your i-Rock!

Supplies:
pen: Copic Marker E57
jewel: Imaginisce i-Rock Hot Rocks Compact Crystal
tool: Imaginisce i-Rock
other: pencil, die cut shape (optional), tweezers


Step 1. Decide what you want to make. You can use any die cut shapes, bling, swirls, etc to use as a template for your handmade bling. I chose a butterfly to match it to the other butterflies in my page. Trace lightly with a pencil around your shape.


Step 2. Using tweezers, place the rhinestones on your lines. By doing this you will know if your lines will show and if you have enough rhinestones for your project. Use different size rhinestones for a more professional look.


Step 3. Carefully start adhering your rhinestones (follow the instructions for your i-Rock tool). I removed most of my rhinestones from my page so I can work better but you can just go over each rhinestones and set them.


Step 4. You will end up with something like this when you are done heat-setting your rhinestones. It looks just like when you first placed the rhinestones on your lines to check but this time they are attached permanently. Now, you can leave your bling like this and it will look great but if you want to customize it and match it to your page, you can use a Copic marker and color your rhinestones.


Step 5. Carefully color in with a brown Copic (I used E57) the rhinestones in the body of the butterfly and the antennae. Let it dry and do it again if you want for a richer color.


Step 6. Stand back and admire your custom bling!

I hope that you enjoyed this quick step-by-step tutorial on how to make your own bling using the i-Rock! If you don't have one, then you NEED one! Check out the AWDML online store to get your today!

Tuesday, April 19, 2011

tuesday...Step by Step Thank you Card

Hi! Today I'm going to show you how to make an easy but elegant thank you card.

Supplies:
  • cardstock: Bazzill;
  • patterned paper: Basic Grey Curio;
  • stamps: Basic Grey Thank you), Heartfelt Creations (leaves);
  • punches: Martha Stewart Punch Around the Page Scallop 3 Dot;
  • glitter: Glimmer Mist (Frost, Olive Green, Suede, Burnt Red), Stickles (Frosted Lace);
  • tools: Cuttlebug, Tim Holtz Tonic Paper Distresser;
  • other: Scribbles 3D Paint, red button
To Make the Flower:

Step 1. Hand draw or punch out 3 daisies from white cardstock.


Step 2.  Glimmer mist them using Frost, Olive Green, Suede, Burnt Red Glimmer Mists and let them dry. Once dry, fold each petal in half using a pair of twizzers.


Step 3. Stamp the flower shape from the Basic Grey Thank You Stamp on a cream cardstock and cut it out.


Step 4. Gather your pieces to make your flower. You will need the three daisies, the stamped image and a button.


Step 5. Layer the daisies so that the petals overlap. Add the stamped image and the button  to the center. Hand-stitch the button to the flower.

To Make the Card:

Step 1. Cut out a 2.5"x5" rectangle from the Basic Grey's Curio paper and using the Martha Stewart Punch Around the Page Scallop 3 Dot border punch, punch on both sides of the pattern paper.


Step 2. Make your card from a 5"x7" white cardstock and fold it in half. Emboss the front of the card using your Cuttlebug and an embossing folder.


Step 3. Stamp the sentiment (Basic Grey Stamp) onto white cardstock and cut it out. First cut a rectangle and then cut a small triangle on one side to give it a banner look.


Step 4. Assemble the card. Place the Basic Grey punched paper in the middle of the card. Add your handmade flower to one side and the sentiment next to it. I added a stamped leaves to mine to finish it off.


Here is a close up of the card. I slightly curled the sentiment with my fingers to give it some dimension before I attached it to my card.

I hope that you enjoyed this quick step-by-step tutorial!

Monday, April 18, 2011

monday...Trailmakers April Challenge 2

This is a bittersweet post for me as this is my last post as a Trailmaker DT member since this is my last term as a DT member. However, I do want to share with you my last project. The for the next 2 weeks is to make a rainy day project and this is what I came up with:
I made an umbrella shaped card and a matching purse. For the purse, I used the template from Krisi's Kreations,our April sponsor. She has wonderful templates and svg files for sale as well as digital kits, alphabets and elements at her store. Stop by and check it out for yourself!

I decorated it by embossing a white cardstock and suing it as the background. I added some yellow flower and a few leaves that I cut with my Pazzles. I finished it off by adding a sentiment by My Pink Stamper (our February sponsor), two rhinestones and yellow ribbon for the handles. I also did some faux stitching on the purse to match the umbrella card.


I cut out the umbrella card with my Pazzles Inspiration in white. I used the Indie Girl Collection that I got from the TrailMakers store.I just loved the blues and yellows from this collection and thought it would look wonderful for a rainy day card! I added some yellow flowers, a few rhinestones and a button from the Trailmakers April Kit. I did some faux stitching on the card too. The zig zag lines are actually cut out with my Pazzles using this template by Krisi's Kreations. This zig zag is actually a border file which I shrunk down to make a zig zag stitching to add interest to my card without having to actually sew it! I then went over it with a white pen and voila! Instant stitched lines!

Here is a close up of the card inside the little purse so you can get a better view of them:


I added a quote to the card that I printed using my computer and then shaped as a little banner. The quote reads: "If you want to see the rainbow you gotta put up with the rain."

I can't wait to see what you came up with for your rainy day project! Remember to link it here for a chance to win!

Friday, April 15, 2011

friday...AWDML April 15th Reveal-Hero Arts

Today is the 15th which means it's reveal day for the second featured manufacturer at AWDML! As you know, the first manufacturer is Basic Grey and you can see my projects here. The second manufacturer is 
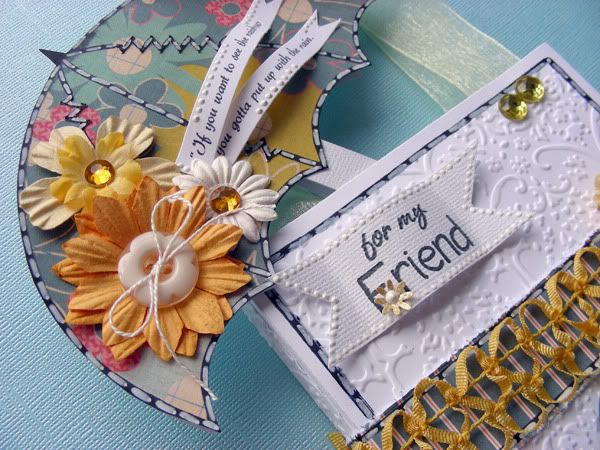
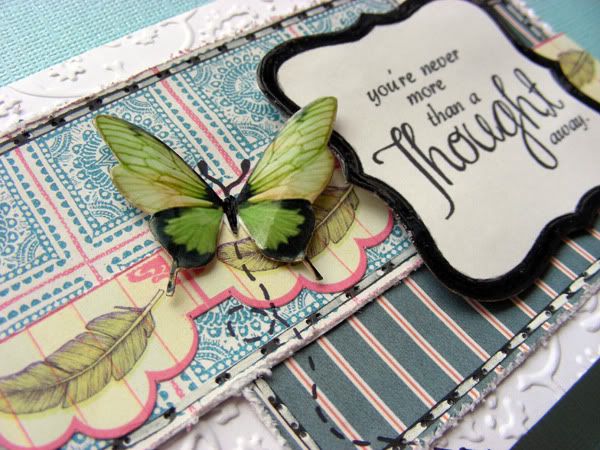
Hero Arts and this was my first time using their products and I must say that I loved it!


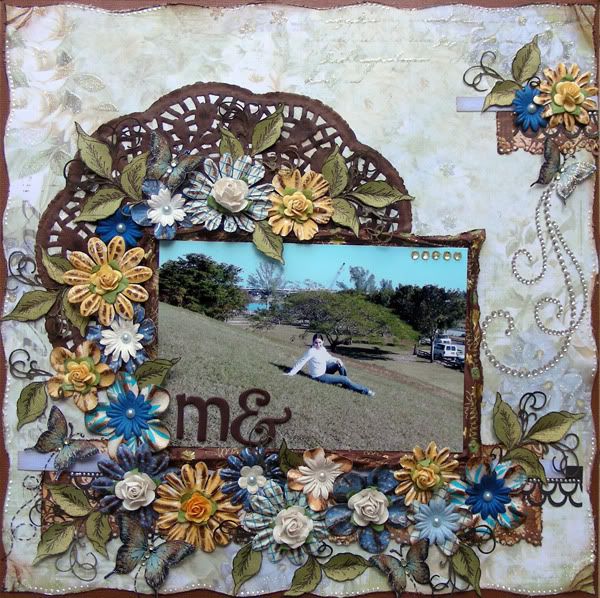
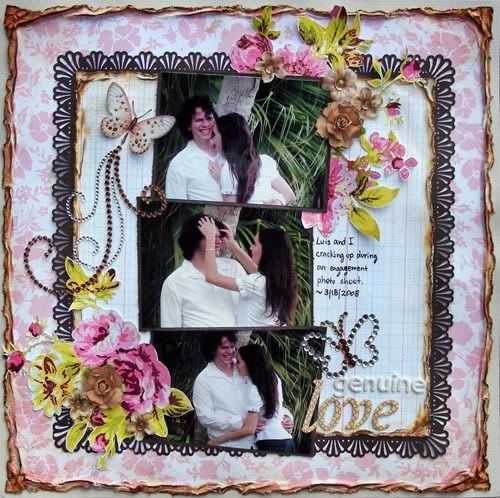
My hubby took this picture of me at the local park on a hill and I love that you can see the background in the picture! For this layout, I used two different colors of Hero Arts blooms-Sunshine and Sea. Now, I wanted to make this layout in more earth tones and these blooms, specially the yellow ones, were a bit bright for my page. My solution?


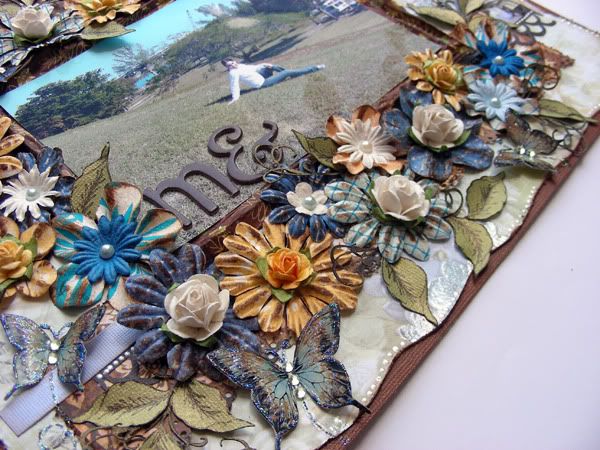
I inked them with Tim Holtz walnut satin ink! Now they all look like they belong in this layout! I used smaller Prima and Recollections roses as flower centers and added Pazzles cut leaves which I sprayed with glimmer mist. As you can see, I ran out of e's so I used the & sign as my e for my title. I really like how it looks!


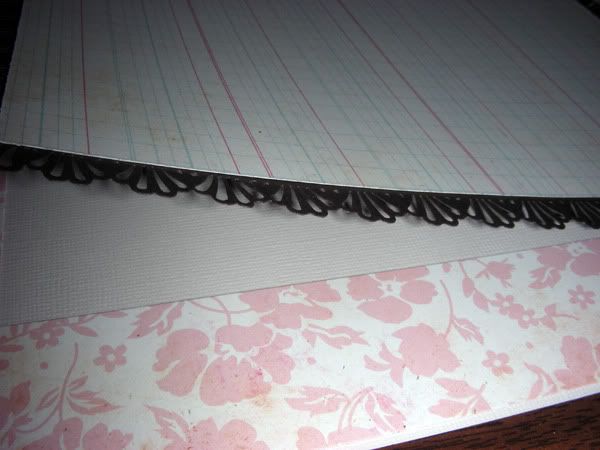
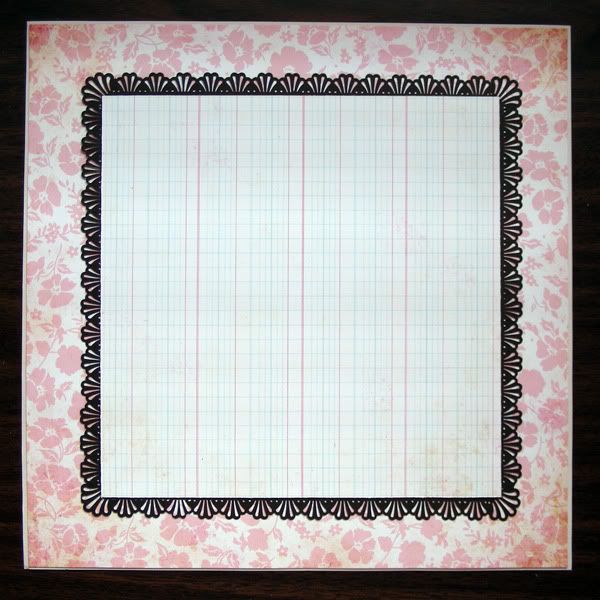
I recolored my white doily from the dollar store using walnut ink-love this stuff! I sprayed several layers and used my blow drying to dry between the coats of ink. I wanted the doily to look very dark so that it would stand out against the light colored Best Creations paper.


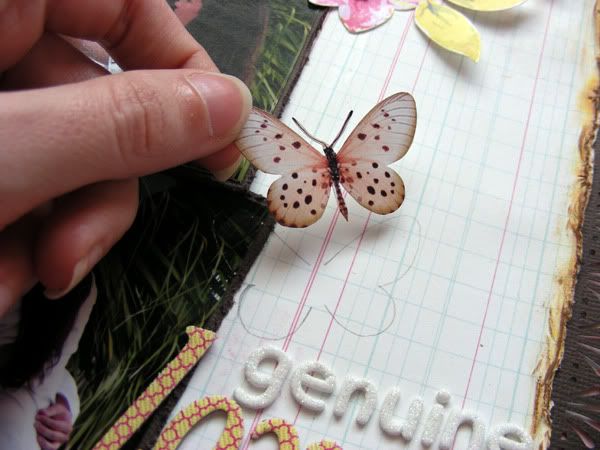
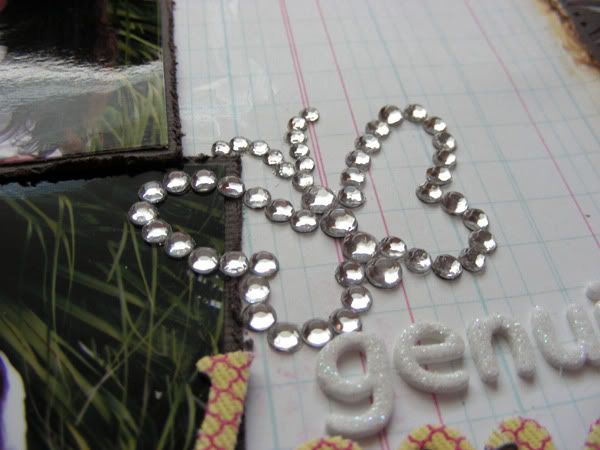
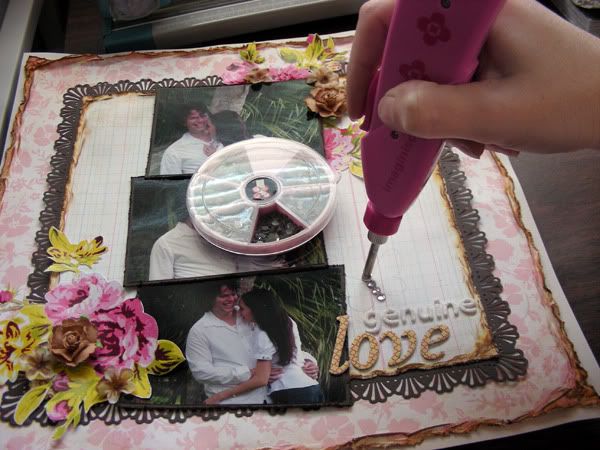
Finally, I added another smaller flower cluster on the top right corner of the layout. I finished it off with a butterfly and a Zva bling. I also used a few Hero Arts's rhinestones to accent the butterlfy's body. It gives them a finished and elegant look.


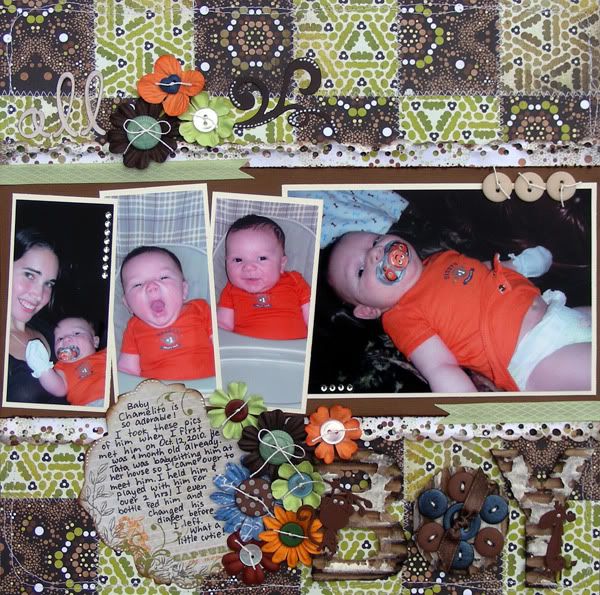
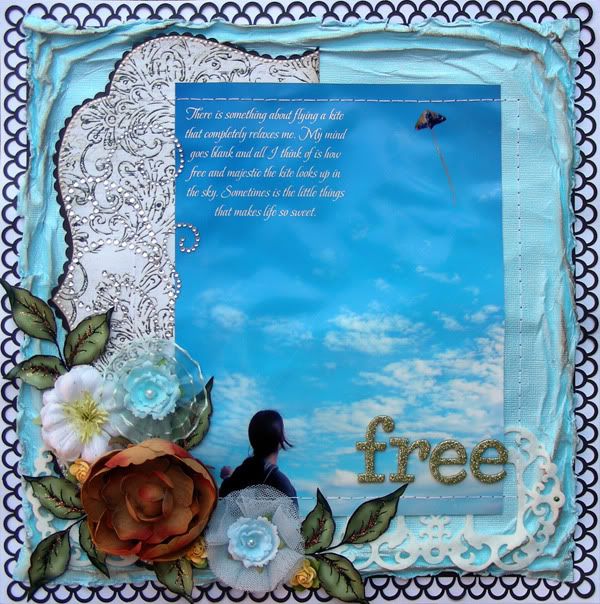
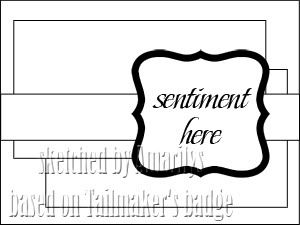
My second layout is a more masculine layout as I used the pictures that I took of my youngest baby cousin back when he was only 1 month old in October. I used my own sketch (sketch_26for this layout. I rotated the sketch and broke up the picture to include 4 pictures instead of 1. I used only one sheet from the Basic Grey's Origin line of paper and cut it into 2x2 squares. Since they are double sided, I turned every other one upside down and machine stitched them to make a quilt for the background. This is a great way to use those double sided papers since they match already!


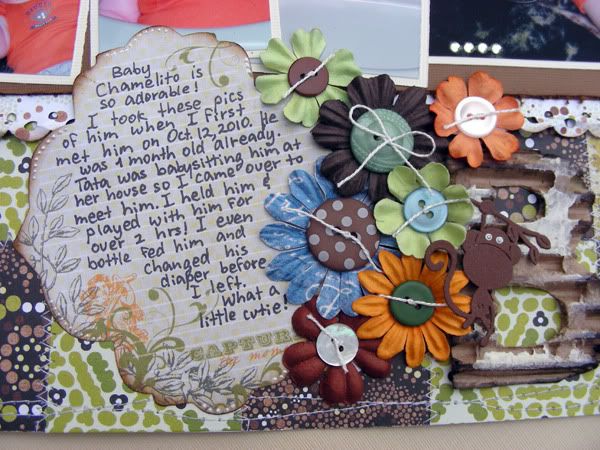
I made a cluster of flowers, some from my stash and some are Hero Arts, and added little buttons to the centers to make them a bit more masculine. Yes, you CAN use flowers in a boy layout! By adding buttons and using masculine colors you can cluster them and use them in boy layouts. I used a Pink Paislee journaling card and hand wrote my journaling about me meeting the baby for the first time.


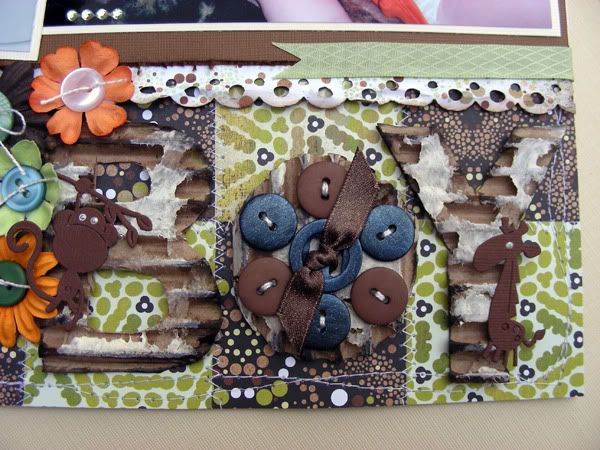
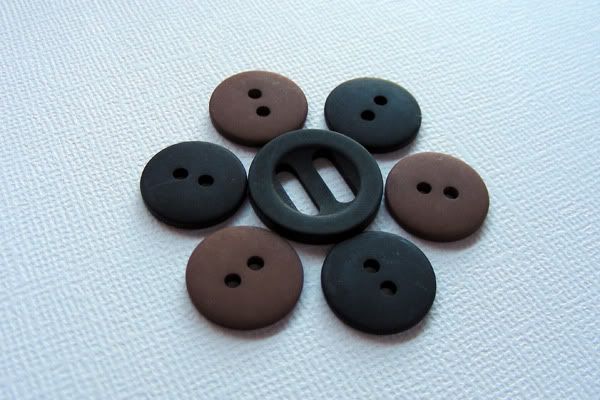
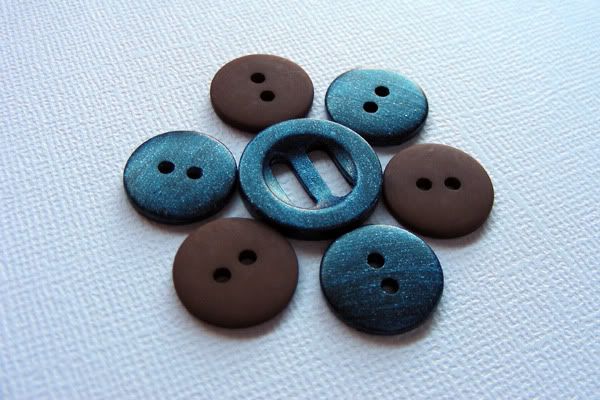
Now, I wanted the title to scream boy-literally! I cut out the letters from a piece of cardboard and distressed them with white paint and Tim Holtz ink. I used 7 buttons to make the letter o. I painted some black button's from Bo Bunny's All Stuck up buttons because the black ones were too harsh for a baby's layout. I used Creative Imaginations' paint-love this stuff that I received as a RAK from my good friend Wendy (thanks Wendy!).

Here is the before and after:


I hand stitched them to the letter o and added some ribbon to the center to finish it off. I used my Cuttlebug to cut out two critters for the other two letters- I love these little animals!

ps. In case you are curious, I used 20 buttons in this layout! :)

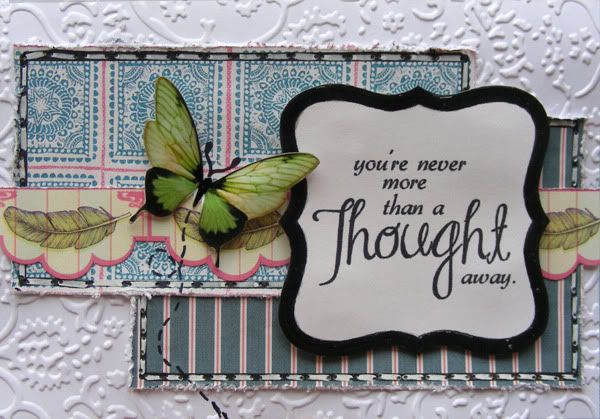
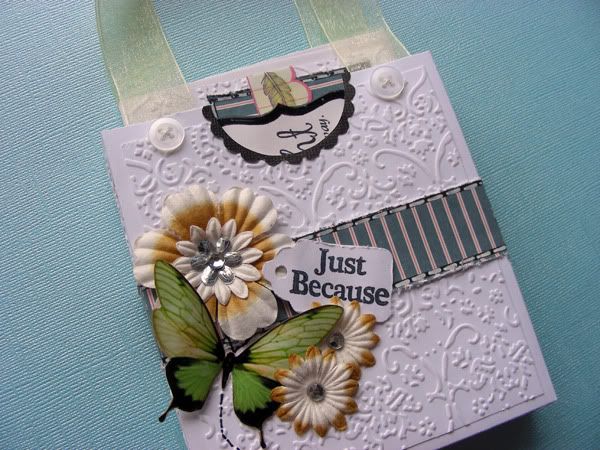
Well, my last project is a quick card:

I used my cuttlebug to emboss the background white cardstock-I feel that this step gives any card great elegance! I doodled stitches on the Basic Grey paper and added two layers of Martha Stewart punched cardstock. I layered 2 Hero Arts flowers and made a fiber center to soften the card. The sentiment is by My Pink Stamper and can be used for more than one occasion: Birthdays,Wedding, Graduations, etc.

Thanks you for stopping by today! I appreciate each and everyone of your sweet comments!

Saturday, April 9, 2011

saturday...sharing a layout

I hope that you are all having a happy weekend! I got to play with my scrappy stuff this weekend and finished a layout for a few challenges.


Supplies-cardstock: Bazzill, Core-dinations; patterned paper: My Mind's Eye; chipboard: Thickers; embellishments: Prima Die Cut Felt Art flowers: Prima, Recollections; bling: Zva Creative; ink: Tim Holtz; tools: Martha Stewart punch

This layout looks kind of plain since I used mostly cardstock (black, white and cornblue) and only one pattern paper which happens to be black and white but I like the elegance and simplicity of it . I printed my picture big (8.5"x6.5") and journaled in it before I printed it out. I've always wanted to try this but needed a large picture to fit all journaling (what can I say, I'm a journaler! lol). I entered this layout in Krissy's Journaling Challenge (use a creative way of journaling in your layout). Anyway, I did some water distressing on the blue cardstock and lightly inked the raised edges.


I used Martha Stewart punch around the page and made a black doily for the background. I layered all the cardstocks and attached my picture. I hand-sewed the square around the picture. It took a while to do this but it was absolutely worth it!


I added some Prima blooms that I got recently and a few hand cut leaves with some diamond stickles and a Zva flourish and voila! I love the end product!

Thank you for stopping by today!

Tuesday, April 5, 2011

tuesday...AWDML Contest-Basic Grey!

Hi bloggers! I have some exiting news for you today!

A Walk Down Memory Lane is hosting a manufacturer contest for April-Basic Grey "Spring is Here" Contest!!!!!!!!!


Here is the information:
Create a layout using 60% of Basic Grey products - you can use any BG collection and products

* Upload your layout to the Gallery under Spring is Here contest category by midnight on April 30th
* 1 Layout per person
* Submit you creation by posting your creation in the gallery then link it back here
* To upload into the gallery you must register in the gallery first.
* The entry must be new and not entered in other contests or challenges
* Winner will be announced on May 5th
* Winner will receive a GC from AWDML!!!

Hope some of you are able to enter!

Monday, April 4, 2011

monday...Trailmakers April Challenge 1

Happy Monday everyone! Today I want to tell you about The {Paper} Trailmaker's new challenge-to use their banner as the inspiration for your project! You can use the color, use it as template, or anything else as long as you use it for inspiration!

Here is the banner:


I decided to use it as a template for a set of greeting cards. Because I'm a visual person I actually sketch it up before and this is what I came up with:


and here is my card set complete with a purse to hold them:


and here is an individual card so you can see more detail. I made 4 for this set:


These were very simple to make after I drew up a sketch for them. I used two rectangles of the same pattern paper (Sassafras Indie Girl) and just flipped one over. This is a great way to use double sided paper since most of the time you only get to use one side. You are also guaranteed that they will match! To take it up a notch, I used the wonderful Sassafras borders as my middle layer of paper. It adds such an elegant touch to the card!


I did some faux stitching on the rectangles and distressed the edges. I ran the white base cardstock through my cuttlebug embossing folder to add dimension. I finished it all off with a computer generated sentiment and a little butterfly.

As for the purse card, the template is from Krisi's Kreations.  She is our April sponsor and she has wonderful templates and svg files  for sale as well as digital kits, alphabets and elements at her store.  Stop by and check it out for yourself!


Of course that I needed a pretty container to display my card set. I printed the pdf on white cardstock, cut and folded on the lines. It was really fast to make the purse as Krisi's instructions are easy to follow. I added some embossed cardstock as well as a butterfly on the purse to match the notecards. I finished it off with a pretty yellow ribbon as a handle and added little buttons as embellies.

I can't wait to see your take on this challenge and by all means, feel free to use my sketch based on the badge!