Tuesday, May 31, 2011

tuesday...Threading Waters punch tutorials

Since so many of you asked about the Fiskars Treading Water Border Punch, I decided to do a step by step on how I did my tag.

Supplies
paper: Basic Grey, Crate;
ribbon: Fancy Pants Ribbon Celebrate;
punch: Fiskars Treading Water Border Punch;
stamp: Fiskars Acrylic Stamps All Year Greetings;
tools: Fiskars Stylus, Fiskars Personal Trimmer
other: hemp cord, Prima packaging, flowers

To make the ribbon strip


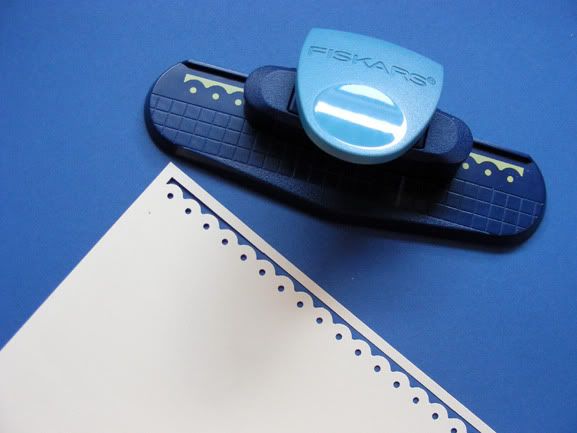
Step 1. Punch out a strip of paper using your Fiskars Treading Water Border Punch.


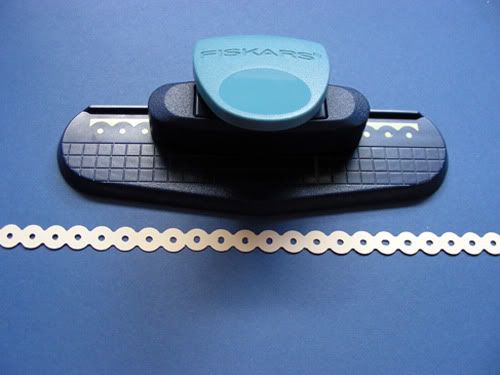
Step 2. Cut the strip of paper to 1" (you can do this before or after step 1). Turn the strip around and punch on the other side to get a symmetrical ribbon design. You can use like this on you can weave thin ribbon through the holes to embellish the strip of paper.

To make the flower


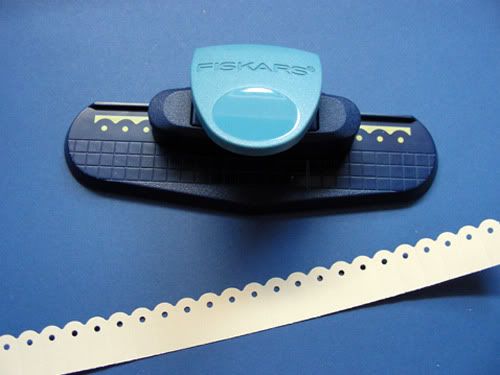
Step 1. Punch out a 1" strip of paper on only one of the sides.


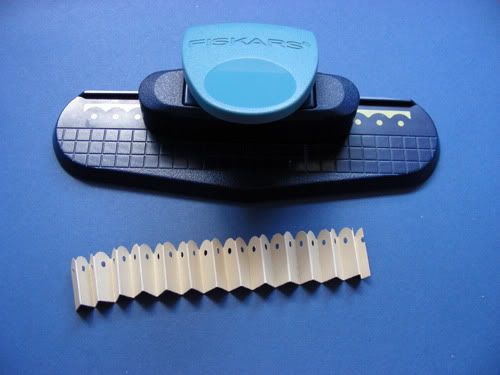
Step 2. Fold back and forth on each scallop like so. I used my Fiskars stylus and a ruler to do this.


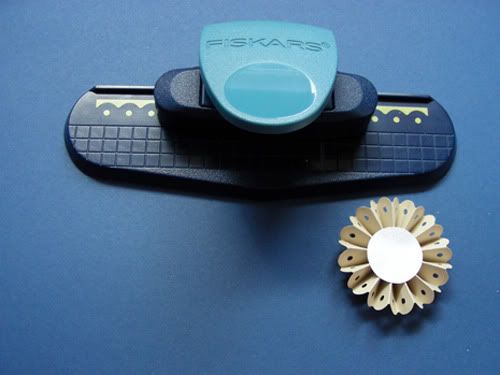
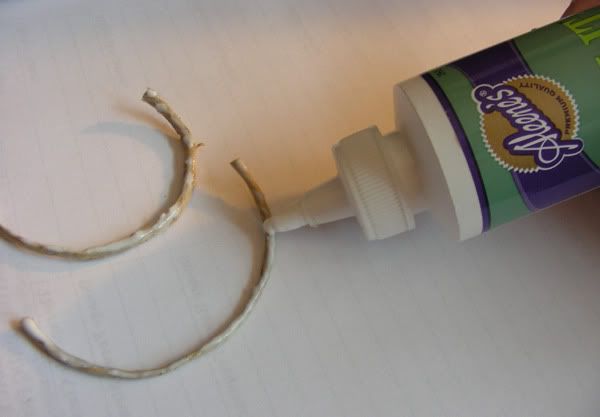
Step 3. Glue down both ends together and add a scrap of paper to the back for support like so. I used a 1" circle punched out of scraps for mine.


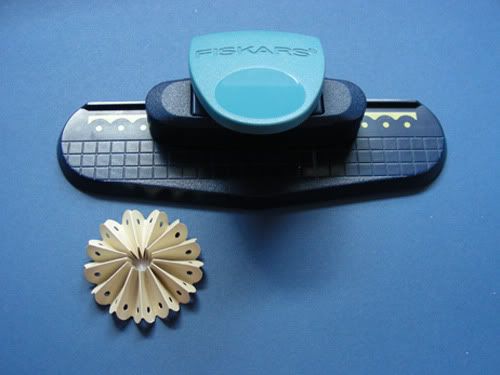
Step 4. Embellish the front of the flower however you want. I added some hemp rope to mine and inked the edges for dimension (see finished tag).

To punch around the page


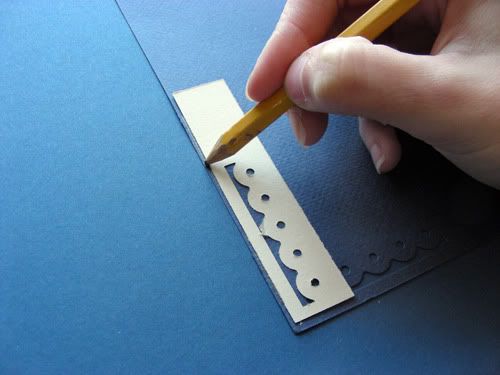
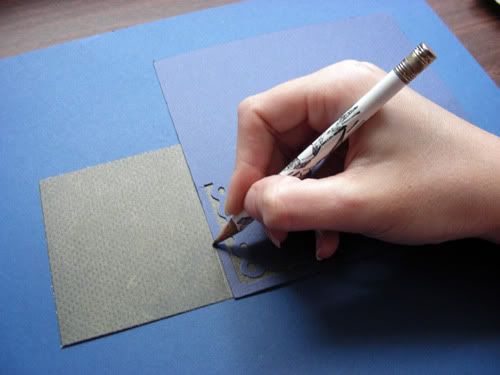
Step 1. Punch out a small strip of scrap paper and put it aside. Punch out another bigger piece of scrap away from the edges. Layer the smaller scrap (mine is cream) on top of your bigger scrap (mine is blue) like the picture above. Make sure that that the corner hole aligns well and that the smaller strip is at a right angle with the bigger strip of paper. Make a mark on the edge of the smaller strip of paper.


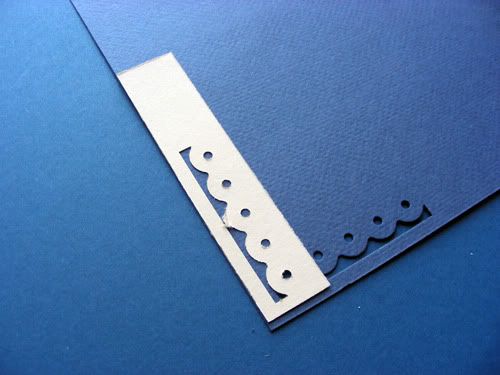
Step 2. Cut out the excess paper from your bigger strip using your Fiskars Personal Trimmer. Alight both strips of paper again and punch out the other side around the corner.


Step 3. You should now have something that looks like this. This is your template and is very important-do not loose it!  :)


Step 4. Use your template to work on your project's corner. You can either mark it with a pencil , remove the template and then punch or you can punch directly over the template, turning the punch over to make sure that the template aligns with the project.


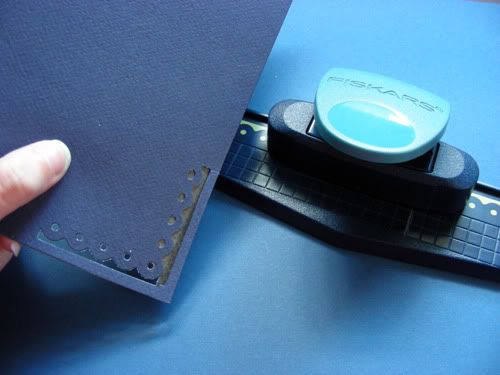
Step 5. Again, use the template to make a line to later cut your project to size.


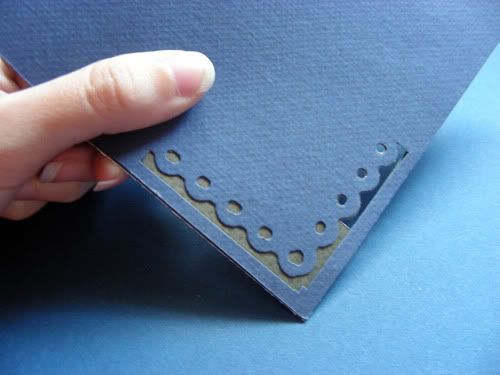
Step 6. To finish your project, you will again use the template to make the corner. You will encounter something like this. Punch one side first and then the other.


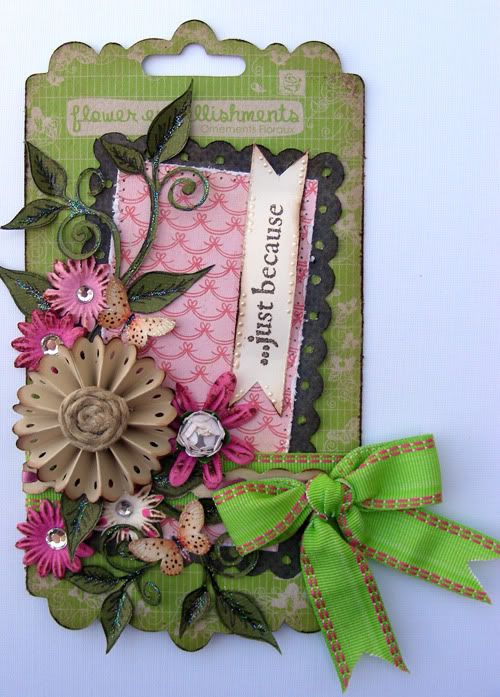
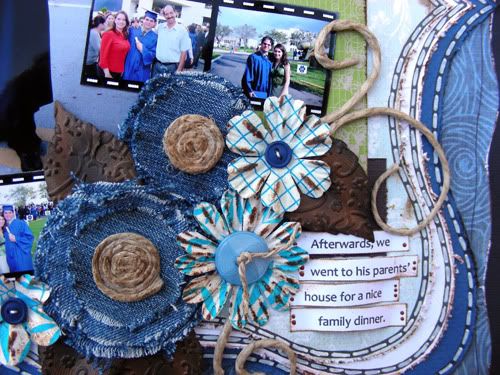
Add your embellies, ribbon, flowers, and sentiment to a Prima packaging and your tag is done.

Remember that practice makes perfect with this punch! Enjoy & have a wonderful rest of the week! :)

Tuesday, May 17, 2011

tuesday...AWDML May 15 Reveal-Fiskars

Hi bloggers! I'm happy to announce that I now live in Kissimmee, Fl (10 mins away from Disney World!). The trip was long as we drove a UHaul truck from Miami to Kissimmee as well as a car on tow. The trip lasted almost 5 hrs but we made it just fine. It has now been 4 days since we moved here and the apartment is looking and feeling more and more like home  :)

Today, I also want to share with you my projects for AWDML's second Featured Manufacturer for the month of May- Fiskars!


Supplies- cardstock: DCWV; patterned paper: My Mind's Eye; letter stickers: Basic Grey, Fancy Pants; flowers: Prima; glitter: Stickles (Diamond, Black Diamond), Glimmer Mist (Frost, Burnt Red); ink: Tim Holtz; tools: Marvy Uchida 1" circle punch, Fiskars Border Punch (sunburst), Martha Stewart Corner Punch (optic dot); pens: Sharpie, Zig Opaque Writer; stamp: Fiskars; other: 3D paint, rhinestones from Joann, lace, hemp cord

I used Let's Capture These Memories Sketch #77 for this layout. The pictures are of my mom on the day that she became an American Citizen.


I made a pinwheel out of a red and blue pattern paper (American flag colors) and added a flower and some hemp cord to the center to soften it. I also handmade the big flourishes.


On the right side there is hidden journaling describing the day and how proud we are of my mom. I used a Fiskars border punch as a border to the circle. Come back in a week and I will teach you how I did this. I added some faux stitching to the circle and some machine stitching to the black background.


Supplies- cardstock: DCWV; patterned paper: My Mind's Eye; flowers: Hero Arts; ink: Tim Holtz; punch: Fiskars Threading Waters; tools: Cuttlebug, Pazzles; other: large blue flowers, ribbon

This is another layout for my sister-in-law's baby boy album that I'm working on right now. She is due on July 1st so I really need to finish this soon! This is the pregnancy page and right next to it goes the ultrasound page which I made using the same colors so that it would flow. She asked me not to use too many baby colors so I opted for blues/oranges/browns/greens for her baby album. I hope she likes it!

Here is the ultrasound page:

Supplies- cardstock: DCWV; patterned paper: My Mind's Eye; flowers: Hero Arts; ink: Tim Holtz; punch: Fiskars Threading Waters; tools: Cuttlebug, Pazzles; other: large blue flowers, ribbon


I cut the pregnant woman's silhouette with my Pazzles as well as the little bear. Isn't he the sweetest? I left plenty of space for hidden tags behing the main pictures so she journal all about my nephew. Can't wait to meet him!

Here are both pages side by side:


Finally, here are a card and tag featuring Fiskars:


Supplies- ribbon: Fancy Pants; punch: Fiskars; flowers: Prima; stamp: Fiskars, Magnolia; other: 3D paint, flowers from Michaels flower dept

This is a matching card and tag set that I made for a little girl's birthday. I used my Tilda stamp and Fiskar's sentiment stamps. The border punch is also by Fiskars and all the papers that I used here are leftovers so I'm very happy to have used my stash for this card! Notice that both the card and tag have the same basic design. You will see this again next month as I'm working on a tutorial for you!  :)


Supplies- paper: Basic Grey, Crate; ribbon: Fancy Pants; punch: Fiskars; stamp: Fiskars; bling: Stickles; other: hemp cord, Prima packaging

I used a Prima flowers packaging to make this tag. I just couldn't get myself to throw it away! I used Fiskars Threading Waters border punch a lot on this tag. I used the Threading Waters Border Punch for the brown border, the strip of paper that I weaved the pink ribbon through and placed on top of the thicker green ribbon and my medallion flower. This punch is very versatile and useful AND it's 25% off at AWDML this month! I cut the greenery with my Pazzles and used a Fiskars stamp for the sentiment.

Thanks for stopping by! 
 

Thursday, May 5, 2011

thursday...making your own masculine flourishes

Today I have a quick tip to make masculine flourishes.

Supplies:   


Cut your hemp cord to size using your Fiskars Scissors. Apply your re-positionable glue and let it dry. Finally, adhere the flourish to your layout and mold it to your desired shape.

note: I like to use re-positionable glue because it allows me to play with the shape of the final flourish but you can also use a permanent adhesive.

Here is a close up of my flourish and you can see the finished layout here:


I hope that you enjoyed this quick tip!

Wednesday, May 4, 2011

wednesday...AWDML April 1st Reveal-Fancy Pants Design (2)

I hope that everyone is having a wonderful week! Today is Wednesday already and the weekend will be here before you know it!

My hubby and I are going apartment hunting tomorrow in Kissimmee, Fl, 4 hrs from where we live. The plan is to find something by this weekend and move by next week. Wish us luck!

Well, today I have another reveal layout for AWDML using this month's featured manufacturer Fancy Pants Designs.


supplies-cardstock: Bazzill; patterned paper: Fancy Pants; letter stickers: Fancy Pants; flowers: Hero Arts; buttons: Fancy Pants; ink: Tim Holtz; tools: Cuttlebug; pens: Sharpie, Zig Opaque Writer; other: 3D paint (brown), hemp cord

The pictures are of my husband's undergrad graduation back in 2006 when he graduated from FIU with his B.S. in Biology. I used 2 different lines of Fancy Pants pattern paper for this layout because I needed a dark and a lighter shade of blue for this layout since the school colors were blue and gold. I used my Pazzles to cut the die cut our of the pattern paper and cardstock and added some faux stitching to the  borders because to me, stitching whether is machine, hand or faux always looks masculine.


I handmade some denim lollipop flowers and added hemp rope circles to the center. I also distressed some blue Hero Arts flowers that I had lying around and added them to the layout to make my cluster in the bottom right hand side. I finished this corner off by making my own handmade flourishes with hemp rope. Come by tomorrow and I will have a quick tutorial and some tips on how to do this.


For the title, I used Fancy Pants Design brown stickers. I just LOVE this font and color and had to use it here! I matted it on a Prima packaging that I couldn't throw away. I actually have a good collection of Prima packages waiting to be used on layouts. I distressed the edges of the package and inked them to give it a rustic look.


Finally, for the journaling, I printed it with my printer and cut it into strips. I  curled the centers and glued them along the side of the main picture and in the embellished right side corner.

Hope you have a great day and thanks for stopping by today!

Monday, May 2, 2011

monday...AWDML April 1st Reveal-Fancy Pants Design (1)

Happy Monday bloggers! Can you believe that it's May already? I certainly can't! SO much is going on with my hubby and my life together right now and it's exiting and overwhelming at the same time.

Next weekend we are going apartment hunting in Kissimmee, FL, about 4 hours from where we live. We are moving because he got a job offer there. We are really exited about the change but it's scary too since we have always lived in Miami our whole lives. We are definitely looking for a change though.

Ok, back to the original post. Since today is the beginning on May, this means reveal day for AWDML! This month's featured manufacturer are Fancy Pants Design and Fiskars. As always, I'll share my projects with you using the first manufacturer and on the 15th, I'll share my projects using the second manufacturer. This month though, I decided to do things differently. I'll feature only 1-2 projects per week per manufacturer.


Supplies-cardstock: Bazzill Basics; patterned paper: Fancy Pants, Paper Adventures; ribbon: Fancy Pants; chipboard: Thickers; letter stickers: Basic Grey; punch: Martha Stewart; buttons: Fancy Pants; ink: Tim Holtz; tools: Cuttlebug; other: 3D paint,

I had so much fun working on his double pager! It's a birthday themed double layout for my sister in law's baby album that I'm working on right now. My first nephew will be born in less than 2 months!

Here is a close up of the left page:


and the right side:


I wanted to make this birthday page boyish and happy so I chose Fancy Pants It's Your Day Paper. I also used the collection's ribbon to match it to the paper. The buttons are also by Fancy Pants but from a different collection.

Photobucket


I made a little tear bear holding a present and another one peeking from behind a photo mat. They are both wearing party hats. I also made a yummy looking chocolate cake complete with icing!


I added a paper pieced elephant on top who is holding a bunch of balloons. I added little animals throughout the layout. I used my Cuttlebug to cut these.


I also added stars in different colors and embossed and pop dotted some to give them dimension. I finished off by adding sewn buttons to the stars and two large tags behind the main photo mat.

I loved working with the Fancy Pants paper since the paper weight is great for distressing (this is very important for me!) and the design s are amazing! This particular paper that I worked with had this adorable little panda and I knew front he moment I saw him that I wanted to include him in the design.


I cut out the second one from the opposite page and pop dotted him on top of the one on the right to give him direction and for him to look like he was on top of the photo mat. Doesn't he look adorable there?

Thank you for stopping by today! Hope you can come back to check out the rest of my projects using Fancy Pants!