Thursday, March 31, 2011

thursday...back to the basics

Afternoon bloggers! I have something fun to share with you all tonight! Penny over at sb.com posted a new challenge a few days ago which sounded very challenging but it had a lot of appeal to me. I'm one of those who stacks challenges to make it more challenging to me. Well, she challenged us to make a layout using the basics: paper, ink and scissors (and glue of course!). This needs a bit of explaining as ink is a very broad term in her vocabulary. We could use any ink-distress inks, different colored pens and even the printer as it uses ink! We could use any paper and the scissors had to be regular scissors, not shaped ones.

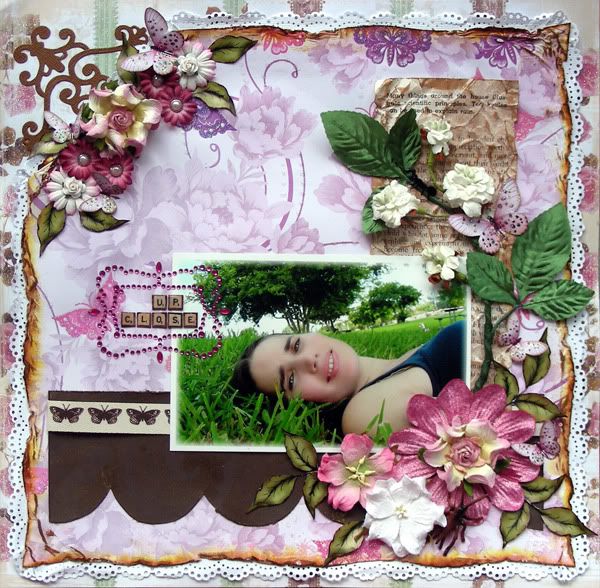
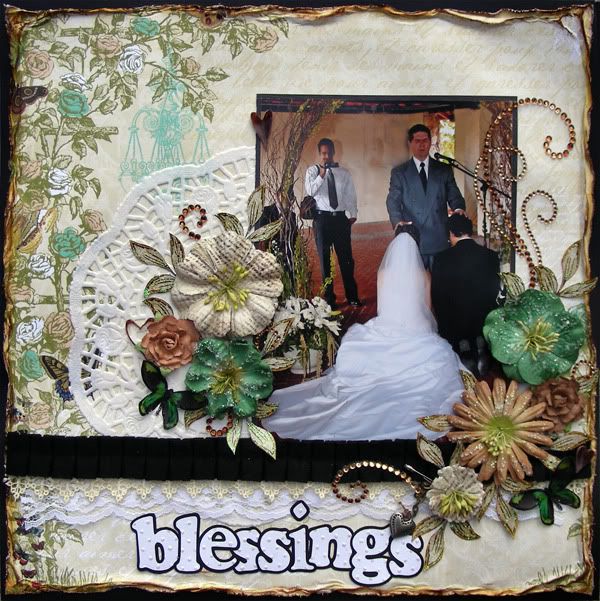
Well, after 3 days of thinking and working on it, here is my take on this challenge and I must say that I'm very happy with the results:


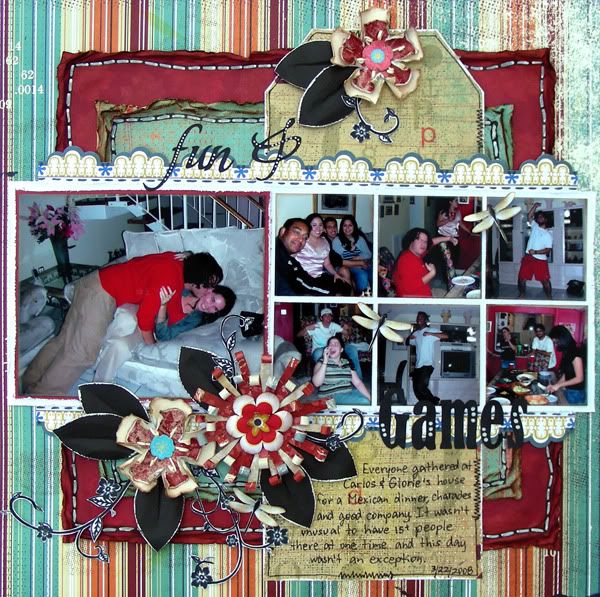
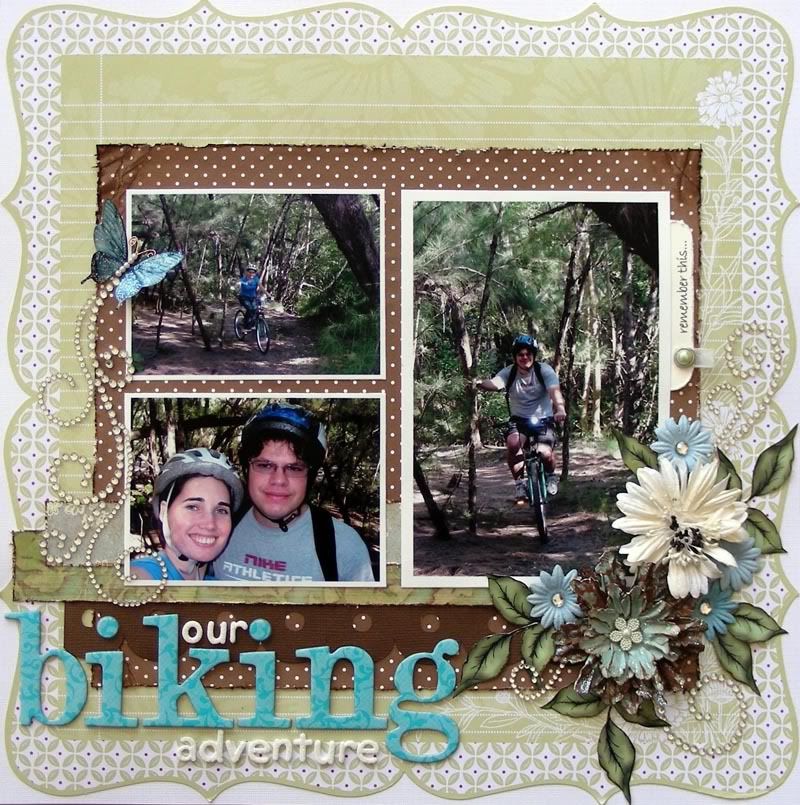
I hand cut everything you see here using my handy pair of scissors. I distressed all the edges so that you wouldn't see the crooked lines plus I love to distress! I did some faux stitching on the background pieces as well as the large tag to add some interest, depth and texture. I used one of Basic Grey's old line, the Recess line, for this layout. Who said who have to use school paper on school layouts? The pretty edges are from Sassafras. I always cut them all up when I get their papers and store them away for later. I managed to use 7 pictures in this layout as I had a lot of pictures from this event.


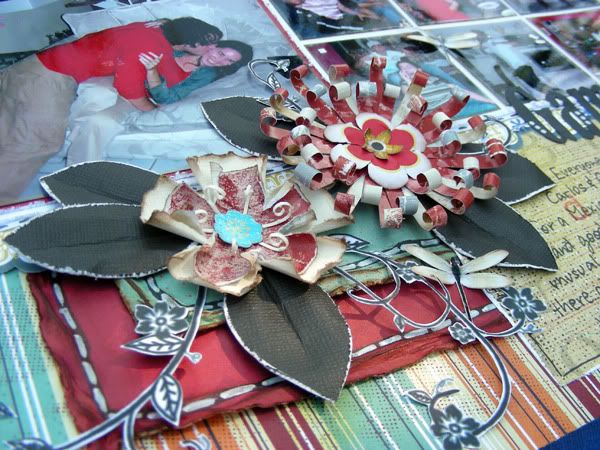
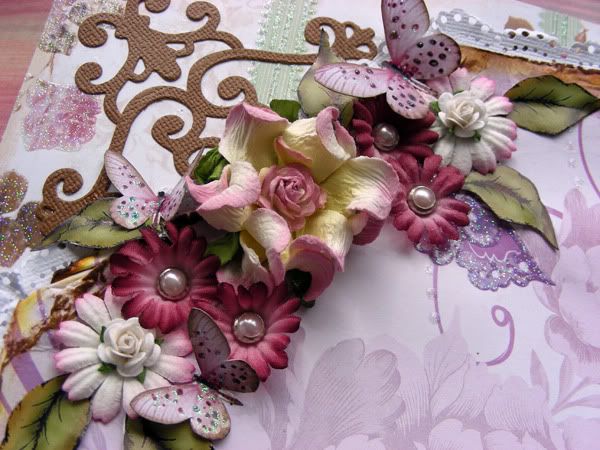
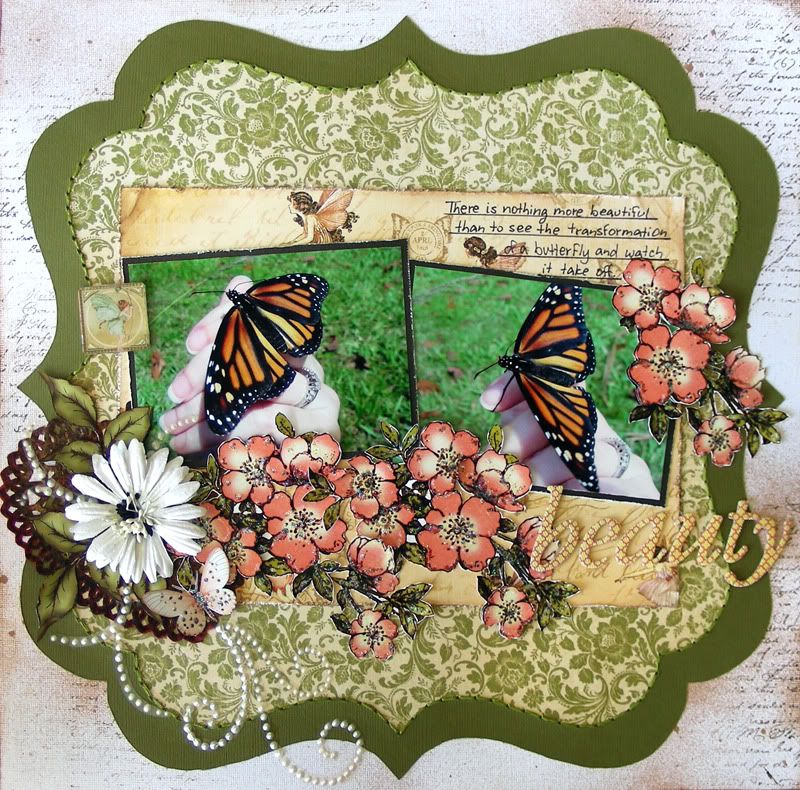
Of course, I made my own flowers. I used Gabrielle's tutorial for the two that look similar and Helen's tutorial for the larger flower. All the flower centers are fuzzy cut from leftover papers from my stash. I don't remember them all but I remember the center for the larger flower is from a GCD Studios paper and the tiny yellow flower in the center is from Basic Grey's Origin line. I distressed them and cupped them with the back of my rounded pen to give them dimension.


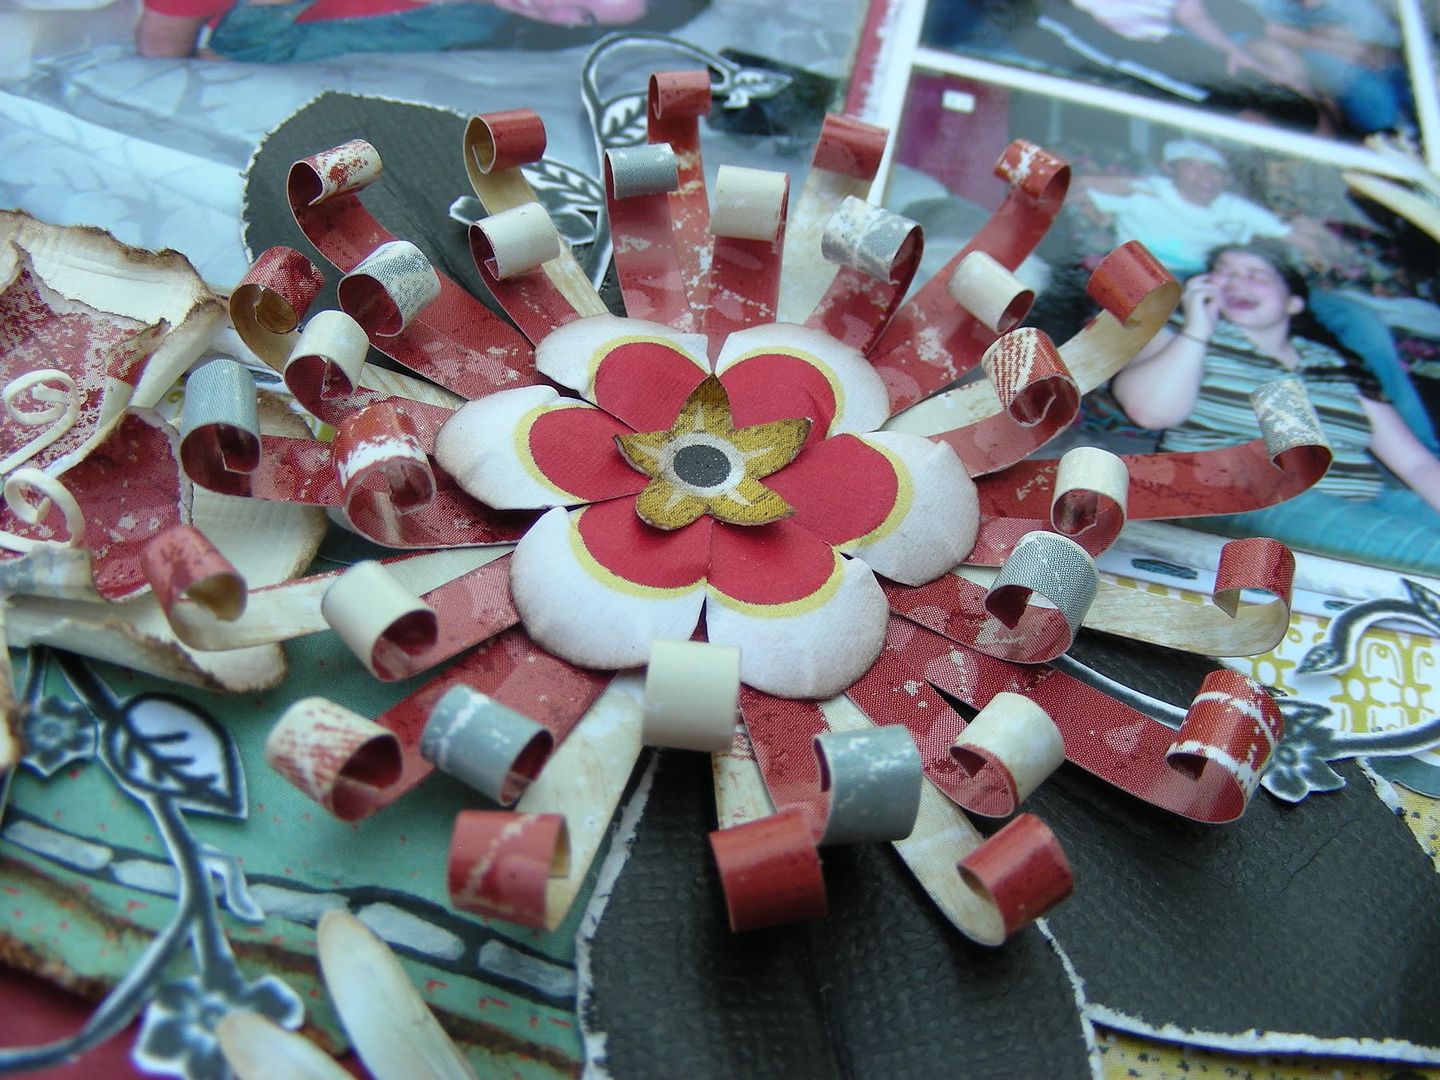
For the strips of paper, I carefully cut them trying to make them the same size but as you can see, I failed miserably. It's okay that they are different sizes though, it adds character to the flower, or so I keep telling myself. I curled the tips with my scissors originally and then rolled them with my hands. I hand drew the leaves on black cardstock, cut them and distressed the edges.


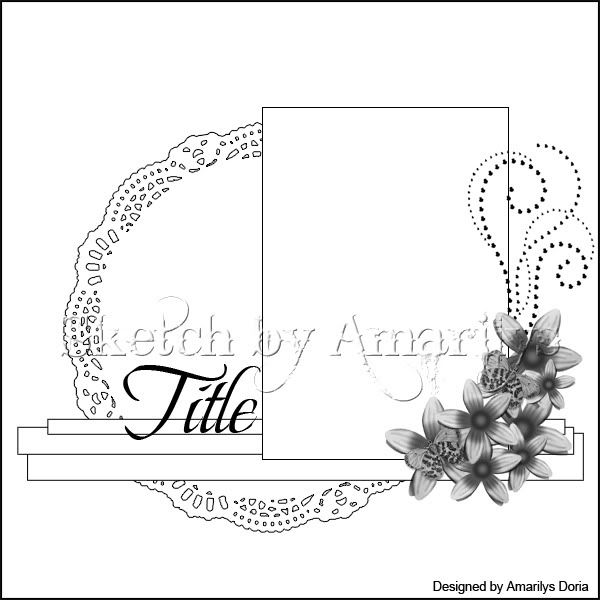
The fuzzy cutting was an interesting process as was the title. For the fuzzy cutting, I used this photoshop brush. I printed it on white paper and cut around it, just like you would a stamped image. For the title, I wrote out the words, printed them on white cardstock and carefully cut around them. I didn't like the fact that you could see the white edges so I colored everything over with a thick black sharpie.


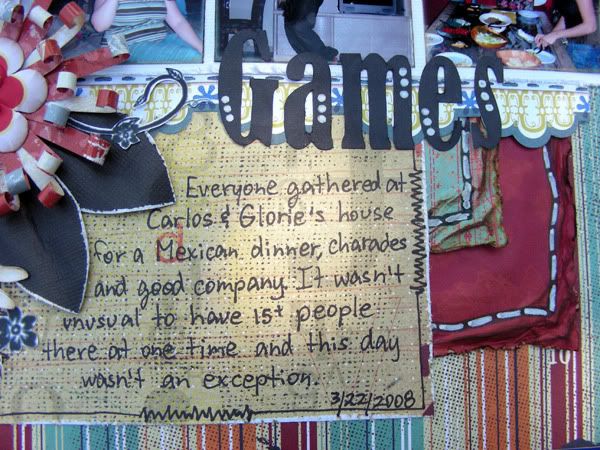
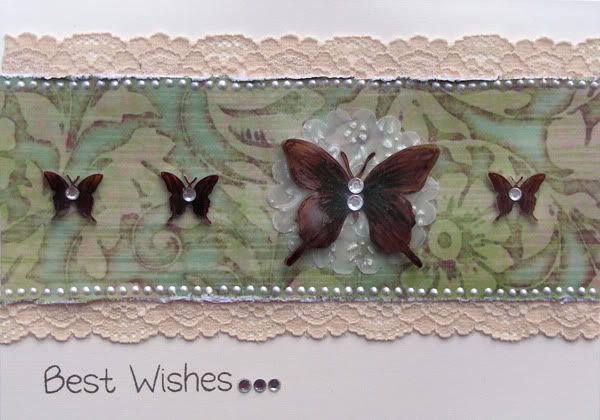
I did a few dots in white to mimic bling. Oh, how I missed being able to use stickles and 3D paint! LOL
I finished by journaling in the lower part of my over sized tag.

I do feel quite accomplished after finishing this layout using only paper, ink and scissors. Why don't you give this challenge a try? You'll be surprised at how creative you can be when limited by your supplies!

Saturday, March 26, 2011

saturday...DIY banner embellie

I'm re-posting this tutorial that I made for AWDML Step-by-Step earlier this month here on my blog. It's a fun and easy do-it-yourself banner. Hope you enjoy it!

Here is what we are making:

Supplies

Step 1: Hand draw your own shape in a scrap of paper or use my picture above as a guide.


Step 2: Using your template, trace the shape on the scraps of papers and cut them out. Distress using the Tim Holtz Tonic Paper Edge Distresser and ink the edges with Tim Holtz Vintage Photo.


Step 3: Using a pair of shaped scissors (I used a scallop one), cut around the shape to make an outline and finish your banner.


Step 4: Cut off the corners of the pendants, fold them to make the triangle shape, and glue the pieces along the floss like in the picture above.


There you have it! Embellish with flowers, add letters, bling-whatever you want and add to your project!

Here is the card that I made using this banner and here is my tutorial for the shrink plastic letters that I used for this banner:


and a close up of the finished banner on the card:


Hope you enjoy this quick tutorial. Use up those scraps of papers to make wonderful homemade banners!

Thursday, March 24, 2011

thursday...shrink plastic tip and technique

Good morning bloggers!

Remember the alphas on my banner tutorial that I did some weeks back? Well today I have a very different way of making your own dimensional alphas. Do you remember shrink plastic from when you were a kid?


Photobucket
Here is my word cut out from shrink plastic using my Cuttlebug and an alphabet set (Harmony). I took a picture next to a quarter so you can see the size of the letters.


Photobucket
Of course, I colored them with a copic marker (E57) so that it would match my project.

Photobucket
Here are the letters after I baked them in my toaster over for approximately 2 minutes. Take a look at the quarter and compare it to the letters. See how much they have shrunk?

Photobucket
Here is the finished banner with the letters affixed to it. Remember that I have a tutorial for you on how to make this cute banner using your scraps.


Photobucket
Finally, here is a close up picture of the banner and letters so you can see how thick and rich in color they are.
So now you know another use of shrink plastic. They make great alpha letters, specially when you combine it with the great selection of copic colors! I hope that you enjoyed this quick tip!

Monday, March 21, 2011

monday...Trailmakers March Challenge 2

I had the privilege this month to come up with a sketch for The {Paper} Trailmakers second March challenge.
Here is the sketch:


and here is my take on it:

Supplies: cardstock: Best Creations; patterned paper: Colorbok; Graphic 45-Once Upon a Sprintime; chipboard: Thickers; flowers: Prima, Recollections; ink: Tim Holts Vintage Photo; pens: Sharpie; glitter glue: Stickles; other: ribbon, 3D paint, doily

I fuzzy cut the inside of the wonderful Graphic 45 12"x12" paper, distressed and inked the edges, and stickled the flowers, leaves, bunnies and fairy. I kept the circle from the sketch by adding a white doily that I found in the dollar store. I omitted the horizontal strips of paper from the sketch because I didn't wanted to cover the pretty Graphic 45 paper. Plus the paper is busy enough that you don't need a horizontal element.


I used a Recollections flower from my stash and a Prima rose, ribbon and tag from the kit to make the cluster in the bottom right side of the layout. Remember that if a sketch has flowers as embellies you do not need to use flowers in your layout. It just means that you should have embellishments of some sort in there. I finished this corner off with some handmade pearl bling using 3D paint.


Finally, I added some pretty butterflies in the top left corner to balance the layout.

If you like this sketch, come and play with us at The {Paper} Trailmakers this month! You have until the end of this month to upload our creations to the Mr. Link on the blog. I can't wait to see what you all do using this sketch!

Sunday, March 20, 2011

sunday...Trailmakers sketch challenge

Happy Sunday everyone! Today I want to tell you about The {Paper} Trailmakers's second biweekly challenge which happens to be a sketch designed by me! If you like this sketch, use it and play along with us for the chance to win a $15 gift certificate to the store.


Come back tomorrow to see my take on my own sketch using The {Paper} Trailmaker's March Kit!

Saturday, March 19, 2011

saturday...AWDML sketch inspiration week

All good things must come to an end and today is the last day for my weekly sketches posts.Well, without any further ado, here is the last sketch:


and here is my sample layout:
Supplies: cardstock:  Bazzill; patterned paper: Graphic 45; chipboard: Thickers; flowers:  Prima; glitter: Glimmer Mist, Stickles; ink: ColorBox; tools: Cuttlebug,  Cuttlebug Baby Face Alphabet, Tim Holtz Paper Distresser;  punch:  Martha Stewart;  other: handmade flowers, handmade white thickers, 3D  paint

Hope that you enjoyed this all this week's sketch inspiration posts as much as I enjoyed making them for you!

Friday, March 18, 2011

friday... Best Creation GDT

As their Guest Designer Best Creations also sent me this yummy pink/purple papers from their Spring Collection to play with and let me tell you, I squealed when I saw it! It is the most beautiful glittery paper that I've even seen! The design is spectacular and the paper weight is phenomenal! What else can you ask of Best Creation?

Here is what I came up with:
Best Creation GDT
Supplies: cardstock: DCWV; patterned paper: Best Creation Inc.; Flower: Recollections; ink: Tim Holtz Vintage Photo; Bling: Recollections; Other: pearl brads, big pink bloom, handmade vine, toy cricket, handmade white roses, sheet of paper from a book

The picture was taken at the local park and its of me laying down in the grass. I just love how this picture came out though! I titled it up close because it's a rare close up of my face that you don't see often. I layered the beautiful butterfly paper on another lighter, pink and green paper and used a Martha Stewart punch to mat it.

Best Creation GDT
In the top left corner, I made an embellished corner with flowers, leaves and butterflies and used my cuttlebug to make the scroll.

TIP: For the scroll, I actually used two swirl die cuts because I wanted it to be bigger and fit in the corner. Play with your die cut shapes to make bigger, more intricate design by layering them!

Best Creation GDT
I printed out my own faux scrabble titles using Lisa's tutorial. I inked the borders and used some Diamond Glaze on them to give it shine and depth. I framed it with a pink Recollection bling frame that I picked up a few weeks ago in Michael.

Best Creation GDT
I made another embellishment cluster on the opposite side of the scroll corner. I used some flowers (Recollection, Petaloo, Bazzill), leaves, butterflies and even a toy cricket! Yes, you heard me right! I think he is adorable and goes well with the picture of me laying down on the grass.

TIP: For a dramatic effect, use small toys like crickets and other small bugs to add to the layout as embellies. They will go great in boy layouts too!

Best Creation GDT
I wanted to add a vine to this layout but I didn't have any at home so I decided to make my own. They are really simple to do if you have the right materials. I have done them before so I had everything to make them. I attached it to my page with two small wires that I bet you can't even see! I added another butterfly and a tiny black ant brad! The printed and distressed sheet of paper is actually taken from a book and distressed to look old.

Now, for my next project I actually made a slideshow to show my pictures because I took over 85 pictures of the project! I made a Paper Bag Album, Love themed that I absolutely adore! It is actually my first PBA and I just love how it came out!

This album is full of details. The album itself is 5"x6" and it has 10 full pages inside, not including the front and back page, and 6 smaller 5"x3.5" mini pages, that are perfect for removable tags for journaling and extra pictures. There are also four 5"x4.5" removable tags in the paper bag pockets. This makes this mini album 18 pages in total! I stitched every page and almost every tag. I used tags, flowers, bling, rick rack, ribbon, glitter, stickles, doily, shaped brads, and lace among other other things to embellish this album.

Here is the slideshow:

All the pink and purple papers are by Best Creation Inc. The black and white papers is by My Mind's Eye. Bazzill cardstock and a a miss mosh of embellies from my stash.

Thanks for stopping by my blog today! Have a great day!

friday...AWDML sketch inspiration week

Happy Friday everyone! Today is the end of the weekend the beginning of the weekend! This week of sketch inspiration at AWDML is coming to an end but we still have 2 more sketches, today's and tomorrow's.

Here is today sketch:


and my take on it:
Photobucket

Have fun with this sketch!

Thursday, March 17, 2011

thursday...Trailmakers glossy accent tutorial

Back at the beginning of the month when I showed you my debut layout for The {Paper} Trailmakers March Kit, I told you that I was working on a tutorial using glossy accents. Well, the wait is over as here it is.

This tutorial is quick and easy but has wonderful effects!

Supplies:
  • Glossy Accents
  • Tim Holtz Clear Fragments (or anything clear for that matter)
  • Image, clip art or pattern paper


Step 1. Apply a thick layer of Glossy Accents to one side of the clear fragment, making sure that to cover all the surface. Do NOT shake your Glossy Accents or you will get bubbles.


Step 2. Carefully attach the clear fragment to the image that you chose. Make sure that it's either the same size or a bit bigger. Some of the Glossy Accent will come out. This is normal. Let it dry for a few minutes or hours, depending on the size of your clear fragment.


Step 3. Once it's dry, cut out the excess paper and you are done! Attach to any project for a neat and different embellie which gives your project great dimension!

and here is my finished layout again so you can now see the fragment:


Hope you enjoyed this quick tutorial! Can't wait to see what you make with your Glossy Accents!

thursday...AWDML sketch inspiration week

I have a card sketch for you today. Here it is:


and here is my sample:


There are so many possibilities with this sketch! You can replace the butterflies with stars, flowers, or anything else! You can make it as simple or elaborate as you want. For more information on how I did the butterflies, check out this post.

Hope you enjoy today's sketch!

Wednesday, March 16, 2011

wednesday...AWDML sketch inspiration week

Here is today's sketch and sample layout:

Photobucket


supplies- cardstock: Bazzill; patterned paper: Webster's Pages Life Portrait Light the Way; flowers: Prima Sugar Plum Roses; Recollections; pens: Copic Marker E57; glitter: Stickles; bling: Zva Creative Large Symmetrical Flourishes Clear G; tools: Pazzles Inspiration; other: Grafix shrink film, oven, lace

I hope that you enjoy today's sketch!