Friday, October 28, 2011

friday...handmade paper tutorial

Happy Friday everyone! I finally finished the tutorial that I've been promising for the past month (sorry!). I'm also hosting a challenge over at AWDML's blog today to make your own pattern paper. It's a great way to try this tutorial and get a chance to win over at AWDML! Ok, let's get started!


Throughout the month you have seen me use handmade papers on my layouts and today, I'm going to show you how I made them so that you can try it too for a custom look on your layout and cards!

Posted Image
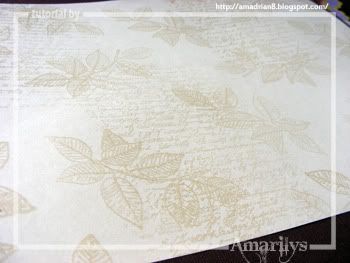
Step 1. Start with a cream colored 8.5"x11" sheet of smooth cardstock. Randomly emboss using the Prima Notary Stamp and a leaf stamp. Remember to go over the edges for a more finished look. My leaf stamp is by Martha Stewart and I've had it for a while. Clear emboss the whole sheet of cardstock using your heat embossing tool.

Posted Image
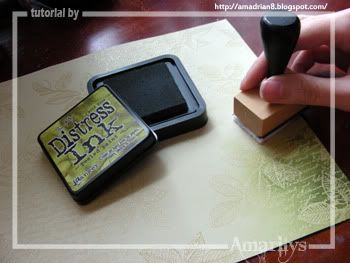
Step 2. Using your Tim Holtz tool and Tim Holtz Peeled Paint distress ink, lightly cover most of the cardstock like shown. Remember to vary the shade of the color by adding more or less ink to any given area.

Posted Image
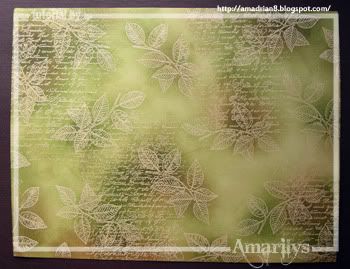
Step 3. Add some Tim Holtz Vintage Photo distress ink in random spots to add dimension. Your cardstock should look like this when you are done.

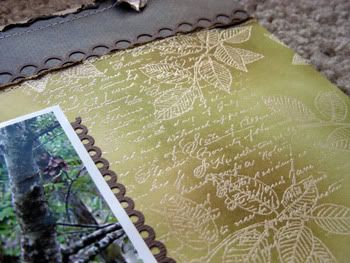
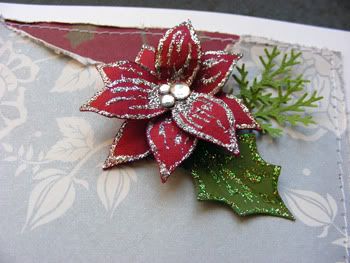
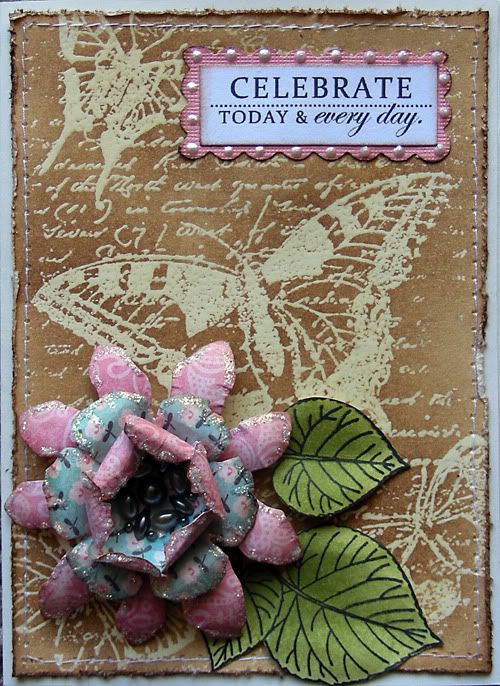
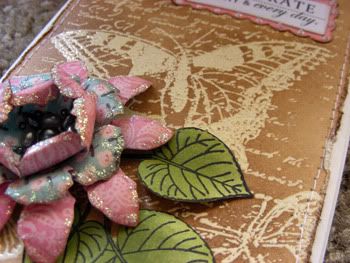
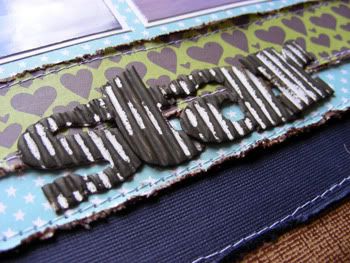
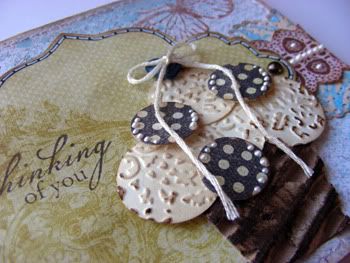
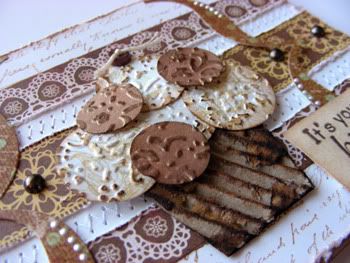
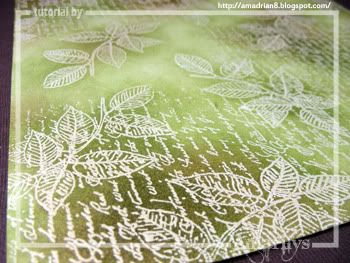
Here is a close up of my finished paper:
Posted Image

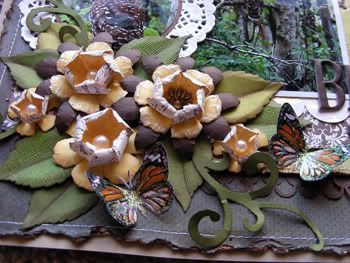
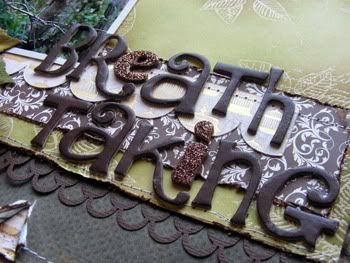
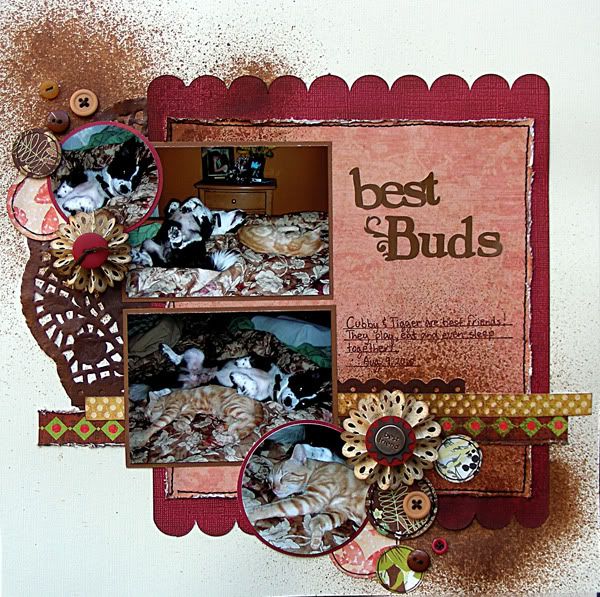
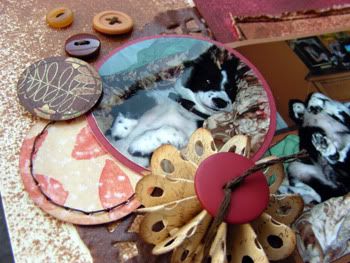
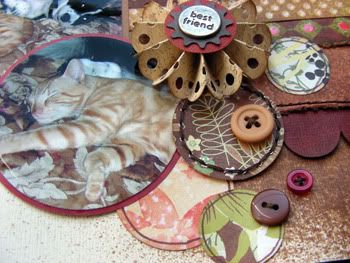
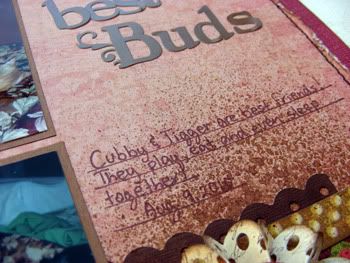
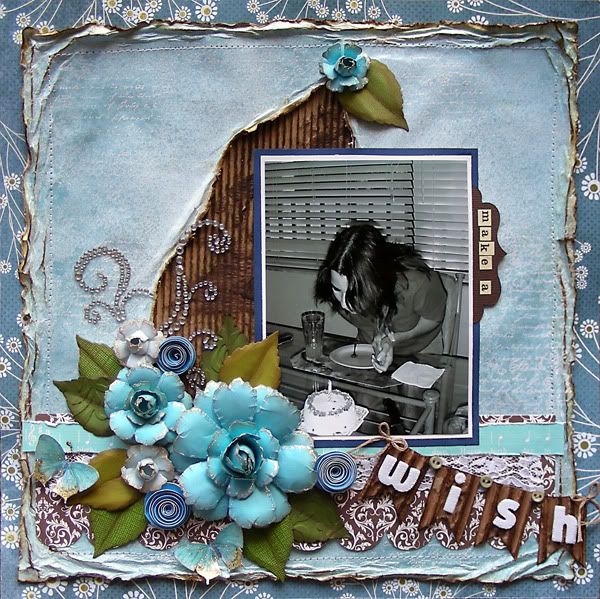
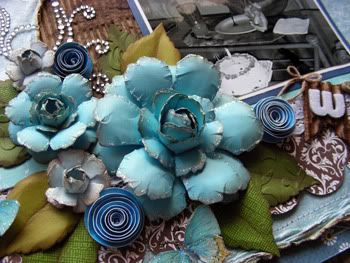
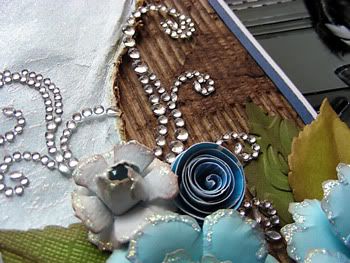
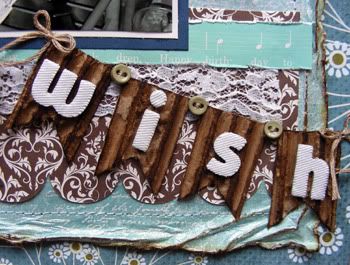
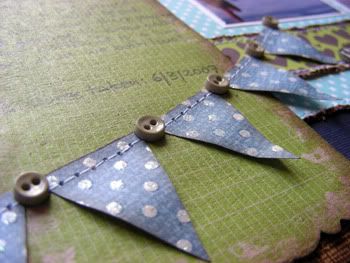
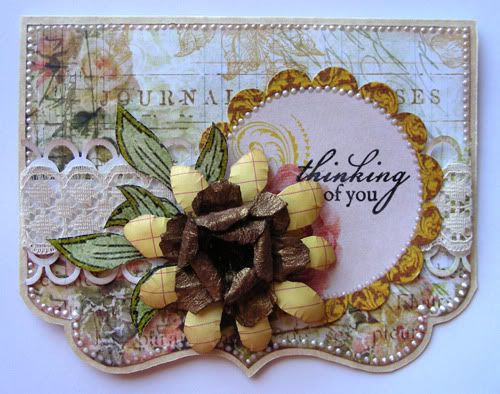
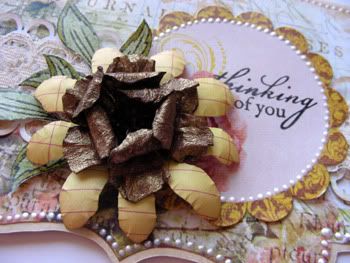
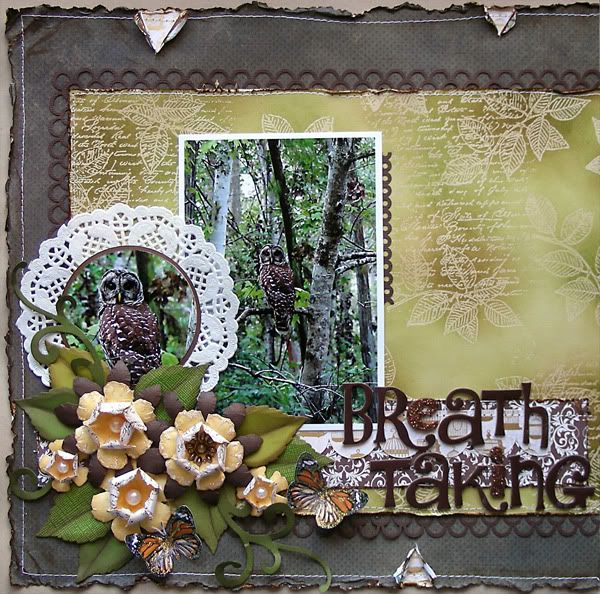
Finally, here is a layout I made using this completely custom made sheet of pattern paper:
Posted Image

Supplies-
cardstock: Bazzill, Recollections; 
patterned paper: Basic Grey Marjolaine Creme de Menthe, Jillibean Soup Dutch Mustard Soup Leeks, DCWV Mariposa Stack;
bling: Prima flower centers;
glitter: Ranger Stickles Cinamon, Diamond;
chipboard: American Crafts Thickers;
ink: Ranger Tim Holtz Vintage Photo, Peeled Paint, Embossing Distress Ink, Ranger Embossing Powder Clear;
stamp: Prima Notary stamp;
tools: Marvy Uchida 2500 heat embossing tool, Martha Sewart around the page punches (Double Loops, Scallop 3 Dots), Cuttlebug, Tim Holtz Tattered Florals dies, Sizzix decorative flourishes die set, Tim Holtz paper distresser, Fiskars Stylus;
other: doily, pearls, sewing machine,


Hope that you enjoyed this tutorial! I sure had fun making it for you and using it to make my completely custom papers throughout the month!

Thanks for stopping by my blog. I really appreciate all of your comments. Have a wonderful weekend!


***All the Products in BOLD can be purchased  from A Walk Down Memory Lane online store.

Thursday, October 27, 2011

thursday...AWDML October 15 Reveal- Ranger (3/3)

Happy Thursday bloggers! The week is almost over!

Today I want to share my last layout featuring Ranger products for AWDML.

Remember that over at AWDML this month's featured manufacturers are Jillibean Soup and Ranger  products! This also means that this whole month Jillibean Soup and Ranger products are 25% off over at AWDML and yes! all stickles, glimmer mists and distress ink pads are included!

Here is my layout:

Supplies-
cardstock: Bazzill, Recollections;
patterned paper: Basic Grey Marjolaine Creme de Menthe, Jillibean Soup Dutch Mustard Soup Leeks, DCWV Mariposa Stack;
bling: Prima flower centers;
glitter: Ranger Stickles Cinamon, Diamond;
chipboard: American crafts Thickers;
ink: Ranger Tim Holtz Vintage Photo, Peeled Paint, Embossing Distress Ink, Ranger Embossing Powder Clear;
stamp: Prima Notary script;
tools: Marvy Uchida 2500 heat embossing tool, Martha Sewart around the page punches (Double Loops, Scallop 3 Dots), Cuttlebug, Tim Holtz Tattered Florals dies, Sizzix decorative flourishes die set, Tim Holtz paper distresser, Fiskars Stylus;
other: doily, pearls, sewing machine,


About a month ago, my husband and I went for a walk to a regional park close by and we saw this gorgeous owl sitting on a branch really close to the trail. She was just looking at us and I just snapped pictures of her and got these two really good shots and I knew I had to scrap them soon.


For this layout I handmade my own paper. Tomorrow I'll finally have the tutorial up here on my blog so come back tomorrow again!


Of course, I also handmade my own flowers using Tim Holtz Tattered Flowers dies (which I LOVE!). I added some pearls and Prima flower center to my handmade flowers and finished them off with Diamond stickles on the petals. I die cut some leaves (Cuttlebug 2x6 dies leaves & netting) and swirls (Decorative Flourishes Set Sizzix Sizzlits Dies Set 3 pk) in different shades of green and added them to the cluster. I finished it off by adding a few computer generated butterflies.


For the title, I used two different Thickers because I ran out of e's from the main Thickers pack. I stickled the e and i (for balance) with cinnamon stickles to give it some bling.

I hope you enjoyed my projects this month using Ranger and Jillibean products. I certainly did! Remember to come back tomorrow for the tutorial on how to make your own pattern papers just like the ones that I've been using throughout this month.

Wednesday, October 26, 2011

wednesday...Heartfelt Creations DT!

I'm really exited to announce that I made the Heartfelt Creations DT!

I first saw their gorgeous stamps and dies in Lisa Gregory's layouts and fell in love with them immediately! Now, I'm by no means a stamper but their stamps are absolutely gorgeous and so easy to use and do you know what's the best part? Some of them come with a custom matching spellbinders die! I'm honored to be part of this team and can't wait to start designing with their stamps and dies! Stay tuned because this is going to be so much fun!

Tuesday, October 25, 2011

tuesday...just sharing some layouts

Happy Tuesday everyone! I'm glad to you stopped by my blog today as I have two fun projects to share with you! I got to play over the weekend over with Birds of a Feather monthly challenges (they host 5 every month!) and got 2 layouts done over the weekend!

The first one started out as a lift for the scraplift challenge but somehow it morphed into the color challenge. the colors are red, orange, green and yellow (fall colors).


here is the layout that I scraplifted by Jenelle:


The pictures I used are of my kitty and doggy sleeping on my bed together. These two are the best buds which I find very interesting because my dog hates cats (with a passion!). I just love to play alon their challenges because one) I', always up for a good challenge and two) I can always manage to use only scraps in those challenges! All the papers I used are scraps from my scraps bin!


Of course, I handmade all the embellies on this layout. I've been wanting to make a circles layout for a very long time and this design was easy to adapt into one that used circles as embellies. I handstitched some and doodles on others to give depth and texture. I also added buttons to balance each corner out.


The paper rosettes I made with my Fiskars border punch and a cream colored cardstock stamped with my Prima script stamp (love this one!) in brown. I finished them off with a bitton and th eother one with a best friend pet brad. I glimmer  misted with vintage photo reinker mixed with water on both corners.

Here is a close up of my title/journaling area:


Now, since I ended up using the last layout in the color challenge, I had to lift another layout for the actual scraplift challenge :)

Here is the layout that I scraplifted by Krissy Clark McKee:

Isn't it gorgeous? She actually scraplifted it from Liz Chidester (but that's another story...LOL)

and here is my take on it:


I used the pictures of my hubby and I decorating the Christmas Tree back in 2009 (our first Christmas together as a married couple). That year, we decorated the tree Red/Silver/White so I used the same color combo for the layout. Again, all the papers used here are scraps. I handmade the poinsettia flowers using  my Pazzles Inspiration to cut them in different sizes but I pretty much followed my tutorial (you can find it here). I outlined the flowers with silver stickles and added different size rhinestones to the centers.

Here are a few close ups of the flowers and title:


I really liked the three strips of papers on the left side of the layout so here is how I made it work on my layout::

I first stamped with my Prima script stamp on grey cardstock. Then glimmer misted the whole thing with clear glimmer mist and doodled around the edges with my white Signo pen. I finished by adding a button in red, silver and white.

Thank you again for stopping by my blog today. I hope you enjoyed my little tips and walk throughs of my layouts!

Sunday, October 23, 2011

sunday...AWDML October 15 Reveal- Ranger (2/3)

I hope that you have enjoyed your weekend. I know I did! Hubby and I went to a state park and spent so many hours there just trailing. We saw cranes and wild deer. Can't wait to scrap the pictures!

Well, today I want to quickly share another project using Ranger.

Supplies-
cardstock: Bazzill; 
patterned paper: Basic Grey Marjolaine Creme de Menthe, Jillibean Soup Dutch Mustard Soup Leeks;
bling: Prima;
glitter: Diamond;
chipboard: American crafts Thickers;
ink: Ranger Tim Holtz Vintage Photo, Embossing Distress Ink, Ranger Embossing Powder Clear;
stamp: Prima Notary script;
tools: Marvy Uchida 2500 heat embossing tool, Cuttlebug, Tim Holtz Tattered Florals dies, Tim Holtz paper distresser, Fiskars Stylus;
other: sewing machine, lace, cardboard, floss

I had a lot of fun working on this layout! I took this picture of my mom in 2009 on her birthday but the colors in the background were too busy so I turned it black and white which left me a lot of cushion room to play with colors! I opted to do a blue/brown layout thought but love the results! I made my own pattern paper, the light blue background paper, for this layout using glimmer mist and Prima script stamp. I water distressed and inked the edges.


I made the flowers using Tim Holtz Tattered Florals dies which I just got and I LOVE already! I stickled the edges of the flowers for some bling.


Using my Cuttlebug, I die cut some leaves using different shades of cardstock, inked their edges and molded them with my fingers. I also made the rolled dark blue flowers and added a few butterlies and some bling to finish the cluster.


I handmade the banner using cardboard and added a bow at each end and tiny buttons in between the pendants. I just love how it turned out! I have hidden journaling under the picture (the make a part of the title pulls out to reveal the hidden journaling).

Thanks for stopping by my blog today! Come back on Friday and I'll have a step by step tutorial on how to make your own pattern paper for your layouts using Tim Holtz inks and glimmer mists!

Monday, October 17, 2011

monday...AWDML October 15 Reveal- Ranger (1/3)

Good morning everyone! October is definitely flying by!

As you all know by now, this month's featured manufacturers over at AWDML are Jillibean Soup and Ranger and today I get to share with you my Ranger products! This also means that this whole month Jillibean Soup and Ranger products are 25% off over at AWDML and yes! all stickles, glimmer mists and distress ink pads are included!

Here is my first projects using Ranger:


Supplies-
cardstock: Recollections;
bling: Prima Flower centers;
glitter: Icicle;
ink: Ranger Tim Holtz Vintage Photo, Embossing Distress Ink, Ranger Embossing Powder Clear;
stamp: Prima Notary script, Martha Stewart Butterlies and Leaves Stamps;
tools: Marvy Uchida 2500 heat embossing tool, Tim Holtz Tattered Florals dies, Tim Holtz paper distresser, Fiskars Stylus;
other: sewing machine, pre-scored card base, 3D white paint, computer generated sentiment


For me, Ranger means Tim Holtz and Tim Holtz means glimmer mist, distress ink pads and stickles and that exactly what I used to make this card (along with Tim Holtz's new Tattered Florals die)!

I made my own pattern paper using Prima Notary (script) stamp, a Martha Stewart Butterfly stamp that I got for $2 at Walmart some time back and Tim Holtz Vintage Photo ink (I'm working on a tutorial on how to make your own pattern paper). The leaves are also a stamp by Martha Stewart that I colored with Peeled Paint distressed ink and hand cut them.


For the flowers I used Tim Holtz new Tattered Florals dies, MME pattern paper and Prima's flower centers. I made the sentiment on photoshop, printed it on white cardstock and adhered to my card.

Thanks for stopping by my blog today and do come back again before next month as I'm working on at least one tutorial using stamps and distress inks to make your own paper!

Tuesday, October 11, 2011

tuesday...AWDML October 1 Reveal- Jillibean Soup (3/3)

Good morning everyone! I was actually away for the weekend. Went sto see my FIL who is moving to WA state next week. His family (MIL and younger BIL) will follow as soon as they sell the house. Hubby and I had a nice visit but it was sad to see how the house has changed already since they are packing and getting rid of some furniture that they can't take with them. We did have a good visit though even though it was a very rainy weekend down in S. Florida.

Anyway, today I want to share with you one last card using Jillibean Soup products. Remember that this month's featured manufacturers for AWDML are Jillibean Soup and Ranger (more on this on the 15th!). This means that this whole month Jillibean Soup and Ranger products are 25% off over at AWDML!

Here is my card:

Supplies-
patterned paper: Jillibean Soup Spotted Owl Soup Dancing Hats, Spotted Owl Soup 6 Silly Owls;
ink: Tim Holtz Vintage Photo;
stamp:Basic Grey Delta Series Acrylic Stamps Birthday Hat;
pens: Signo White;
other: pre-scored brown card base from Michaels, sewing machine, Pazzles Inspiration 


This card was so easy to make! I used the Jillibean Soup Spotted Owl Soup Dancing Hats paper for it. I cut a few strips off the pattern paper, inked the edges, and glued them on my brown pre-scored card base. I then machine stitched through all the strips of papers. The little owl I handcut out of the Spotted Owl Soup 6 Silly Owls paper. Isn't he just darling? I stamped the sentiment (by Basic Grey) in black  but it was too dull against the bright colors of the paper so I went over it with Black Diamond stickles to make it pop.

I actually made a sketch for this card and turned it into a challenge over at the AWDML blog. Below is the sketch:


Pretty simple sketch, right? Plus, it gives you an excuse to use those tiny scraps of pattern papers that you can't throw away but are too small for a layout!

Remember to share your take with us over at AWDML and enter to win a $5 gift card to the store! Just post your creation to our Facebook Wall and you’ll automatically be entered in our monthly drawing! I can't wait to see your creations!

Wednesday, October 5, 2011

wednesday...OMG! I can't believe that I made it!

Wow! Ok, I have some news but I'll start in the beginning... So, I've been following Lisa Gregory's blog every Wednesday because that's when they reveal their Heartfelt Creation projects (and I LOVE what she makes with their stamps!) and I'm lazy so I start with Lisa's and then hop over to the Heartfelt Creation site from her blog. Well, they had a DT call that ended Sept. 30 and I figured that I'll throw my name in the hat. I guess hoping to be chosen but not really expecting it, if you know what I mean. Well, they released the semi-finalists today on the blog and guess what? YUP, I made it to the semifinalist list! This means that I'll be competing with 19 other ladies for the DT! I'm so exited and honored to even be considered for the Dt have made it to as a semifinalist! I am by no means a stamper (I think?) but I absolutely love Heartfelt Creations stamps!!!!

Thanks Heartfelt Creations for the opportunity and let the second round for the final DT begin!  :)

wednesday...AWDML October 1 Reveal- Jillibean Soup (2/3)

Happy Wednesday everyone! The week is almost over!!!  :)

Today I want to share a few tips with my next project using Jillibean Soup products. Remember that this month's featured manufacturers for AWDML are Jillibean Soup and Ranger (very exited about this one but I'll have more on this manufacturer on the 15th!). This means that this whole month Jillibean Soup and Ranger products are 25% off over at AWDML!

Here is my layout:

Supplies-
cardstock: DCWV, Core'dinations Vintage Cardstock Burnt Sugar;
patterned paper: Jillibean Soup Blossom Soup Fresh Cilantro, Dutch Mustard Soup Creme Fraiche;
alphas: Jillibean Soup Corrugated Alpha Stickers White;
embellishments: Jillibean Soup Corrugated Shapes Arrows;
buttons: Buttons Galore Button Bonanza Rainforest;
chipboard: American Crafts Thickers;
ink: Tim Holtz Vintage Photo;
paint: Ranger Adriondack Earthtones Acrylic Paint Dabber Espresso;
pens: Signo White;
other: white acrylic paint, tiny buttons from Walmart, sewing machine

I had so much fun with this layout since the pictures I was working with are of my funny hubby playing racketball (and posing for the camera!) back in 2007. I was inspired by the design of a layout that I made last month (you can see it here) and tried it with a masculine page and love how it looks. I love all the layers it has!


Of course, I made most of my embellies. I used this tutorial by Lisa (modified just a bit) to make the leather-like tag. It was a fun but messy process! LOL I do love how it looks and it gives the layout a very masculine look. I was plesantly surprised to find out that Jillibean Soup makes corrugated shapes, specifically, stars! As you know, I've been handmaking them from cardboard but Jillibeans offers them precut already and they were so much easier to use! I painted them with acrylic paint (white) and then randomly used my paint dauber in brown to give it some depth and color. I added different shaped buttons for the middle and white fabric thickers for this part of the title.


For the other part of the title, I used Jillibean Soup corrugated alphas (which, again, didn't know they existed!) in white. I used my dauber again to paint some areas to match my stars. I distress, inked and machine stitched all the layers.


I handmade a banner with left over papers from my stash. Stitched through it and added tiny buttons in between the pendants. Now, for a fun TIP!

TIP: Don't throw away those pretty Prima flower/bling packaging! Use them on your layout as an accent (their borders are beautifully shaped!) or even as journaling tags like I did here! I just inked the edges and placed on my layout to use as a huge journaling tag!


I hope that you have enjoyed this quick tip and walk-through on how I made my layout. remember to think twice before you throw those packages away!

Monday, October 3, 2011

monday...exiting news!

I'm so happy to announce that after a small break from designing sketches, I'm back in the Creative Scrapper Sketch Team! I can't wait to start designing for them again as I loved my last term there!

Here's the new sketch team:
Nicole Nowosad
Juliana Michaels 
Kristine Davidson 
Amarilys Doria (that's me!!!)

You can check out the announcement here. Can't wait to start!

monday...sharing a few cards today

I hope that everyone had a great National Card Making weekend (National Card Making Day was Oct. 1)! I sure did as I spent my weekend making a few cards and enjoyed playing along Pink Paislee's challenges.

For my first card, I used this Becky Fleck's sketch:


I mirrored the sketch and came up with this card:


I absolutely loved the row of buttons on the sketch and made sure that I made this the focal point of this card. I used buttons that I had lying around, most of them from old shirts, and stitched them to the card. This extra step really makes the card. I used both sides of Pink Paislee's North Pole pattern paper. I used the lighter grid pattern side as the background for my card.


I stamped a 4x6 piece of  this pattern paper with Prima's Notary stamp and embossed it with clear embossing powder. I then inked the paper with Tim Holtz vintage photo ink to make the letters show. I finally glimmer misted here and there with Suede glimmer mist to give it some shimmer. I then trimmed the paper to fit in my card base (4.25x5.5") pre-bought card base. I distressed the borders and machine stitched around the edges. I punched out a small border using my Martha Stewart punch (Cherish) and then added the row of buttons and finished it off with a computer generated sentiment. I entered this card in Challenge #7 Mixed Media Challenge, which was to use more than 2 mediums on a card. I used glimmer mist and Tim Holtz's ink.

For my second card, I used a Pink Paislee 365 degrees flip notes as my focal point:


I stamped a white cardstock with Prima's Notary stamp yet again with brown ink (StazOn). I then stamped Martha Stewart butterflies and used some perfect pearls on them. I finally glimmer misted some spots with my Frost glimmer mist. I then inked and machine stitched the edges and attached to the cream colored base. I added some Pink Paislee papers to make the border in the middle. I added the notecard, stamped a sentiment by Fancy Pants and finished it off with a handmade Pink Paislee papers circle cupcake. I entered this card in Challenge #6 Stamping Challenge, which was to layer stamps. I layered my scrip stamp with Martha Stewart butterflies (perfect pearls).

Here is a close up of my embellies:


My third card was my favorite of all!


I designed and cut the shape of the card with my Pazzles Inspiration out of cream cardstock.
I used the Pink Paislee's Butterfly Gardens collection for the background of this card. I handmade the flower and glimmer misted the top 2 die cuts with Suede glimmer mist. I finished it off by adding a stamped sentiment by Fancy pants to the Pink Paislee die cut sticker circle. I entered this card in Challenge #3 Shaped Cards which happened to be hosted by Karola ( I absolutely LOVE her shaped cards!).

Here is a close up of my flower and sentiment area:


Finally, for my last card, I used the pretty lace paper from the Sweetness collection along with my sewing machine to make the background:


I stamped a white cardstock with Prima's Notary script stamp and inked the edges. I then added strips of the pattern paper that I hand cut, and machine stitched zig zags in between the strips. I love how the background looks! I made the little cupcake with Pink Paislee Butterfly Garden paper and glimmer misted the 3 smaller circles with Suede glimmer mist for some glimmer and difference in color. I finished it off by adding a stamped sentiment by Fancy Pants. I entered this card in Challenge #2 Stitching Challenge.

Here is a close up of this card:


Thank you for stopping by my blog today! Hope you have a great week!