
Today we are doing a cross promotion with Scor Pal. Please visit the Heartfelt Creation blog at www.heartfeltcreations.us/blog and the Scor Pal blog at http://scor-pal.blogspot.com/. Prepare to be blown away with all the amazing project featuring the Scor Pal and Heartfelt Creations products.
Here's what I came up with using both Heartfelt Creations and Scor-Pal products:

Supplies-
Heartfelt Creations:
HCPC 3367 Vintage Life Background PreCut SetHCPC 3468 Tattered Blossoms PreCut Set
HCPC 3480 Brookside Manor PreCut Set
HCPC 3532 Beautiful You PreCut Set
HCPC 3539 All Seasons Gazebo PreCut Set
HCPC 3540 Spring Season PreCut Set
HCPC 3541 Summer Season PreCut Set
HCPC 3544 All Seasons Sentiments PreCut Set
HCD 722 Tattered Blossoms Die
HCD 723 Garden Romance Die
HCD 731 Decorative Leafy Frame Die
HCD 737 Ornate Gateway Die
HCDP1 234 Daphne Paper Collection
452255 Grand Calibur
368770 Scor-Pal Measuring & Scoring Board
Other:
StazOn Archival Ink (Jet Black, Timber Brown), Tim Holtz
Distress Ink (Vintage Photo), Tim Holtz Blending tool, Recollections White
pearls, The Crafters Workshop 6"x6" Small Brick Template, Distrezz-it-all
tool, Martha Stewart Large Circle Cutter, Scor-Pal tool, texture paste, liquid
pearls, embossing tool
Of course, if you have a Scor-Pal you *HAVE* to make a rosette or two and let me tell you, it was so fast and simple to make them with this tool that I made 3! Scroll down to see a quick tutorial on how I made the rosettes.
.

Here's a close up of one of the rosettes and beautiful tattered flower by Heartfelt Creations. I also added a black iron gate and some brick texture to the background. Gabrielle has an awesome tutorial for this if you would rather make it yourself.

I also made a paper ribbonw itht he Scor-Pal as well as my some diamond scoring on my circle that I first stamped the beautiful new Spring stamp image by Heartfelt Creations.

Another close up of the rosettes. I can't get enough of them!
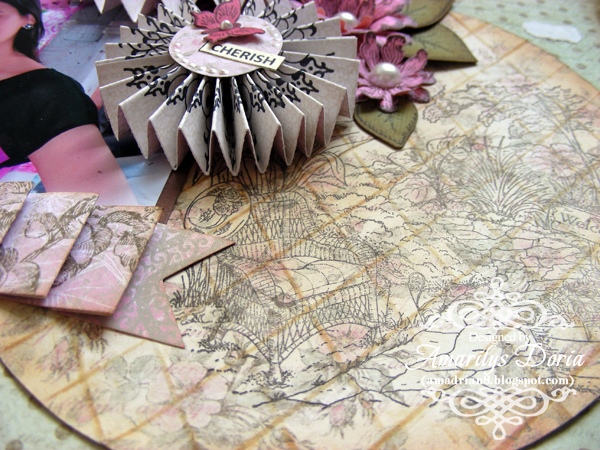
Another better close up of the texture achieves with the Scor-Pal on the circle layer.
Here is the step by step write-up for this project:
Distress a pattern paper using the Distrezz-it-all
machine and tear a few peek a boo areas randomly on the background paper. Stamp the Vintage Life Background PreCut stamp
twice on a cream colored cardstock and distress the edges with the tool and
distress ink. Tuck in under the peek a boo areas. Adhere the background layer
over a brown cardstock. Using The Crafters Workshop 6"x6" Small Brick
Template add some texture paste randomly to your background. Die cut a circle
out of a light color pattern paper and stamp the garden chair image unto it
using brown archival ink. Using your Scor-Pal, score a diamond pattern on the
back side of the circle. Ink all the edges and embossed areas with Vintage
Photo distress ink. Adhere the circle over the dry background. Add a 6”x4”
matted photo over it. Make your own paper ribbon by trimming a 1”x12” pattern
paper and scoring every 1” and 0.5” and then alternating between mountain fold
and valley folds. Cut a v at the end of the paper and add over the bottom of
the photo. For the rosettes, cut two 1”x12” strips of pattern paper and stamp
the border image of your choice along the strip. Using the Scor-Pal, score every
0.5” and alternate folding between mountain fold and valley folds. Connect both
pieces with adhesive and press them down to form your rosette. Add a word
sentiment and a tiny butterfly to finish it off. Stamp and die cut using the coordinating die some tattered
flowers. Layer these flowers and finish them by adding a large white pearl to
their center. Stamp and die cut some laves and the gate from the Ornate Gateway
Die. Add the embellies to your layout as shown.
-----------------------------------------------
Rosette Tutorial using Heartfelt Creations Stamps and the Scor-Pal tool
-----------------------------------------------

Step 1. Trim two pieces of paper to 1" x12".

Step 2. Stamp the border from the All Seasons Sentiments PreCut Set 3 times in each strip of paper with black archival ink.

Step 3. Using your Scor-Pal, score the whole strip of paper every 1/2".

Step 4. Alternate between mountain fold and valley fold.

Step 5. Adhere the end of one strip with the beginning of the next.

Step 6. After you connect the strips you will end up with something like this.
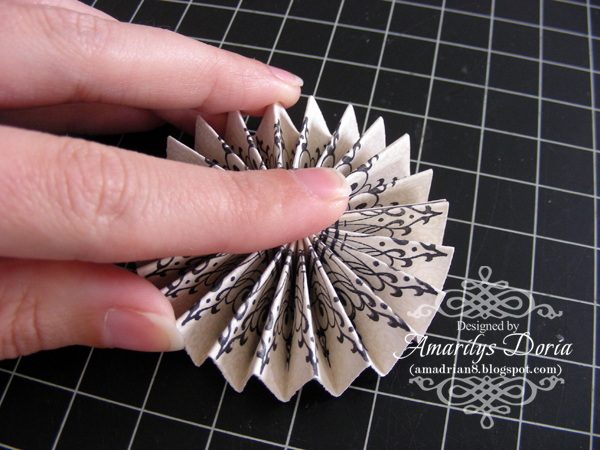
Step 7. Push down on the center of the paper to form your rosette. Add a glue dot or any adhesive of your choice (I recommend something that dries fast) to the back of the rosette.

Step 8. Your rosette is now ready to be embellished.

Step 9. Add a 1" punched circle to the center.

Step 10. Add a butterfly, sentiment and some tiny liquid pearl drops to finish it off.
Thank you for stopping by my blog today! Remember to go to the Heartfelt Creations BLOG and check out what the other designers made this week with the Scor-Pal products!

your layout is just stunning. Love the rosettes.
ReplyDeleteSimply beautiful!
ReplyDeleteGorgeous, gotta try those rosettes, I love them!!!!
ReplyDeleteSo pretty!
ReplyDeleteI love, love, love this page! The rosettes are so clever! The distressed edges and layering are stunning. Beautiful, beautiful!
ReplyDeleteI love, love, love everything about this layout! The distressed edges, the layering, pleated paper, textured brick background...all so elegant! The rosettes are stunning. Love that you stamped them. Clever you!
ReplyDelete