
Today was my turn to post on the AWDML blog and boy do I have a super fun project to share with you! Also, don’t forget to read all the way to the end to find out today’s sale item! Trust me, you DON'T want to miss it! So, let's get started!
I will be showing you how to make this 9 Christmas Greeting Card Set-using only ONE sheet of double sided 12"x12" paper! You can gift these sets or keep use the cards as your Christmas cards!

cardstock: Bazzill 12x12 Cardstock Sugar Cookie;
patterned paper: Simple Stories 25 Days of Christmas Naughty or Nice;
bling: Ranger Stickles-Gold, Tattered Angels Glimmer Mist-Pearl, Zva Creative Double Flourishes Clear;
ink: Tim Holtz Vintage Photo;
pens: Ranger White Opaque Pen;
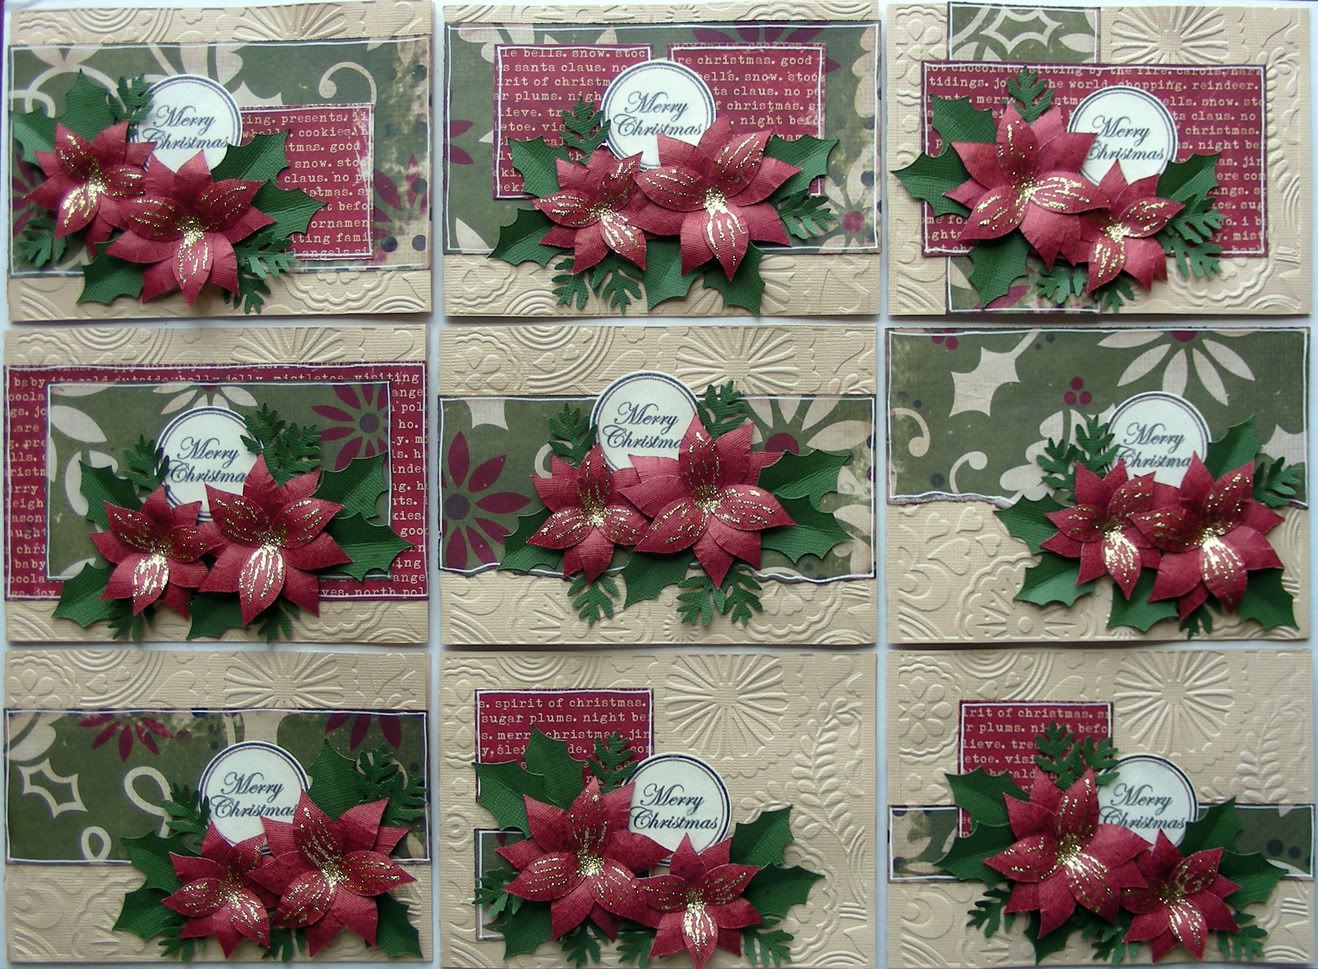
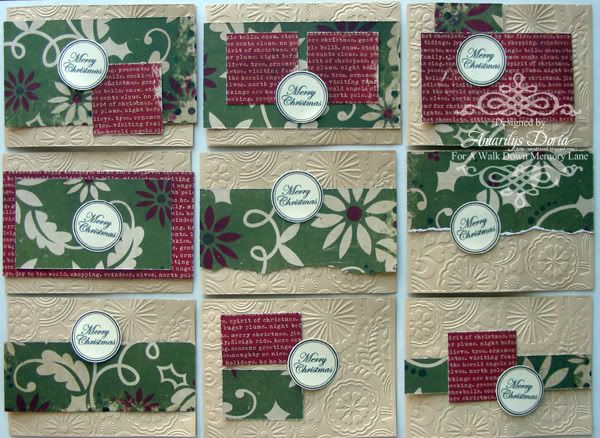
Here is a picture of all the cards:
(click image to view it bigger)
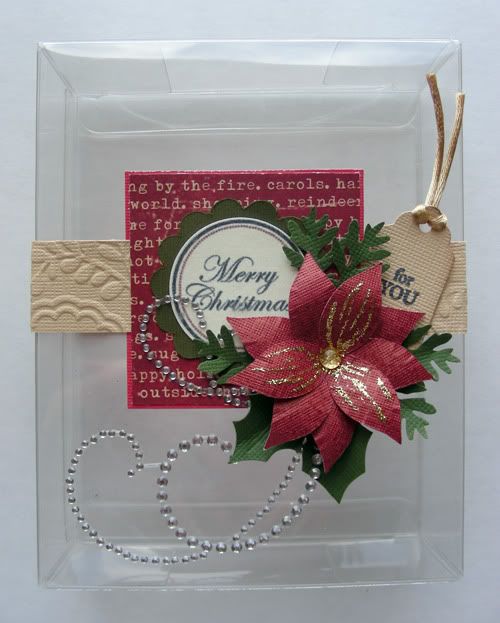
and of the finished clear box:
Here is a quick tutorial on how to make this set of greeting cards using only one sheet of 12"x12" pattern paper (plus the card bases).
Supplies:
- cream color cardstock for base
- one sheet of double sided paper
- Ranger White Opaque Pen
- Ranger Stickles-Gold
- Cuttlebug machine
- Cuttlebug Embossing Folder Floral Fantasy
- Clear Boxes for Cards Large
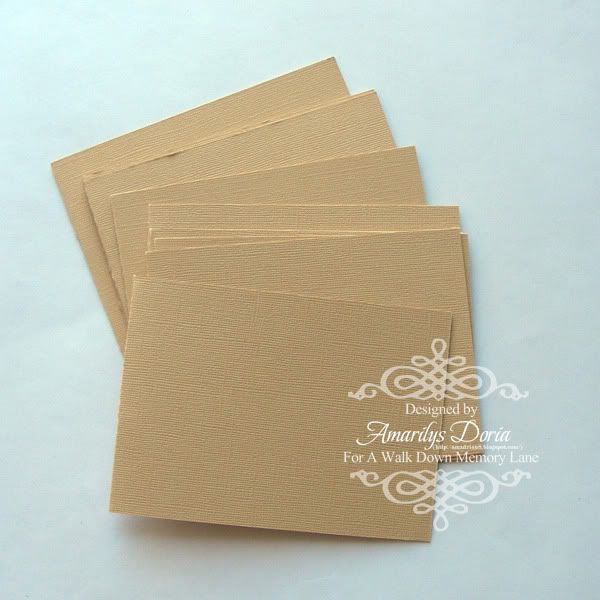
Step 1. Make or use 9 pre-scored card bases in cream color. (Shelly had a great Tip for us in a previous Newsletter on how to make 3 A2 cards out of a 12"x12" sheet of cardstock!). Run your card bases through an embossing folder to add some elegance to your cards.
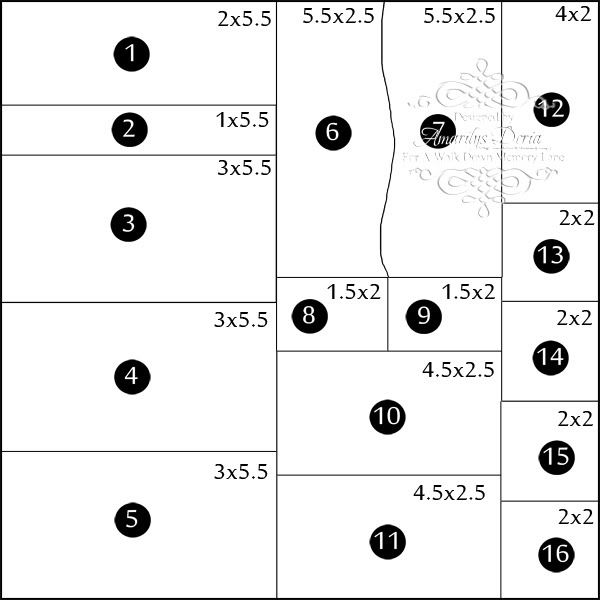
Step 2. Cut your pattern paper according to these measurements.
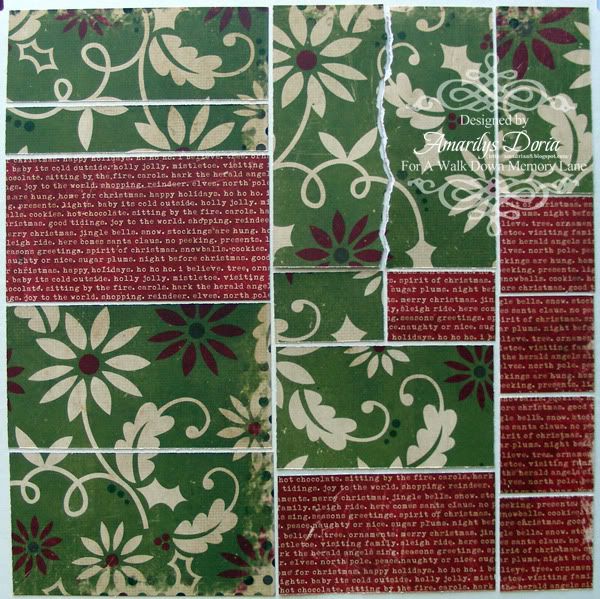
(You will end up with something like this. I went ahead and flipped a few of my pieces already because I will be using the red sides for these pieces.)
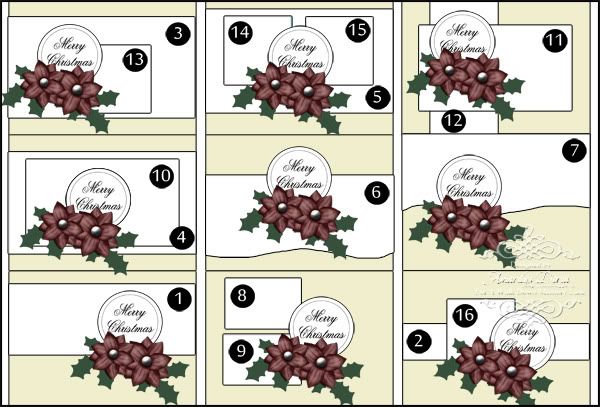
Step 3. Use these sketches to make your cards. The number coincided with the numbers in Step 2.
(Your card design should look like the picture above now. For my sentiment I designed it on Photoshop and printed it on cream cardstock. I then glimmer misted the whole thing with Pearl glimmer mist and dried it right away to prevent any bleeding. You can download the sentiment here.)
Step 4. This is the fun and last part! Ink and draw a faux stitch around your pattern paper's edges. Make some poinsettia flowers (tutorial can be found here or use some store bought ones if you are short on time!), punch out some greenery and embellish your cards!
For the box:
Embellish a clear card box by adding a strip of embossed cream cardstock, a piece of pattern paper (cut out from the center of #4), a sentiment, a flower and a few greenery. Add a Prima crystal swirl and you are done!
I hope that you enjoyed this little step by step tutorial! Here are all the cards photographed individually so you can see how much attention each one has!


Now, for the moment that you have been waiting for. Today's sale item over at AWDML store is...
Thank you for stopping by today! Come back tomorrow for more handmade gifts and 12 days of Christmas sales!

I love this idea and may adapt it for some birthday or spring cards in Jan. as my Christmas cards are all in the mail already. Thanks for the great ideas.
ReplyDeleteI left you a comment over at sb.com, but just wanted to say I LOVE this idea and your tutorial is fantastic!
ReplyDeletedon't you make card making a breeze!!! Thanks
ReplyDelete