
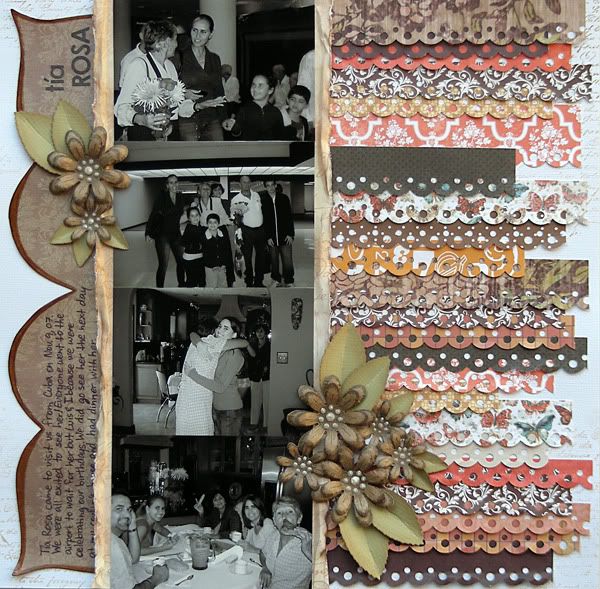
Here's my layout:
 Supplies-
cardstock: Bazzill;
patterned paper: Jillibean Soup Dutch Mustard Soup Leeks, My Mind's Eye (Just Dreamy 2-No Girls Allowed, Paisley Power), Graphic 45 Once Upon a Springtime Pixie Post, Echo Park Victoria Gardens Delightful Doilies, Doodlebug Accent Papers Swiss Dot Bon Bon, Mariposa Stack, Imaginisce Bday Bash It's a Party,
letter stickers: Basic Grey Hello Luscious mini mono stickers;
pearls: Ranger Liquid Pearl (Opal White);
bling: Tattered Angels Glimmer Mist (Pearl);
ink: Tim Holtz Distress Ink (Vintage Photo), StazOn Archival Ink (Brown Timber);
pens: American Crafts Precision Pen (Black), Copic Marker;
stamp: Prima Notary Stamp, Heartfelt Creations Daisy Patch Flowers PreCut Set;
tools: Cuttlebug machine, Martha Stewart Punch Around the Page (Scallop Dot), Spellbinders Rose Creations, Tim Holtz Paper Distressor;
other: Ranger Glossy Accents
Tip: Use your border punch to make a 12" border over half of your layout for added interest.
I made this layout using scraps only, except for the background white cardstock. I gathered my coordinating scraps and used my EK Success Martha Stewart Edge Punch Scallop Dot and punched the border.
patterned paper: Jillibean Soup Dutch Mustard Soup Leeks, My Mind's Eye (Just Dreamy 2-No Girls Allowed, Paisley Power), Graphic 45 Once Upon a Springtime Pixie Post, Echo Park Victoria Gardens Delightful Doilies, Doodlebug Accent Papers Swiss Dot Bon Bon, Mariposa Stack, Imaginisce Bday Bash It's a Party,
letter stickers: Basic Grey Hello Luscious mini mono stickers;
pearls: Ranger Liquid Pearl (Opal White);
bling: Tattered Angels Glimmer Mist (Pearl);
ink: Tim Holtz Distress Ink (Vintage Photo), StazOn Archival Ink (Brown Timber);
pens: American Crafts Precision Pen (Black), Copic Marker;
stamp: Prima Notary Stamp, Heartfelt Creations Daisy Patch Flowers PreCut Set;
tools: Cuttlebug machine, Martha Stewart Punch Around the Page (Scallop Dot), Spellbinders Rose Creations, Tim Holtz Paper Distressor;
other: Ranger Glossy Accents
I made this layout using scraps only, except for the background white cardstock. I gathered my coordinating scraps and used my EK Success Martha Stewart Edge Punch Scallop Dot and punched the border.
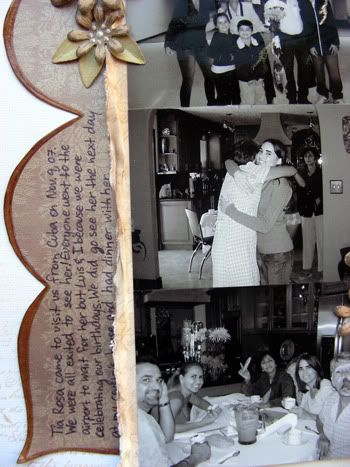
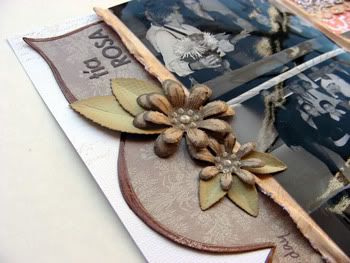
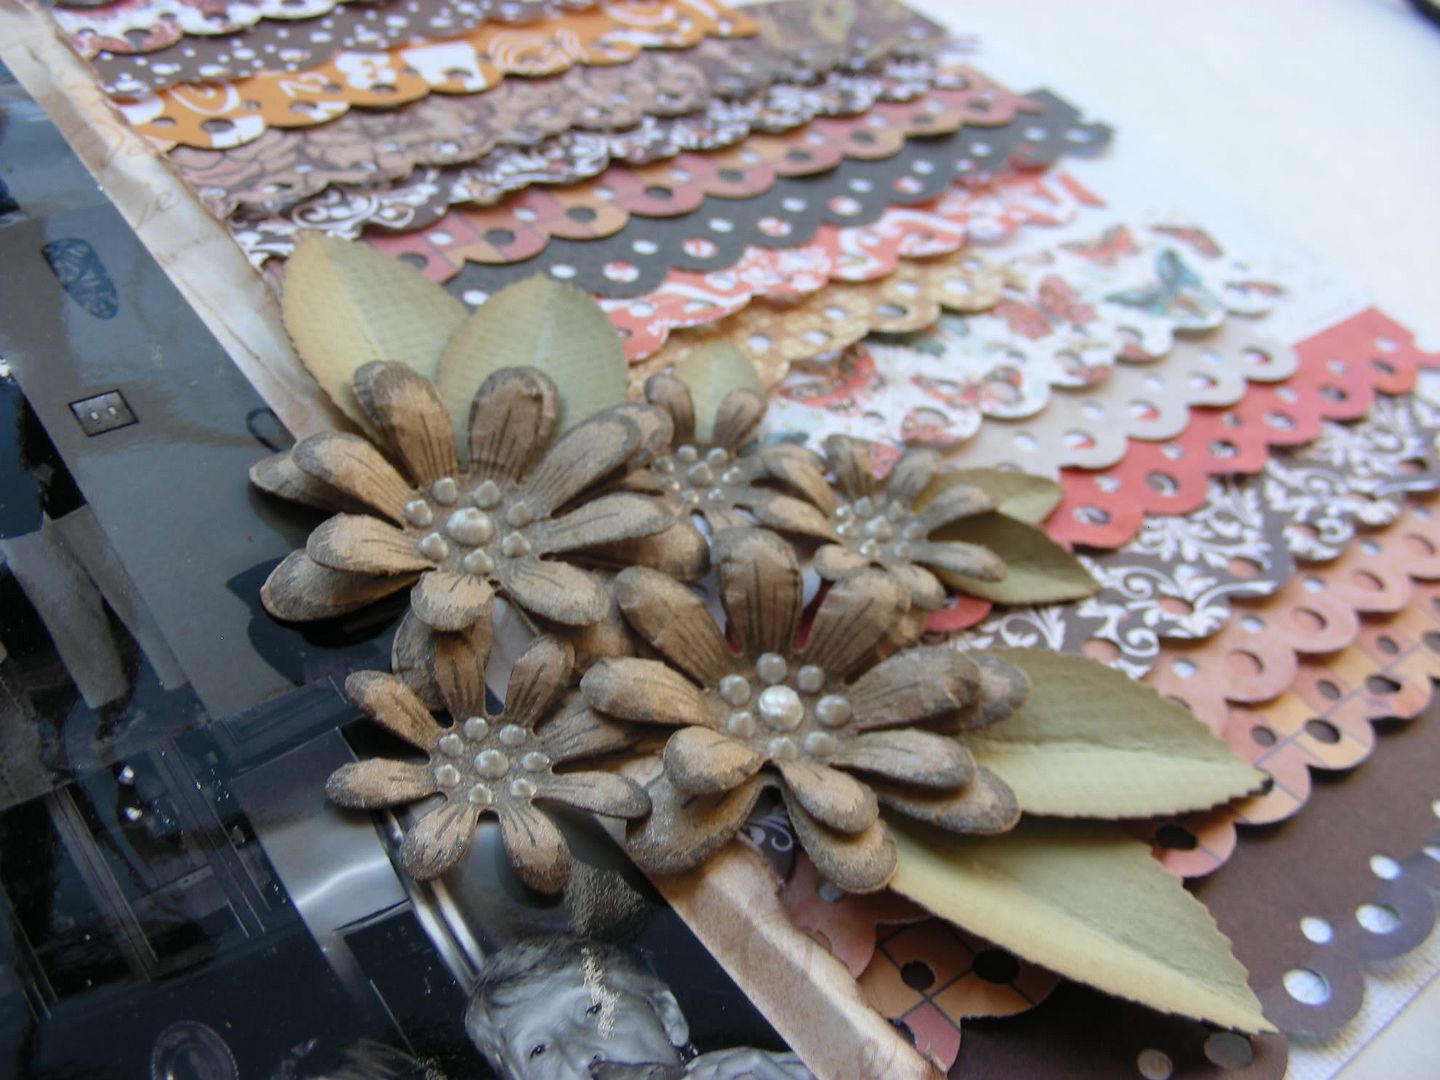 I then trimmed the strips to 6" and I varied their width for added interest. Because the pattern papers are a bit busier, I decided to go with black and white pictures and very neutral embellies. This technique works because you use the same punch unifying the layout. You can even use different color pattern papers (rainbow colors) and the finished layout will still look amazing!
Here are a few more close ups of my layout:

No comments:
Post a Comment
Thank you for taking your time to comment on my blog!