Supplies-
HCPC 3407 Botanical Floral 2 Precut Set
HCPC 3449 Door to my Heart Precut Set
HCPC 3452 Pristine Lilies Precut Set
HCPC 3454 Twining Clematis Precut Set
HCD 702 Decorative Butterfly/Border
HCD 704 Perfect Petals
HCD 712 Bella Rose Die
HCD 719 Cross and Lilies Die
Rose Creations Shapeabilities
317430 Cuttlebug machine
Other:
Kasiercraft pattern paper, Ranger Liquid Pearls (White
Opal), Tim Holtz Distress Inks (Vintage Photo), Ranger Tim Holtz Reinker
(Vintage Photo), Ranger Stickles
(Diamond), StazOn Archival Ink (Jet Black), Inkadinkado Blending Chalks ,
Martha Stewart Punch Around the Page (Vintage Flowers, Wild Flowers), Spellbinders
Shapeabilities Classic Ovals, Puffy Paint, Marvy Uchida Heat Embossing
gun, decorative scissors, rhinestones, sewing
machine
I used the gorgeous picture that Linda (Heartfelt Creations owner) sent me of her daughter Ellen. I decided to go with a pink/brown color combo because of the colors in the picture.


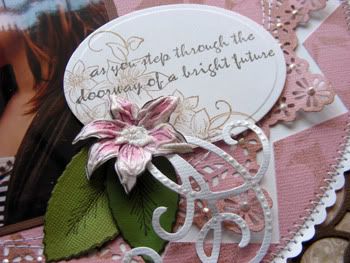
I stamped the sentiment on white cardstock and cut/emboss it in an oval. I added a smaller cluster here too.

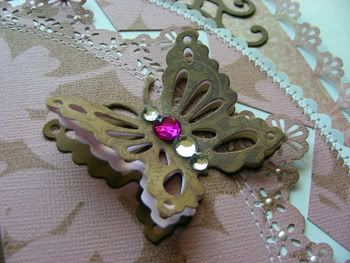
Finally, I made a 3 layer butterfly with rhinestones for the center. I just love this die!
Here is the step by step write-up for this layout:
For your background, punch around the page using Martha
Stewart Vintage Flowers and adhere to a white cardstock. Place the Prima mask
over a pink cardstock and mist with a solution of water a little bit of Vintage
Photo reinker. Make a doily out of this
cardstock following THESE directions. Add this handmade doily to the center of the background. Die cut four brown
corner dies from the Perfect Petals set and add to each corner of the layout as
shown. Mat your picture and add to the left side of the layout. Die cut 3
butterflies from the Decorative Butterfly/Border set and add to the right side
of the picture. Add 4 rhinestones to the body of the butterfly and lift the
wings up. For the flowers, stamp and die cut using the coordinating dies a few
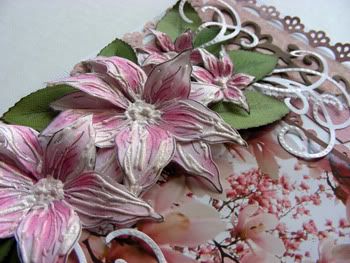
lilies from the Pristine Lilies Precut Set. Color with pink chalk and randomly
add puffy paint in long streaks along the petal. Let dry and use a heat
embossing tool to make the paint puff. Mold them with your fingers and add to
the left side of the picture. Stamp and die cut a few leaves and add to the
cluster. Finally, die cut a few leaves in white cardstock from the Belle Rose
set and cut up the swirls and add them to the cluster as well. Stamp your
sentiment on white cardstock and die cut/emboss using the second largest oval
from the Spellbinders Shapeabilities Classic Ovals set. Stamp the Twining
Clematis Precut Set off center with Vintage Photo distress ink. Pop dot this
sentiment and add to the right corner of the picture. Add a flower, leaves and
flourish here as well. Finish the layout by adding tiny liquid pearl dots on
the handmade doily and white flourishes.
Thank you for stopping by my blog today! Don't forget to stop by the Heartfelt Creations blog today to see all the wonderful creations by the DT! Also, next week we are debuting a brand new collection that you do not want to miss!


This has to be the most beautiful layout I have every seen. Wonderful, just wonderful. Truly a piece of art.
ReplyDeleteWow!! This is absolutely gorgeous!
ReplyDeleteGlorious perfect details from one corner to the next. Magnificent.
ReplyDeleteI can't tell you how gorgeous this is! The pink and brown are lovely together!
ReplyDeleteИзумительно красиво! Просто Аххх! Цветочки - волшебные :)
ReplyDeleteThis is a gorgeous layout!! Love all the pink elements... goes perfectly with the image!
ReplyDelete