
This month we are delighted to release our very first line of Heartfelt Creations paper. Check out the beautiful patterns, luscious colors, and organic textures. Some come with our stamp images in them; others are abstract. This will add some fun and variety to your creations!
The Classic Edition Collection stamp sets and die release is gearing towards the fall season and colder days. A rustic truck, wooden wagon, playful dog, berries, apples, and pumpkins will keep you busy creating as the sun begins disappearing earlier in the evenings. Our card samples will give you many ideas to get your creative juices flowing. Leave a comment on the HC blog by July 24th and you will be eligible to win the entire release.
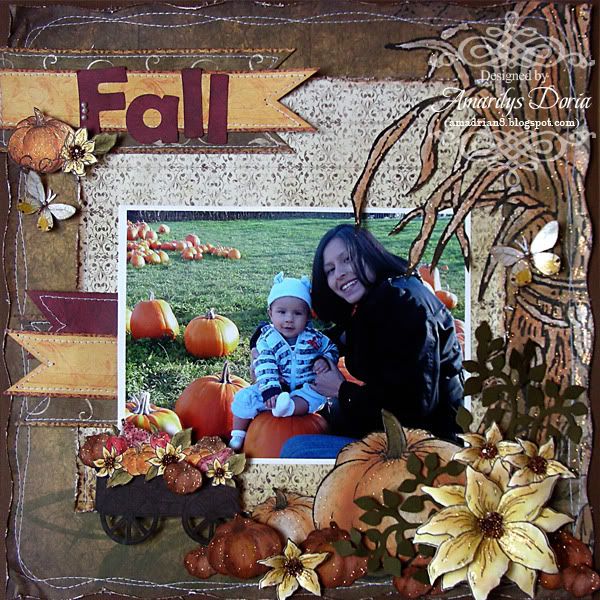
Here's a layout that I made with it using the new collection and the brand new papers:
Supplies-
Heartfelt Creations:
HCPC 3453 Malabar Clematis Precut Set
HCPC 3484 Pumpkin Harvest Precut Set
HCPC 3483 Days Gone By Precut Set
HCD 719 Cross and Lilies Die
HCD 720 Western Broncos Die
HCD 724 Classic Editions Die
452255 Grand Calibur
DDOTS Double Dots 100pc.
9brn Brown Gala Glitz
HCDP1 224 Classic Editions Paper Collection
Other:
Tim Holtz Distress Inks (Vintage Photo), StazOn Archival Ink (Timber Brown), Prismacolor Pencils (PC922, PC937, PC945, PC947, PC1003, PC1034), Rangers Stickles (Diamond), Bazzill cardstock (brown), Pazzles Inspiration machine for title, sewing machine
This is a picture of my only nephew (isn't he a cutie pie?) and his mommy last Fall. I just fell in love with this picture and had to scrap it! The hay on the right side of the picture is actually the pattern paper. I cut it carefully using a craft knife and tucked the picture in between.
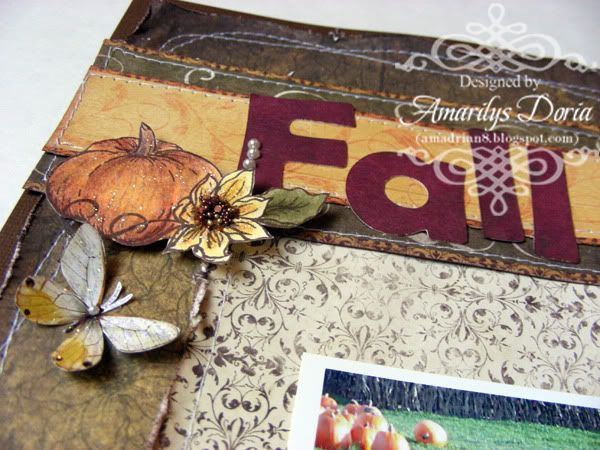
The paper is absolutely gorgeous! You can see a close up of the ones that I used right here. Of course, the stamps are amazing as well! I had so much fun coloring the pumpkins and making the clematis from the Malabar Clematis PreCut Set work well with this new set. I cut my title with my Pazzles Inspiration and added a few yellow/white butterflies.
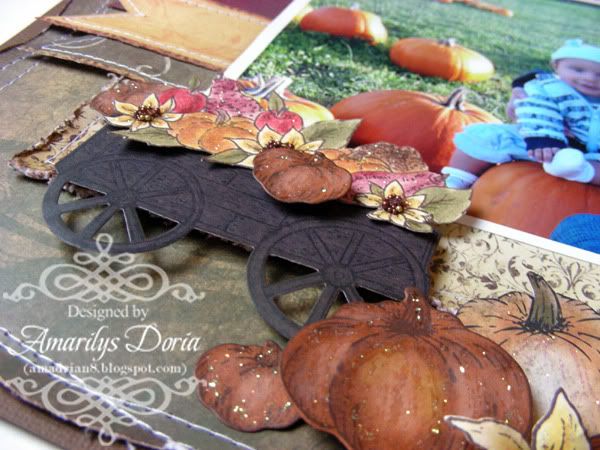
The new collection has amazing new stamps and one of my favorite is the wagon. I stamped and die cut it from a brown paper and used the pretty fruit and flowers image over it.
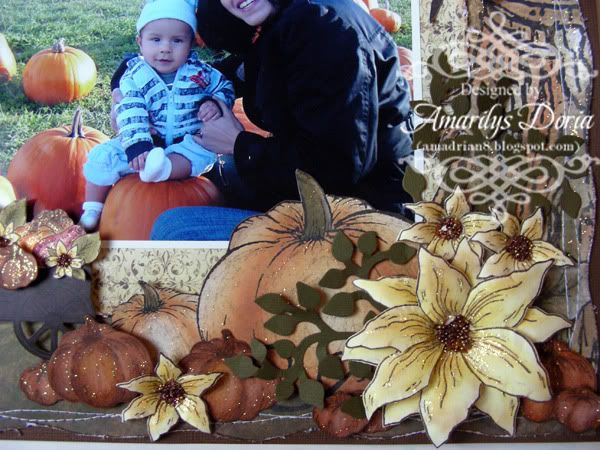
I die cut a few pumpkins, flowers and some greenery to make a cluster in the corner. I added brown gala glitz to the flower centers and some diamond stickles.
Here is the step by step write-up for this layout:
Cut a wavy border on all 4 sides of the pattern paper. Distress with the edges of a pair of scissors and ink the edges with Vintage Photo distress ink. Cut a piece of 8.5” square out of a lighter pattern paper. With a craft knife, cut out the hay image on the background pattern paper and add the lighter pattern paper over the center of layout. Adhere these two layers unto a brown cardstock and machine stitch around the borders. Place a 7”x5” photo in the middle bottom side of the layout, making sure that the hay image goes over it. Cut a V notch to make a banner pendant on three strips of paper. Machine stitch around the edges and add tuck in underneath photo. Make two more of these banner pendants out of pattern paper and place over the top left side of layout. Add a title over it. Stamp the pumpkin and flower image, color and fuzzy cut. Add with a pop dot over the title area. Stamp, color and die cut a few pumpkins and a few flowers from the Malabar Clematis Precut Set. Layer the pumpkins over the photo and pumpkin images on the background pattern paper. Layer the flowers to make a bigger flower and add gala glitz to centers. Add to pumpkin cluster as shown. Die cut two greeneries from the Western Broncos Die set and tuck in under large flower. Stamp the wagon and die cut it out of brown pattern paper. Stamp, color and fuzzy cut the fruits and flowers images from the Pumpkin Harvest Precut Set. Pop dot the fruits image and adhere over the wagon. Add the wagon to bottom left side of photo. To finish, add a few butterflies with a pearl as a body, and add stickles to butterflies, flowers, pumpkins and hay background image.
Thank you for stopping by my blog today! Remember to go to the Heartfelt Creations BLOG and check out what the other designers made this week with the new release!

Tim Holtz Distress Inks (Vintage Photo), StazOn Archival Ink (Timber Brown), Prismacolor Pencils (PC922, PC937, PC945, PC947, PC1003, PC1034), Rangers Stickles (Diamond), Bazzill cardstock (brown), Pazzles Inspiration machine for title, sewing machine
This is a picture of my only nephew (isn't he a cutie pie?) and his mommy last Fall. I just fell in love with this picture and had to scrap it! The hay on the right side of the picture is actually the pattern paper. I cut it carefully using a craft knife and tucked the picture in between.
The paper is absolutely gorgeous! You can see a close up of the ones that I used right here. Of course, the stamps are amazing as well! I had so much fun coloring the pumpkins and making the clematis from the Malabar Clematis PreCut Set work well with this new set. I cut my title with my Pazzles Inspiration and added a few yellow/white butterflies.
The new collection has amazing new stamps and one of my favorite is the wagon. I stamped and die cut it from a brown paper and used the pretty fruit and flowers image over it.
I die cut a few pumpkins, flowers and some greenery to make a cluster in the corner. I added brown gala glitz to the flower centers and some diamond stickles.
Here is the step by step write-up for this layout:
Cut a wavy border on all 4 sides of the pattern paper. Distress with the edges of a pair of scissors and ink the edges with Vintage Photo distress ink. Cut a piece of 8.5” square out of a lighter pattern paper. With a craft knife, cut out the hay image on the background pattern paper and add the lighter pattern paper over the center of layout. Adhere these two layers unto a brown cardstock and machine stitch around the borders. Place a 7”x5” photo in the middle bottom side of the layout, making sure that the hay image goes over it. Cut a V notch to make a banner pendant on three strips of paper. Machine stitch around the edges and add tuck in underneath photo. Make two more of these banner pendants out of pattern paper and place over the top left side of layout. Add a title over it. Stamp the pumpkin and flower image, color and fuzzy cut. Add with a pop dot over the title area. Stamp, color and die cut a few pumpkins and a few flowers from the Malabar Clematis Precut Set. Layer the pumpkins over the photo and pumpkin images on the background pattern paper. Layer the flowers to make a bigger flower and add gala glitz to centers. Add to pumpkin cluster as shown. Die cut two greeneries from the Western Broncos Die set and tuck in under large flower. Stamp the wagon and die cut it out of brown pattern paper. Stamp, color and fuzzy cut the fruits and flowers images from the Pumpkin Harvest Precut Set. Pop dot the fruits image and adhere over the wagon. Add the wagon to bottom left side of photo. To finish, add a few butterflies with a pearl as a body, and add stickles to butterflies, flowers, pumpkins and hay background image.
Thank you for stopping by my blog today! Remember to go to the Heartfelt Creations BLOG and check out what the other designers made this week with the new release!
Gorgeous layout!!... and, yes, your nephew is a cutie pie! Love all the extra little details you put on the page... from the glitter sparkles on the pumpkins and flower to the flower center bling and even the little pearl on the butterfly!!
ReplyDeleteAmarilys, your layout is amazing! Love all the wonderful details. Hugs
ReplyDelete