We are pleased to introduce the Delicate Asters Collection. You are creative. Show your friends with this unique Aster collection. With beautiful elegant petals and Monarch butterflies, this set will represent you in a lively popping way. The typography makes speaking from your heart quick and easy. Our paper is a great value for those looking to get their money’s worth on materials. Since there are two different designs on the paper’s front and back, you get 24 different designs in one package. Now you have a variety of options when you get bored.
There are 6 new PreCut Stamp Sets, one 12x12 Paper Collection, and one beautiful new exclusive Spellbinders die designed for Heartfelt Creations. Leave a comment on the HC blog by September 18th and you will be eligible to win the entire release valued at $145.92 .
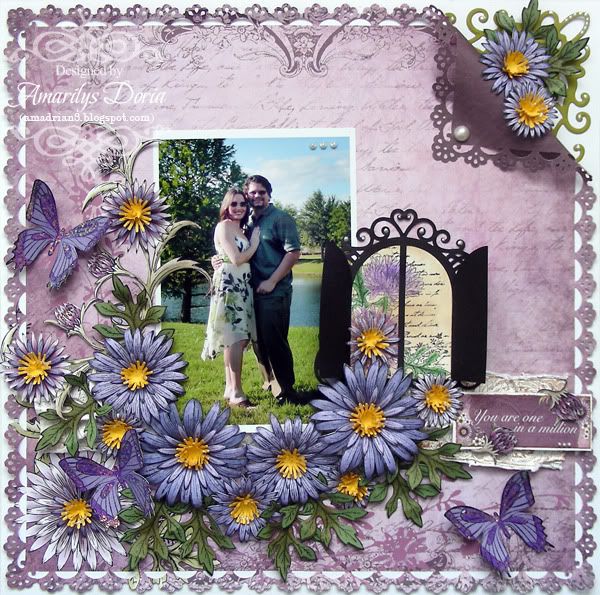
Here's the layout that I did with this new collection:
Supplies-
Heartfelt Creations:
HCDP1 226 Delicate Asters Paper Collection
HCD 726 Delicate Asters Die
HCPC 3496 Delicate Twining Asters PreCut Set
HCPC 3497 Script Aster Background PreCut Set
HCPC 3499 Delicate Asters and Butterflies PreCut Set
HCD 704 Perfect Petals Die
HCD 718 Decorative Chateau Gate Die
DDOTS Double Dots 100pc.
452255 Grand Calibur
Other:
Prismacolor Pencils (PC908, PC932), Tim Holtz Distress Inks (Vintage Photo), StazOn Archival Ink (Jet Black), Martha Stewart Punch Around the Page (Vintage Flowers), Tim Holtz Blending tool, Tim Holtz Paper Distresser, Recollections White Pearls, Ranger Stickles (Icicle), Rangers Liquid Pearls (White Opal)
I know that I have used this picture before but I just love it! My hubby and I took this picture ourselves this past Easter when we were doing a free family photo shoot at a new church. At the end, we set up the camera and took a few pictures of our little family of 2.
I used the new Delicate Asters Paper Collection that coordinates with the new stamp set. Let me tell you, I'm not a big fan of purple but I *LOVE* this collection! You will definitely see more purple layouts from me in the future!
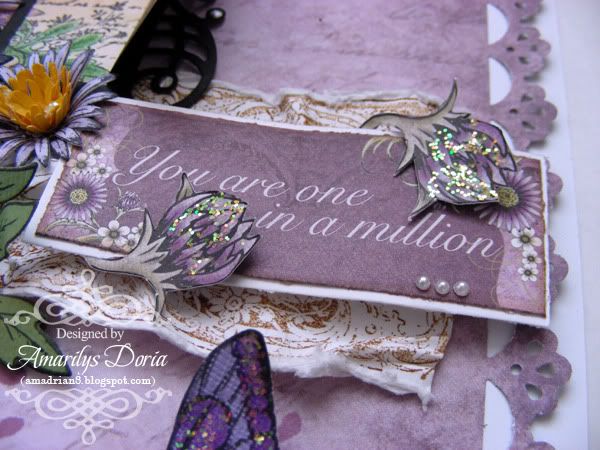
The collections come with a sheet that is all sentiments, strips of paper and bigger pieces, so I decided to use one as my title. I cut it out and matted it on white cardstock. Of course, I inked it a bit with Vintage Photo and added some fuzzy cut flowers and pearls.
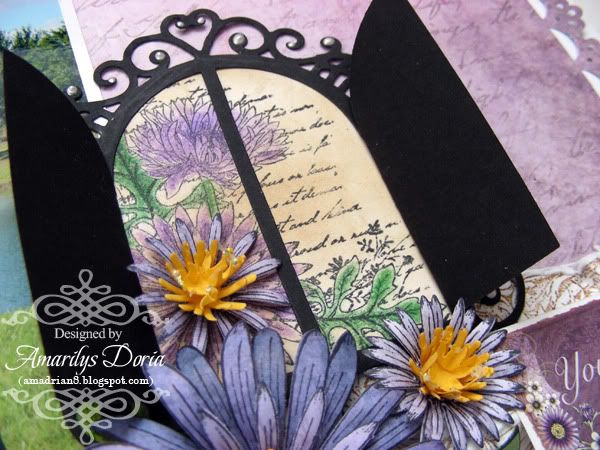
I die cut a black gate and used it over a vintage-looking stamped image from the new collection. I colored in the flowers and leaves with Prismacolor pencils and distressed with Vintage Photo to make it look vintage.
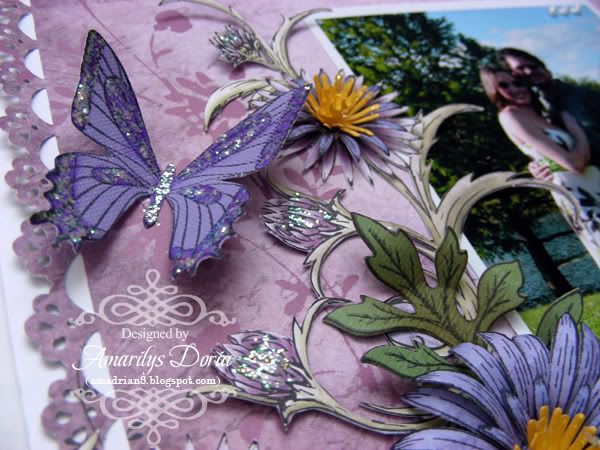
This collection has two new butterflies! I was so exited to see these! I made 3 of the same butterfly, colored it with Prismacolors and applied stickles over it. I also fuzzy cut some blooms and swirls from another paper to add to my layout.
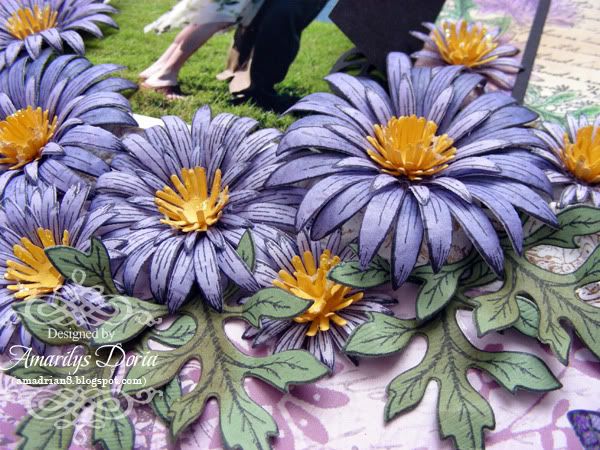
Of course, I made lots of flowers. I used two larger dies and one, one-size-smaller die per flower. I made the centers with the smaller dies that is included in the die set. I also made a bunch of leaves and distressed them a bit with Vintage Photo.
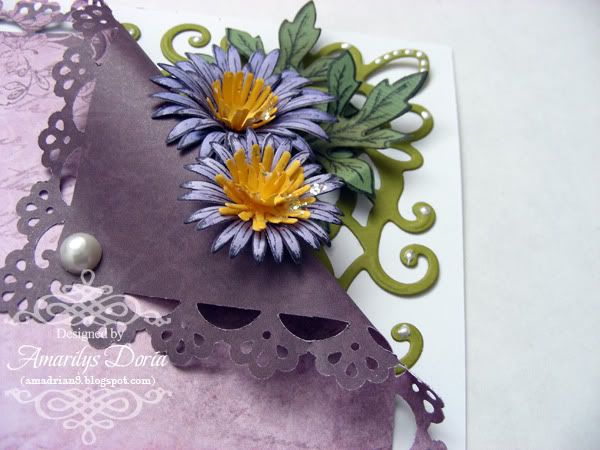
I punched around the edge of the paper with Martha Stewart Vintage Flowers and folded the top right corner back a bit. I tucked in a green corner die cut, some blooms and leaves. I love this little accent corner!
Here is the step by step write-up for this layout:
Punch around the page with Martha Stewart Vintage Flowers. Adhere unto white cardstock and fold back the top right corner to expose the back side of your paper. Add a large pearl to the folded corner. Die cut and emboss a green corner from the Perfect Petals Die and tuck it in under the folded corner. Stamp the border image from the Delicate Asters & Butterfly on white cardstock three times using Vintage Photo distress ink. Cut the strip of paper and distress the edges. Crumble it with your fingers and adhere 1/3 of the way from the bottom. Add a 4”x6” photo over the border. Stamp the background corner from the Script Aster Background Precut Set. Color with prismacolor pencils and ink with distress ink to give it an old feel. Die cut the gate from the Decorative Chateau Gate Die in black and adhere over the stamped background corner. Cut out the extra paper around the stamped image. Add this piece on the right side of the photo. Fuzzy cut a flower and leaves swirls from one of the pattern papers and add to the left side of the picture. You need 2 large asters and 1 two-sizes-smaller per flower. Shape each die cut with a stylus and layer them to form a full bloom. For the center, die cut a bunch of yellow centers from the Delicate Asters Die and add stickles to it. Let them dry and add to flowers. Stamp and die cut with the coordinating die a few leaves as well. Add the blooms and leaves around the photo and on the folded corner as shown. Cut out a sentiment from the sentiment 12x12 sheet and mat it with white cardstock. Pop dot it and add over the stamped and crumbled border. Add two fuzzy cut buds and three pearls. Stamp and die cut three butterflies. Color with Prismacolor Pencils, add stickles and add randomly add to the page. Finally, add liquid pearl dots to the black gate and on the photo.
Thank you for stopping by my blog today! Remember to go to the Heartfelt Creations BLOG and check out what the other designers made this week with the new release!


stunning Amy love the color combo!!
ReplyDeleteAbsolutely fantastic page!! So many wonderful elements! I love that corner turnback! Your flower cluster is gorgeous and I love how it matches your dress in the photo!
ReplyDeleteSooo beautiful page! Love love love the colours.xx
ReplyDeleteWow, you rocked this collection. How exciting that they have come out with a paper line too! Such gorgeous products to work with and your layout is amazing!! ~ Blessings, Tracey
ReplyDeletehttp://gracescraps.blogspot.com/
Stunning page ...love the colour combo and you have done an amazing job on the asters.
ReplyDelete