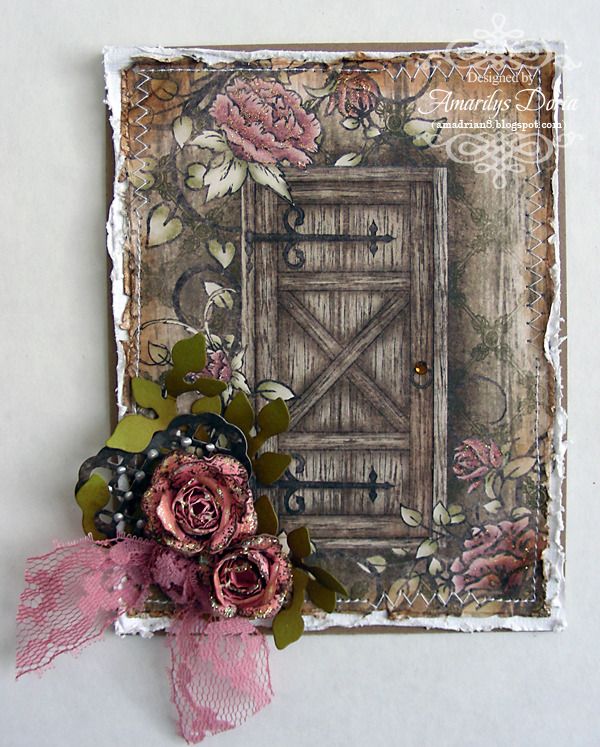
So, today I want to share a card that I made with the new Timeless Amour Collection by Heartfelt Creations.

Supplies-
Heartfelt Creations:HCPC 3500 Open Vintage Floret PreCut Set
HCPC 3502 Mini Vintage Floret PreCut Set
HCPC 3505 Timeless Rosette PreCut Set
HCPC 3506 Passage to my Heart PreCut Set
HCD 720 Western Broncos Die
HCD 727 Vintage Floret Die
HCD 728 Timeless Amour Die
HCDP1 228 Timeless Amour Paper Collection
452255 Grand Calibur
Other:
Tim Holtz Distress Inks (Vintage Photo), StazOn Archival Ink (Jet Black), Prismacolor Pencils (PC908, PC924, PC947), Ranger Liquid Peal (Opal White), OMS, Ranger Stickles (Diamond), Tim Holtz Blending tool, Zutter Distress-it-all, ATG, Recollections Cardstock, sewing machine, X-acto knife
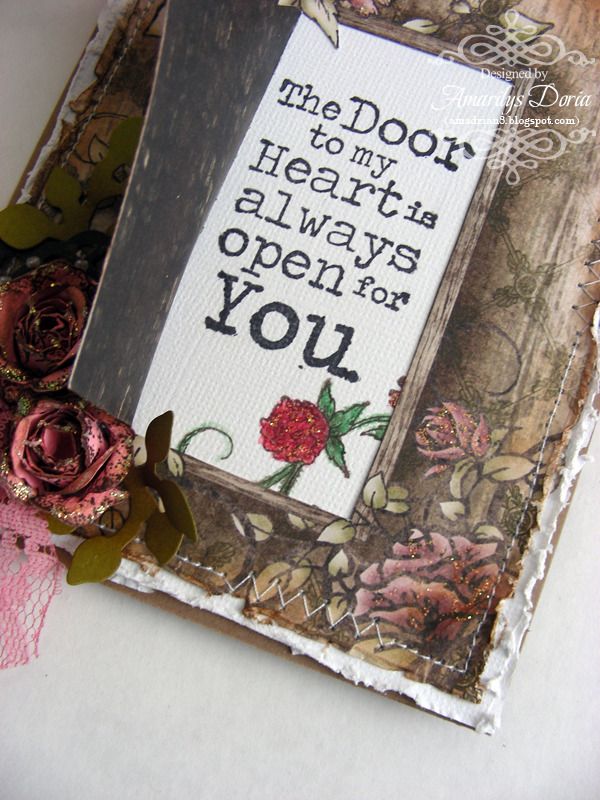
This card measures 4.25"x5.5" and the little door actually opens to reveal the sentiment!

I cut out the door with my X-acto knife and layered a white cardstock underneath and stamped my sentiment so that it would show when the door was open. I did some straight and zig-zag stitching and distressed and inked all the edges to give it a shabby chic look.

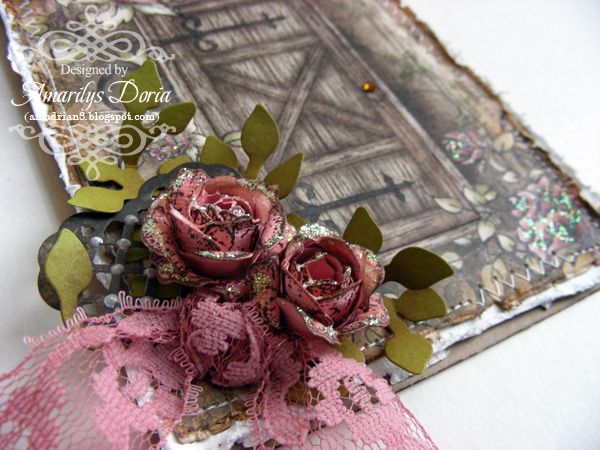
Here's a close up of the sweet roses that I made. I layered 3-5 small dies to make them look like buds. I then distressed them with ink and added some stickles. I made a cluster with leaves, a heart die with liquid pearl drops and a pink lace knot.
Here is the step by step write-up for this layout:
Fold a 8.5”x11” light
brown cardstock in half and cut that in half for your card base. Trim a white
cardstock to 4.25”x5.5” and trim the door part of the pattern paper to
4”x5.25”. With a X-acto knife, cut the door so that it opens to the left. Stamp
the swirl from the HCPC 3505 Timeless Rosette PreCut Set on the bottom side of
the white cardstock and the sentiment from the Timeless Rosette Precut Set on
the center. To make sure that it will show through, place the pattern paper
over the cardstock and lightly trace the open door rectangle unto the cardstock.
After you stamp your images, erase these lines. Distress these two layers with
the Distress-it-all tool and ink the edges of the pattern paper with Vintage
Photo distress ink and the Tim Holtz tool. Adhere the pattern paper over the
cardstock and machine stitch them together. Adhere these two layers over the
background cardstock. Stamp and die cut several flowers from the Open Vintage
Floret Precut Set and Mini Vintage Floret Precut Set but only the smallest
three sizes. Make two rosebuds with these die cut flowers. Die cut the leaves
from the Western Broncos Die and adhere on the bottom left corner of the card.
Die cut the small heart from the Timeless Amour Die and add liquid pearl drops
to the intersections on the lace. Let it dry. Once dry, arrange the heart and
blooms over the leaves. Make a knot with a pink lace and add to the bottom left
corner of the cluster. Finally, add stickles to the roses, background pattern
paper and the stamped image on the inside.
Thank you for stopping by my blog today! Remember to go to the Heartfelt Creations BLOG and check out what the other designers made this week!


So shabby beautiful!
ReplyDeleteFabulously Gorgeous card!! I really like the stitching you did and how the door opens to reveal the sentiment...very creative!
ReplyDeletebeautiful , love the words inside the door :)
ReplyDeleteBeautiful card. I love all the detail..the stiching, glitter, door.
ReplyDeleteWow, Amy!! This is absolutely stunning. You so rocked these stamps!! ~ Blessings, Tracey
ReplyDeletehttp://gracescraps.blogspot.com/