
Like most scrappers, there comes a time where you feel overwhelmed by all the scraps left over by the projects that you have created! Well, I think I hit that point (AGAIN!)!
You see, I've been scrapping since 2003 and have served in a quite a few DTs and well, things have accumulated. I actually do love my 'scrap drawer' and my system for scraps. You see, my scrap drawer is more like 5 drawers and I separate them by color:

RED/PINK/PURPLE
YELLOW/ORANGE/BROWN
BLUE
GREEN
BLACK/WHITE/CREAM
I've been using this method for the longest time and it has worked really well for me!
Well, the other day I noticed that I was having a hard time closing and opening these drawers so I thought it was about time to do a little spring cleaning and use up those scraps!
Yesterday's layout is my first layout using said scraps. Here it is in case you missed it:
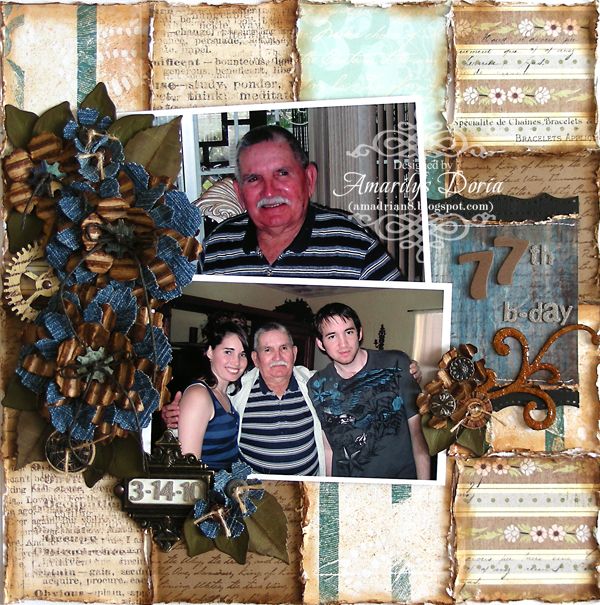
(You can read all about it HERE)
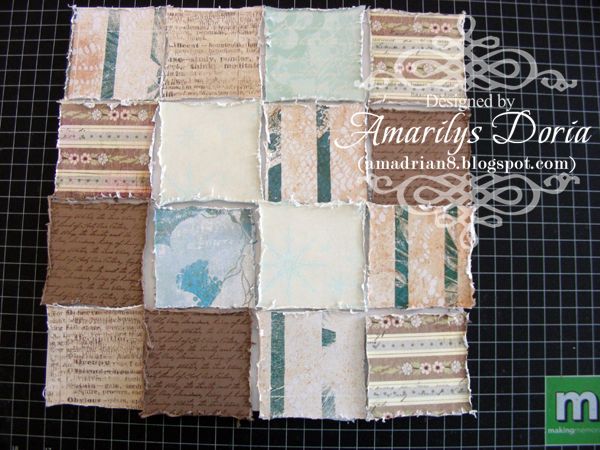
For the background I went through my BLUE and BROWN scraps drawer and pulled a few larger than 3x3 pieces of coordinating papers. I trimmed them down and distressed them with my Distrezz-it-All.
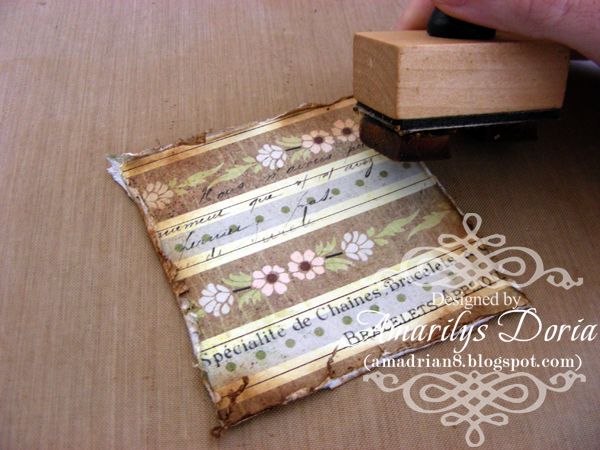
I then used the TH applicator and distressed all the edges with Vintage Photo distress ink.
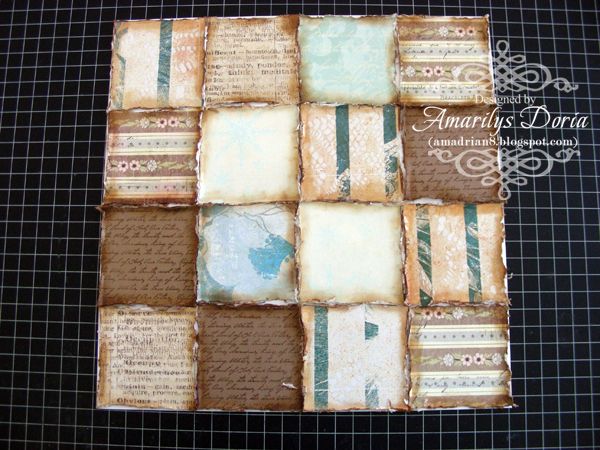
Afterwards, I just adhered each 3"x3" square on a scraps white cardstock (I had cut out smaller squares for a card a few days earlier). I lifted the edges a bit to add dimension and that was it! I now had a unique background to work with!
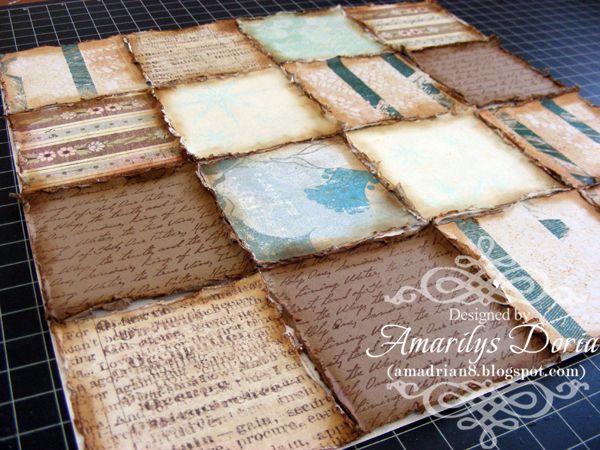
Here's a close up of the background.
For the flowers:
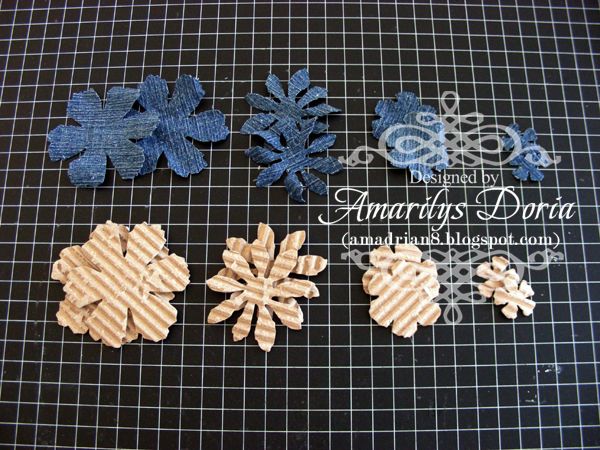
Step 1. Die cut the flowers using the Tim Holtz Tattered Florals using denim and cardboard (these are the boxes that I get my DT stuff in every month). You will get two of each flower in two different materials.
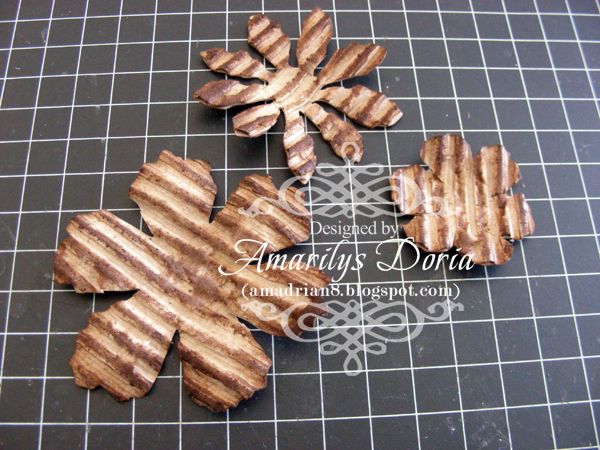
Step 2. Distress with Vintage Photo distress ink the corrugated flowers.
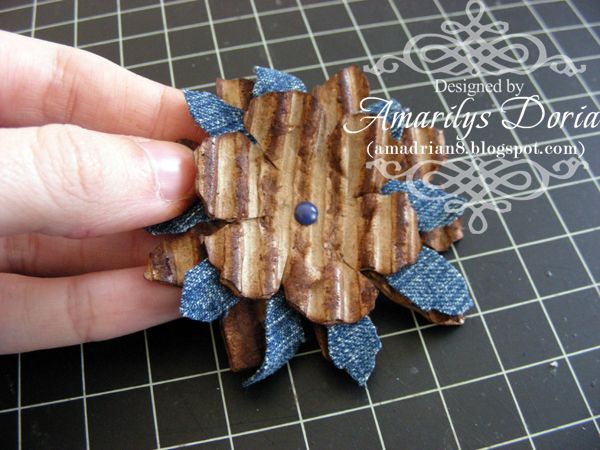
Step 3. Layer them using a cardboard flower and the same type of flower in denim and so on. I held them together using a mini brad (remember those?).
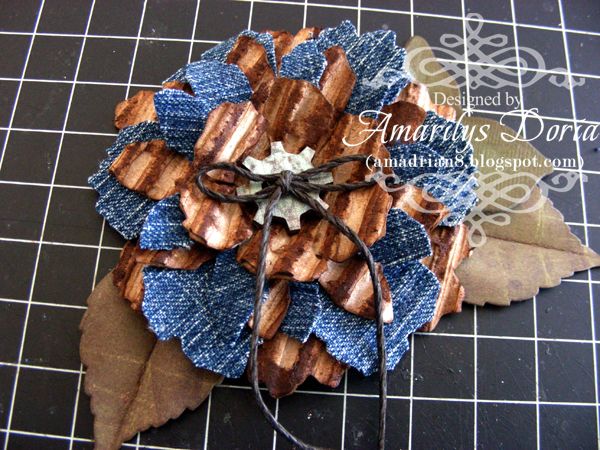
Step 4. Add a Prima wooden button and a thin hemp cord bow.
I hope that you enjoyed these two quick tutorials!

Hi Amarilys,
ReplyDeleteI waited since yesterday after reading your last post :) I love your splendid idea, will keep this is mind! Your drawer storage is awesome; some day I might copy you when I accumulate more scraps; as of now I keep mine in a box {would be glad if you take a peek at my newest post: http://www.qinaahanaartsandcrafts.blogspot.com/2013/03/follow-your-dreams.html }. I love your flower tutorial; amazing flowers. Thank you for sharing.
Hugs and smiles,
Asmah
Love this look!
ReplyDelete