
We're absolutely delighted to bring you the Balmy Breeze Collection. Old world vintage has been combined with tranquil seaside scenes (including a rustic compass, beach chair, fantastic surf, beaming lighthouses) and the Balmy Breeze paper pack, composed of a neutral color palette of peach and mint hues. This set is perfect for the crafter that loves creating vintage projects or for the stamper looking to create a project for her favorite man.
Leave a comment on the Heartfelt Creations blog by April 16th and you will be eligible to win the entire release valued at $180.91
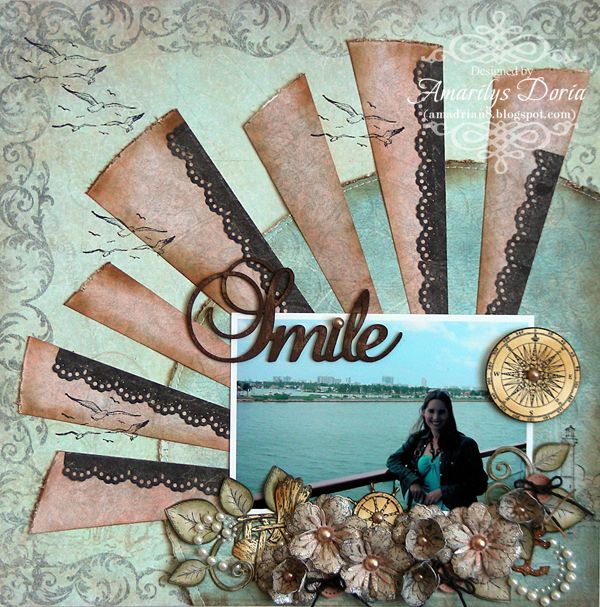
Here's my first layout using this beautiful new collection!
Supplies-
Heartfelt Creations:
HCPC 3500 Open Vintage Floret PreCut SetHCPC 3527 High Seas PreCut Set
HCPC 3528 Sand and Sea PreCut Set
HCPC 3529 Surfs Up PreCut Set
HCPC 3531 Seascape PreCut Set
HCPC 3532 Beautiful You PreCut Set
HCD 726 Delicate Asters Die
HCD 727 Vintage Floret Die
HCD 732 Decorative Flower Pot Die
HCD 733 Decorative Lattice Swirl Die
HCDP1 232 Balmy Breeze Paper Collection
452255 Grand Calibur
Other:
StazOn Archival Ink (Jet Black,
Timber Brown), Rangers Stickles (Diamond), Tim Holtz Distress Ink (Forrest
Moss, Vintage Photo), Tim Holtz Blending tool,
Zutter Distrezz-it All tool, Martha Stewart Large Circe Cutter, Crafter’s
Cord True Hemp (Camouflage), Want 2 Scrap Pearls (LeCreme), Want 2 Scrap Frilly
Flourish Swirl (White Pearls), Want 2 Scrap Chipboard title (Smile), wooden
buttons, pop dots, sewing machine, embossing tool
I had so much fun working on this layout! This layout is based a BAP sketch by Marie-Nicolas Alliot for Prima. You can find it here. I found it via Pinterest (I LOVE Pinterest!) and have been waiting for the perfect papers/photo for it. The picture is of me on a cruise 2 years ago as hubby and I were leaving the Port of Miami. We had so much fun in that cruise!
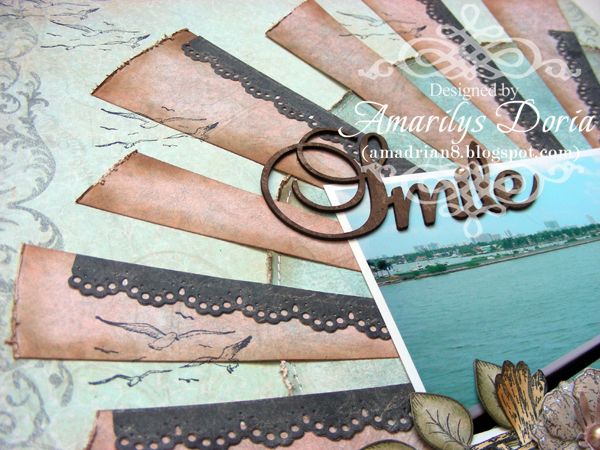
To get the semicircles and rays, die cut two 7” circles out of two contrasting but coordinating pattern papers. Distress the edges using the Distrezz-it-all tool and ink the edges with Vintage Photo distress ink. Machine stitch around the edges of the blue circle and adhere unto the background, making sure that it’s off centered on the right bottom corner of the background page. For the second circle, cut it into strips and adhere as shown over the background and blue circle. Trim excess. The title is a chipboard word from Want 2 Scrap. I just love their products!
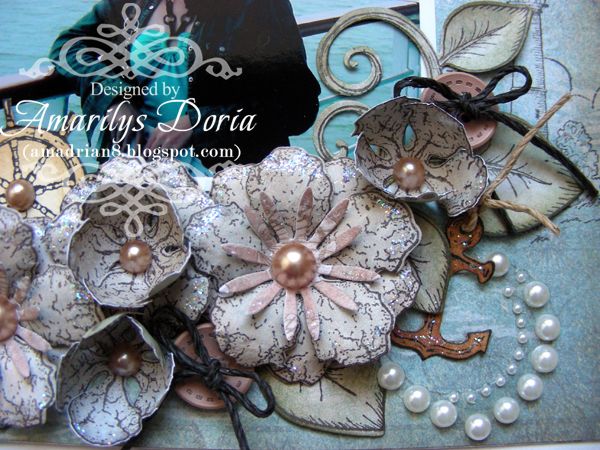
For the blooms, I stamped and die cut a bunch of different size flowers and molded them with my embossing tool to get the desired shape. I then layered them and added a bling pearl (from Want 2 Scrap as well) as the center. I also added some bling swirls and buttons to my cluster.
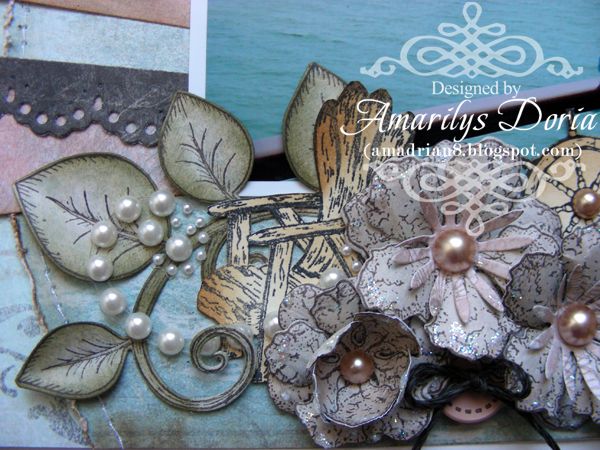
I love these new leaves! I made a bunch and tucked them into the cluster. i also stamped and fuzzy cut the lounge chair and lightly inked the edges for an antique look.
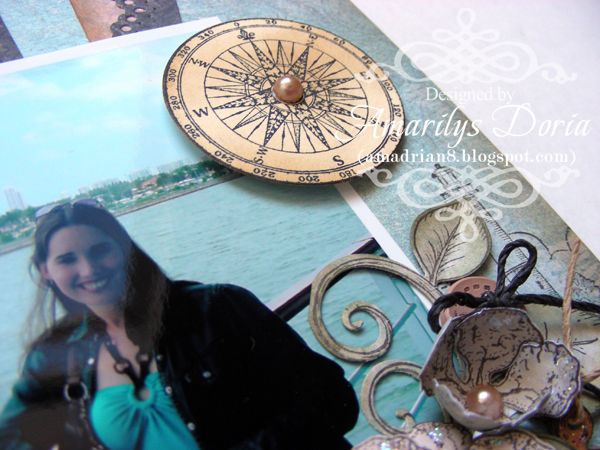
I stamped and fuzzy cut the compass and inked it with Vintage Photo distres ink for an antique look. I then pop dotted it over the photo and added a bling pearl.
Here is the step by step write-up for this project:
Die cut two 7” circles out of two contrasting but coordinating pattern papers. Distress the edges using the Distrezz-it-all tool and ink the edges with Vintage Photo distress ink. Machine stitch around the edges of the blue circle and adhere unto the background, making sure that it’s off centered on the right bottom corner of the background page. For the second circle, cut it into strips and adhere as shown over the background and blue circle. Trim excess of the blue circle. Die cut a bunch of doily borders with the flower pot lace edge die and adhere over some areas of the pink rays. Add your 6”x4” photo over the background, covering where the strips meet and trim any excess that may show through. Stamp the lighthouse image on the right side of the photo and lift the photo up if you need to. Randomly stamp the seagulls a few times throughout the background layer as shown. Stamp the compass, lounge chair, anchor, and the ship’s wheel unto a cream colored cardstock. Die cut or fuzzy cut accordingly. Randomly ink these images with distress ink to give it an aged look. For the flowers, stamp a bunch of open vintage florets in different sizes. Mold them using an embossing tool, and layer them to form full roses. For the open blooms, die cut a few delicate asters out of pink pattern paper and add them to the center. Add a cream pearl as the center for each flower and stickles to the edges. Let it dry. Stamp and die cut using the coordinating die a few leaves. Ink the edges with Forrest Moss distress ink and bend each leaf in half to give them dimension. Arrange the flowers, leaves and fuzzy cut images under the photo as shown. Tuck in a few wooden buttons with a cord bow and pearl bling swirls to finish this area off. Pop dot the compass and add it to the top right side of the photo and add a pearl as a center. Randomly ink the chipboard title with distress ink and add over top left side of the photo. Add a pearl to dot the i. Layout based on a sketch by Marie-Nicolas Alliot.
Thank you for stopping by my blog today! Remember to go to the Heartfelt Creations BLOG and check out what the other designers made this week with the new collection!

I love this! So much attention to detail. I love your flowers and the anchor peeping out from behind them. Just gorgeous!
ReplyDeleteSuch a wonderful page. Love all the details with bling and pearls and all. Just beautiful!
ReplyDeleteThis is a gorgeous layout! I love the design and all the little details you always add. Your layouts are definitely works of art.
ReplyDeleteStunning L/O. Love peeking stamps from the flowers.
ReplyDeleteHugs Nataliya
Another Gorgeous Layout!!! love the lacey beams on from the focal point. Beautiful
ReplyDeleteI just adore your pages - beautiful
ReplyDeleteBeautiful layout, Amarilys! I love all your details around your beautiful photo! Blessings! Kathy
ReplyDeleteBeautiful design! And beautiful photo!
ReplyDeleteooooooooh this is the one I want to lift!! I love it!
ReplyDelete