

Supplies:
Double Dots 100pc. -3D Foam Circles, DDOTS
Crystal Ultrafine Transparent Glitter, 85-glitter
Embossing Powder - White, RPEJ685
Snow Kissed Spruce Cling Stamp Set, HCPC-3749
Frolicking Frosty Cling Stamp Set, HCPC-3750
Snow Kissed Flakes and Tag Cling Stamp Set, HCPC-3751
Frolicking Frosty and Spruce Die, HCD1-7107
Snow Kissed Flakes and Tag Die, HCD1-7108
Gift Box and Mini Snowflakes Die, HCD1-7109
Snow Kissed Paper Collection, HCDP1-269
Other Materials:
Cuttlebug Die Cutting Machine, StazOn Archival Ink (Jet Black), Colorbox Petalpoint Chalk Inkpad, Prismacolor Pencils (PC901, PC918), Odorless Mineral Spirits, embossing tool, liquid pearls, flocking powder, floss
Here's the entire mini album our of the box:

I only used one sheet of pattern paper to make this mini and it's super easy to make!

This is one side of the tags. Each tag has a photo side and an embellished side.
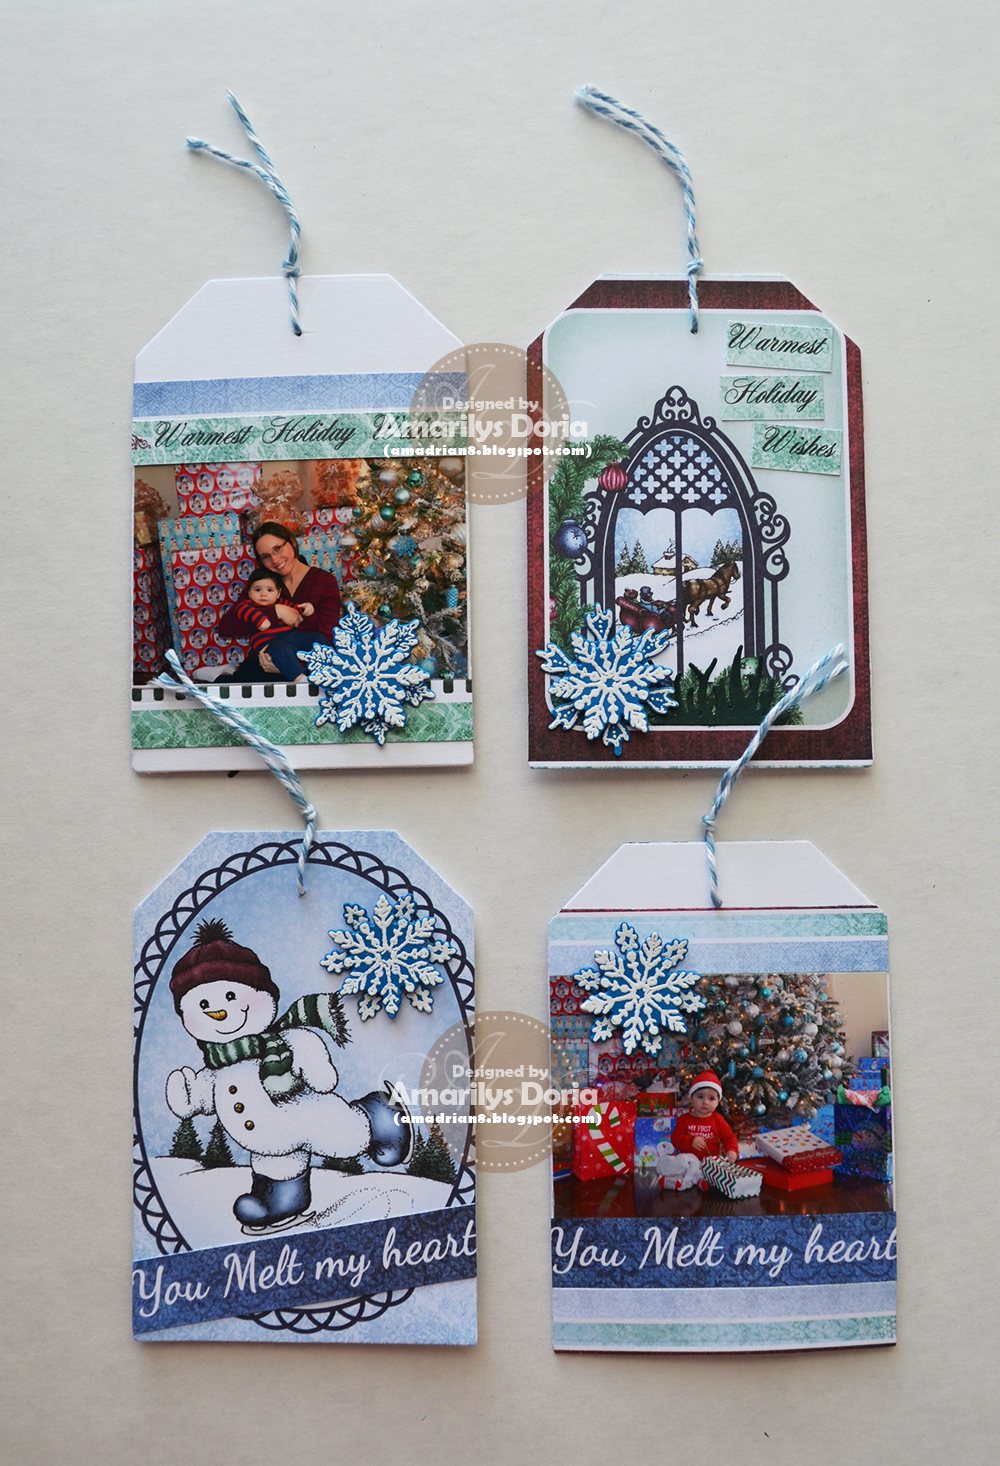
Here are the same tags flipped around!
Here is the step by step write-up for this project:
Gift Box-Stamp the large tag from the Snow Kissed Flakes and Tag Cling Stamp Set in light and dark blue twice on pattern paper and die cut them using the matching die. Die cut two white tags and add the stamped image over the white one for reinforcement. Die cut the gift box from the Gift Box and Mini Snowflakes Die in white. Assemble the gift box and add a tag to the front and one to the back. Add a sentiment strip to the front of the gift box as well as some greenery and a large white bow.
Tag Album-Heat emboss in white each of the large snowflakes twice on dark blue cardstock. Layer a smaller one using pop dots. Die cut 4 large tags. These will hold your pictures. Print your pictures and trim to size to fit the tag. embellish each tag using scraps of pattern paper from the Snow Kissed Paper Collection and the embossed snowflakes. Die cut four tags out of the pre-printed pattern paper. I used only one sheet of pattern paper for this whole mini tag album. Embellish each tag using pre-printed sentiments, greenery die cuts and the embossed snowflakes. For one of these tags, stamp and die cut the smaller snowman from the Frolicking Frosty Cling Stamp Set. Color with Prismacolors and add flocking powder to the body and highlight some areas with glitter. Adhere a photo tag with an embellished tag and add some floss on the top of the tag to tie it in together.
Thanks for stopping by! Remember to go to the Heartfelt Creations BLOG and check out what the other designers made this week! Have a great rest of the week!

what a great idea for a photo tag box, love it Amarilys.
ReplyDeleteSuch a creative project my friend!
ReplyDelete