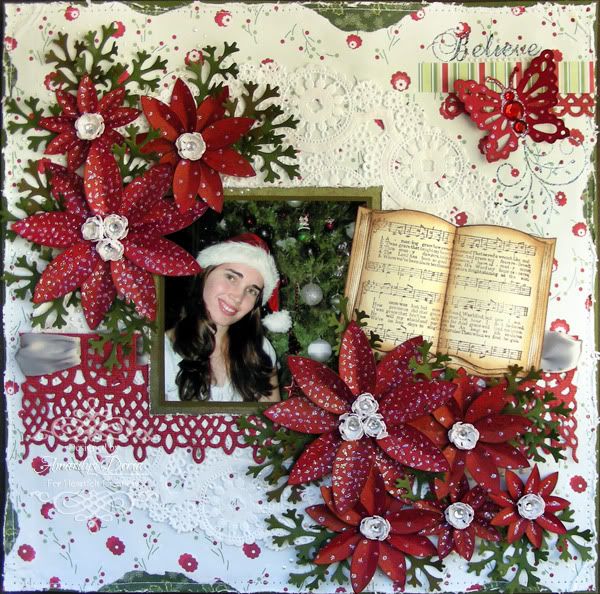
Here is a Christmas layout that I made for the blog hop:
Supplies-
Heartfelt Creations:
HCPC 3306 Posy Patch Garden Delights Precut Set
HCPC 3313 Perfect Petals Medley Precut Set
HCPC 3321 Believe Precut Set
HCPC 3433 Book Frame 1 Precut Set
HCPC 3435 Feather Grass Flourish Precut Set
HCD 702 Decorative Butterfly/Border
HCD 704 Perfect Petals
HCD 713 Decorative Lace Border
Spellbinders Foliage
Spellbinders Carnations Creations
317430 Cuttlebug machine
Other:
DCWV The Christmas Stack, Tim Holtz Distress Inks (Vintage Photo), Ranger Liquid Peals-White Opal, Tattered Angels Gimmer Mist (Burnt Red), Ranger Stickles (Diamond), Ranger Tim Holtz Paper Distresser, StazOn Archival Ink (Jet Black, Timber Brown), white doily, sewing machine
This layout is based on the Creative Scrappers Sketch #185 (designed by me). I used a DCWV Christmas Stack that I've had forever for this layout and a picture of me in front of the Christmas tree about 2 years ago.

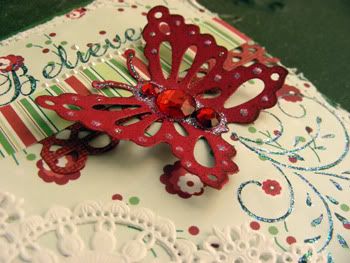
For the beautiful butterfly, I stamped and then die cut the butterfly from the Posy Patch Garden Delights Precut Set. I added some red rhinestones to the middle and some stickles.
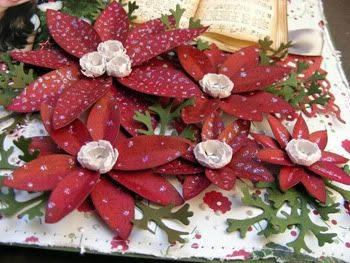
Of course, I handmade all my flowers and had a blast doing so! Here is the tutorial to make them and let me tell you, these are addictive! :)
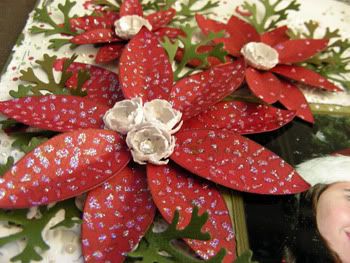
Here is a close up of one of the larger flower:
Here is the step by step write-up for this layout:
Distress the edges of your pattern paper and randomly tear pieces from the sides. Insert small pieces of green pattern paper behind the torn paper to create peek a boo areas around the edges of your layout. Adhere to green cardstock and machine stitch around the edges. Add a white doily off centered in the middle of the background. Die cut two Decorative Lace Borders and cut the top off. String some ribbon through it. Use the remaining ¾ of the lace and add it on top of the doily. Double mat your 4”x4” picture and adhere it on top of the lace and in the center of the doily. With the remaining die cut lace, trim a piece and add it to the top right corner under a piece of pattern paper. Stamp your sentiment above it and a butterfly tail below it using one of the flourishes from the Feather Grass Flourish Precut Set. Stamp and die cut using the corresponding die a butterfly and adhere it over the pattern paper and stamped flourish. Stamp the Book Frame 1 twice, cut them and layer them on top of each other bending the edges of the top book to add dimension. Adhere to the right side of the picture. For the flowers, stamp nine of each petal from the Perfect Petals Medley Set per flower onto red cardstock and die cut them. Tutorial to build the poinsettia flowers can be found here. Cluster your flowers on the top left and bottom right side of the picture and add some die cut Spellbinders Foliage branches to fill in. Finish by randomly adding different size liquid pearls around the clusters. Layout based on my sketch (#185) for Creative Scrappers.
Thank you for visiting my blog today and don't forget to stop by the Heartfelt Creations blog and see all the amazing projects that the rest of the DT created! Also, leave a comment on their blog for a chance to win during the blog hop!!


Your creativity is very evident in this piece! Just lovely...I love those flowers! I wish I could scrapbook...it just isn't me.
ReplyDeleteGorgeous layout! I love how you did the little book and your beautiful flowers!
ReplyDeleteGorgeous layout!! I love that music book!!
ReplyDeleteholy cow...where do I begin?! every inch of this layout is to die for!!! love it!
ReplyDeleteSO gorgeous!!! Love the book too, and all your flowers!Great photo too!
ReplyDeleteThis is so pretty Amarilys. I just love your attention to detail. The little centers in the poinsettia look amazing and the book stamp design on your layout is so sweet. You have capture my heart with this beautiful creation.
ReplyDeleteAnother absolutely "STUNNING" layout. All your attention to detail is amazing.
ReplyDeleteThose poinsettias are gorgeous!!! I know it took a LOT of time since they were made from individual petals. The white center flowers really make the whole poinsettia pop!
ReplyDelete