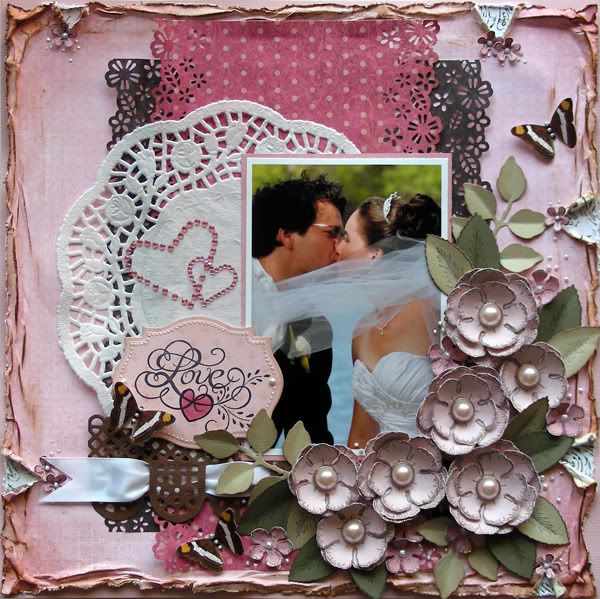
Today I'm going to be sharing a layout that I made using one of my wedding pictures (I can't believe that it will be 3 years this May already!) and my latest sketch for Creative Scrappers!
Here's the sketch:

and here's my take on it:

Supplies-
Heartfelt Creations:
HCPC 3406 Botanical Floral 1 Precut Set
HCPC 3407 Botanical Floral 2 Precut Set
HCPC 3435 Feather Grass Flourish Precut Set
HCPC 3439 Flirty Fleurs Precut Set
HCD 701 Posy Patch Die
HCD 713 Decorative Lace Border
HCD 719 Cross and Lilies Die
Foliage Shapeabilities
Labels 9 Shapeabilities
Rose Creations Shapeabilities
317430 Cuttlebug machine
Other: BoBunny Vicky B, Kaisercraft pattern paper, Bazzill cardstock, Kaisercraft Pearl Brads, Want to Scrap Nestabling (Scalloped Hearts), Tim Holtz Distress Inks (Vintage Photo), Ranger Stickles (Diamond), Ranger Liquid Pearls (White Opal), StazOn Archival Ink (Timber Brown, Jet Black), Martha Stewart Punch Around the Page (Wild Flowers), Inkadinkado Blending Chalks , Diamond Glaze , doily, white ribbon
I used a lot of layers on this layout and chose a pink/brown color combo. I used a vertical picture instead of a horizontal picture like my sketch calls for but that's the beauty of sketches, you can make it your own and mix and match elements to fit your style and pictures!

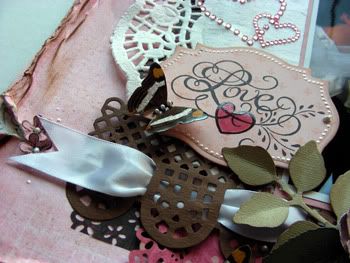
For the title, I stamped the sentiment and colored the heart shape with pink chalk. I then added Diamond Glaze ofver it to make it shiny and give it texture. You can see all the layers here-doily, lace border, water distressed background and two pink/brow layers.
.

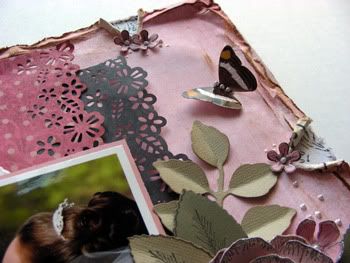
Here's another view of the layers. I added a few butterflies and randomly placed liquid pearl dots around the cluster.

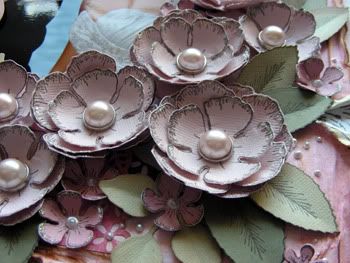
Finally, here are the flowers that I made for this layout. I stamped 2 of the second largest flowers and 1 of the next size down to make the larger flowers. I curled the petals up and added a pink pearl brad as a center. I finished the flowers by adding stickles to the edges. OF course, I added a few leaves, butterflies and liquid pearl dots to finish it off.
Here is the step by step write-up for this layout:
Water distress the background pink pattern paper and make random tears. Place a coordinating piece of pattern paper behind these tears to make peek a boo areas of interest. Adhere onto a pink cardstock. Using the Martha Stewart Wild Flowers punch, punch the edges of two pattern papers, one pink and one brown and adhere them to the center of the background as shown. Using your fingers, lift some areas to give it dimension. Place a white doily off center and mat your picture and place it over the right side of the doily as s shown. Die cut the Decorative Lace Border in brown, string a white ribbon through it and place under the picture. Stamp the love sentiment from the Feather Grass Flourish Precut Set on pink pattern paper using black ink and chalk the heart with pink chalk. Use diamond glaze over it to give it a shiny finish. Die cut the title using the second largest Labels 9 and emboss. Adhere on the left side of the picture and add a butterfly on the left corner. Place two bling hearts over the white doily and above the title. For the flowers, stamp a few of the two largest flowers from the Botanical Floral 1 Precut Set and the smallest from the Botanical Floral 2 Precut Set on pink cardstock. Die cut using the matching die and layer them to form the flowers using a pink brad for the center. The larger flowers use two of the largest stamped flowers and one medium, the medium flowers use two medium stamped flowers and finally the smaller flowers are only 1 layer of the smallest stamps with a liquid pearl drop as a center. Add stickles to the edges to finish them off. For the leaves stamp the two largest leaves from the Botanical Floral 2 Precut Set on two different shades of green cardstock and die cut them using the coordinating dies. Fold them in half to give them dimension. Die cut three leaves from the Spellbinders Shapeabilities Foliage and fold them in half also. Add the leaves and flowers on the right bottom corner of the page. Stamp and die cut a few of the tiny flowers from the Flirty Fleurs Precut Set, add a liquid pearl drop in the center and add to the peek a boo areas as shown. To finish, randomly add a few butterflies and liquid pearl drops around the cluster.
Thank you for stopping by my blog today! I really appreciate all of your comments! Don't forget to stop by the Heartfelt Creations blog today to see all the wonderful creations by the DT!


so many wonderful elements! Just gorgeous!
ReplyDeleteThis is gorgeous! I think you are inspiring me to try a scrapbook page - love that layout.
ReplyDeletereally gorgeous love all the layers :)
ReplyDeleteGorgeous page! Love the flowers and the distressing and especially how you highlighted the pick-a-boo tears with the flowers! Just gorgeous!!
ReplyDeleteGorgeous layout as always!!!!!
ReplyDeleteBeautiful! I love your color combo and the flowers, of course!
ReplyDeleteThis is absolutely stunning Amarilys. You have some of the most stunning Wedding pictures I have ever seen. I have loved each and everyone you have showcased in your layouts. I really love the ribbon threaded in the die cut. That really caught my eye. Beautiful!
ReplyDeleteLove the manner in which you wove the ribbon through the punches... another sensation inspiration piece of work
ReplyDelete