
Supplies-
Heartfelt Creations: HCPC 3395 Bella Rose Vase Precut Set
HCPC 3405 Leaf Medley Precut Set
HCPC 3464 Barnyard Elements Precut Set
HCPC 3468 Tattered Blosoms Precut Set
HCPC 3469 Tattered Blossom Swirls Precut Set
HCPC 3471 Tattered Collage Precut Set
HCPC 3473 Tattered Background Precut Set
HCD 717 Layered Scalloped Posy Die Set
HCD 722 Tattered Blossoms Die
317430 Cuttlebug machine
11blk Black Gala Glitz
Other:
Colorbok Love Stack, Tim Holtz Distress Inks (Antique Linen, Peeled Paint, Walnut Stain), StazOn Archival Ink (Jet Black), Rangers Stickles (Diamond, Black Diamond), Bazzill Cardstock (pink, black), Cuttlebug Birds & Swirls Embossing Folder, Kaisercraft rhinestones (black), Tim Holtz Distress Markers (Vintage Photo, Walnut Stain, Forrest Moss), Sculpey white clay, brown floss, sewing machine
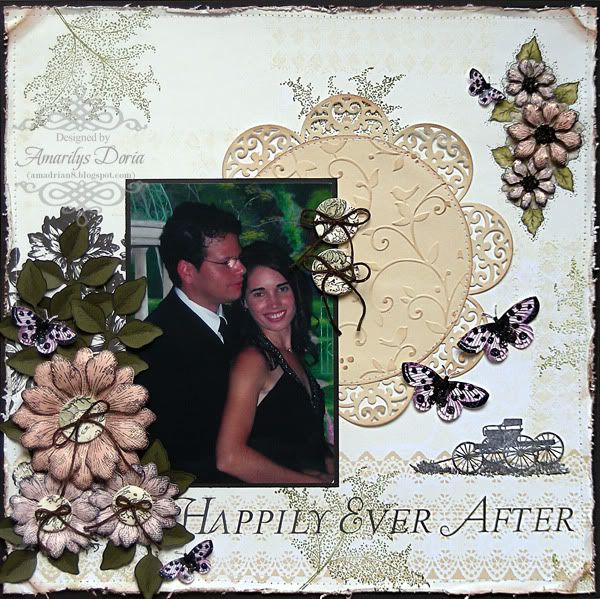
Of course I had to re use the new Old English Garden Collection tattered flowers because they are absolutely amazing! I also added some leaves and butterflies to my layout.

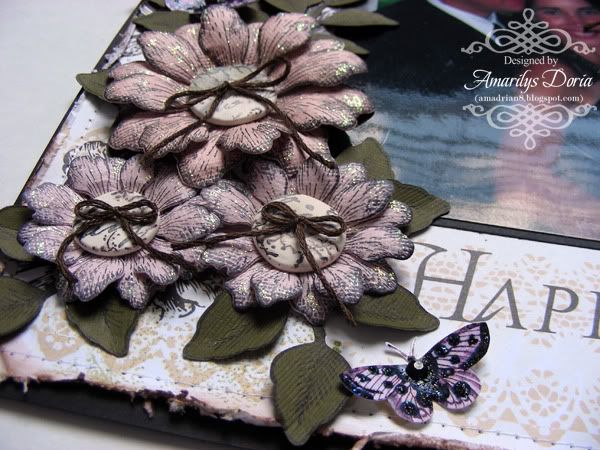
Here's a closer look at one of the flowers. The button in the center I handmade using polymer clay, Heartfelt Creations stamps and Tim Holtz Distress Markers. You can find the tutorial HERE.
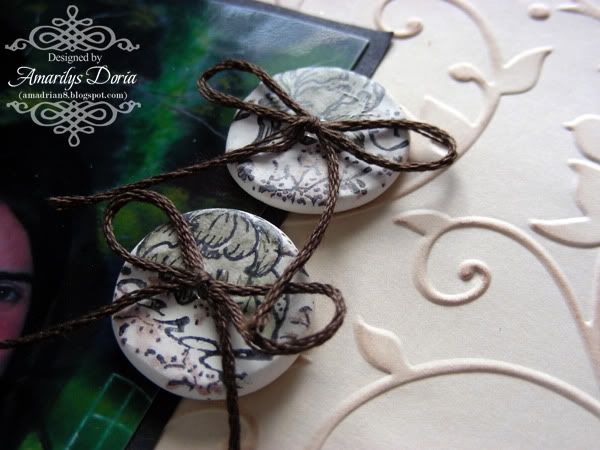
This is another look at my handmade buttons. I just love how these turned out and will definitely be making a few more to use in my future layouts!
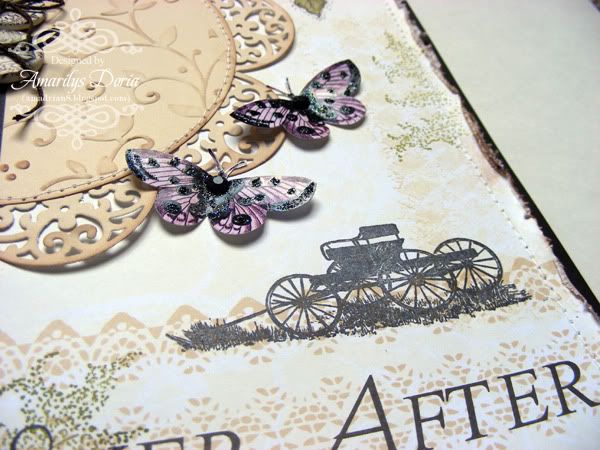
I liked this background paper but decided it needed a bit more 'humph' so I went ahead and added some stamped green leaves and a silhouette carriage. Love how it turned out and by doing this I made this paper 'mine'. :)
Here is the step by step write-up for this layout:
Stamp the flourish from the Tattered Blossom Swirls Precut Set on the top right side of the pattern paper. Color in with Tim Holtz Distress Markers. Stamp the carriage on the bottom right side of the layout using black archival ink. Randomly stamp the leaves bunch from the Bella Rose Vase Precut Set with Peeled Paint distress ink. Distress the edges of the pattern paper using scissors and adhere unto black cardstock. Machine stitch around the edges. Cut out a 5” circle out of cream pattern paper and emboss it using the Birds and Swirls embossing folder. Die cut 9 mini half circles and glue them behind the 5” circle to make a doily. Add to background and machine stitch around the edges. Mat the photo and add over the doily. For the flowers, stamp and die cut different size flowers. Use two of each size to make the larger flowers. Use only one die cut to layer over the stamped and colored image in the top right corner. Add gala glitz to the smaller flowers’ centers. Stamp and die cut some leaves from the Leaf Medley Precut Set. Adhere flowers and leaves to layout to make clusters as shown. For a tutorial on how to make the buttons out of polymer clay, please go HERE. Add the buttons as flower centers and two of the larger ones to the right side of the photo. To finish, add butterflies randomly to the layout.

Wonderful layout Amarilys!! Love all the pretty details! And you even made your own buttons!!! Hugs!
ReplyDeleteWhat a gorgeous layout! Your flowers look amazing. :)
ReplyDeleteThe buttons in the flower centers are just perfect! Beautiful layout.
ReplyDelete