
Since it is his birthday, I figured I'd do a layout about him!
Supplies-
Heartfelt Creations:
HCPC 3457 Birch Tree PreCut SetHCPC 3462 My Guy PreCut Set
HCPC 3463 Western Elements PreCut Set
HCPC 3468 Tattered Blossoms PreCut Set
HCD 720 Western Broncos Die
HCD 721 Rustic Western Elements Die
HCD 722 Tattered Blossoms Die
HCD 726 Delicate Asters Die
452255 Grand Calibur
393386 Labels 4
Other:
BoBunny Serenade
Collection Papers, Maya Road Chipboard Door, Tim Holtz Distress Inks (Forrest Moss,
Vintage Photo), StazOn Archival Ink (Jet Black), Zutter Distress-it All tool, Recollections cardstock
(black , brown), Bazzill Cardstock
(Brick, Leapfrog),
Ranger Stickles (Black Diamond), Zva Self Adhesive Bling (Pewter), brown
buttons, brown ribbon, twine
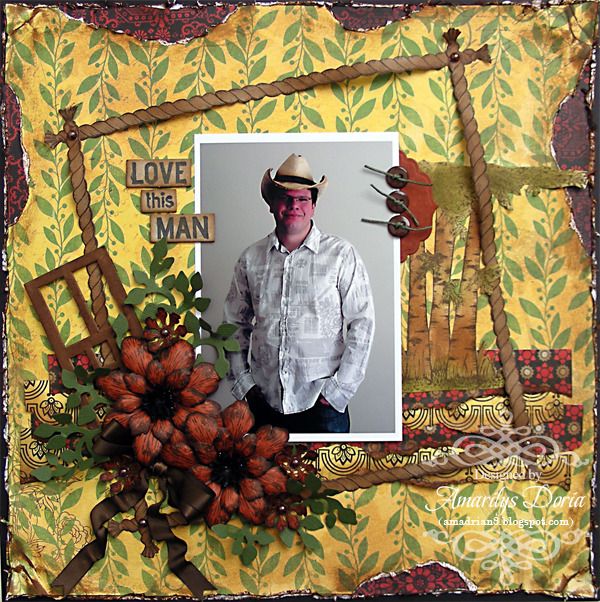
For this layout, I used a picture of my hubby with his new cowboy hat. I also used the ScrapThat! November Kit, "Remember When..." (which is very appropriate for the occasion!) as well as my sketch for ScrapThat! Nov Sketch Challenge below.

You can see how I used an overly girly sketch to make a masculine layout.
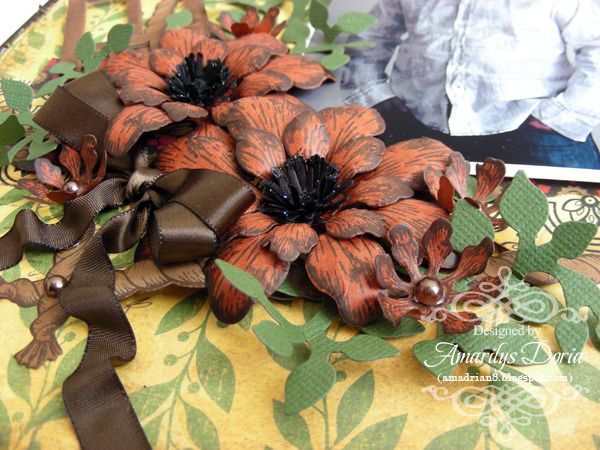
Even though it's a masculine layout, I did use some flowers (manly flowers, I call them). I used red cardstock with black archival ink and black centers to make them a bit more masculine. I added a lot of greenery to the cluster. However, I couldn't resist adding a brown double loop bow. :)
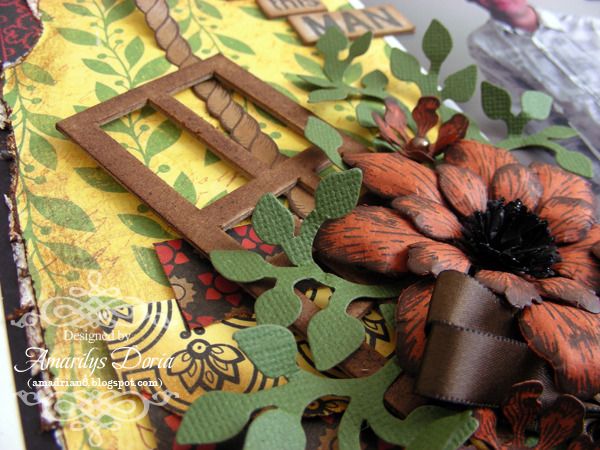
I slightly altered (I just added some color) the chipboard door to add some masculine touches.
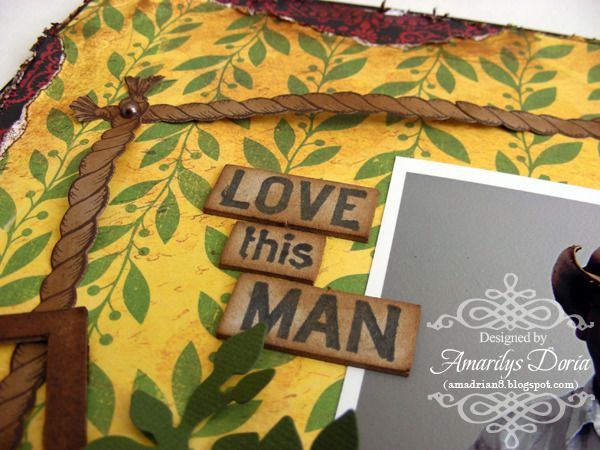
I used the door inserts (rectangles) to stamp my title on. I then inked these pieces too and added them tot he top left side of the picture, as the sketch suggests.
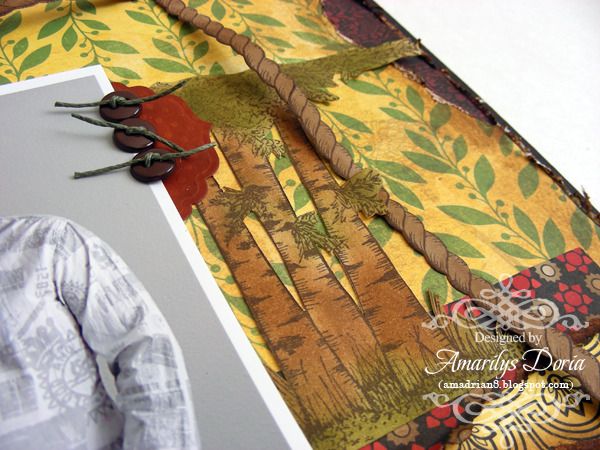
I replaced the flower cluster on the top right hand corner with a stamped image of a tree (colored with distress inks), a shaped die cut tag and three buttons. I didn't want that many flowers but still wanted that cluster there. I love how this corner looks!
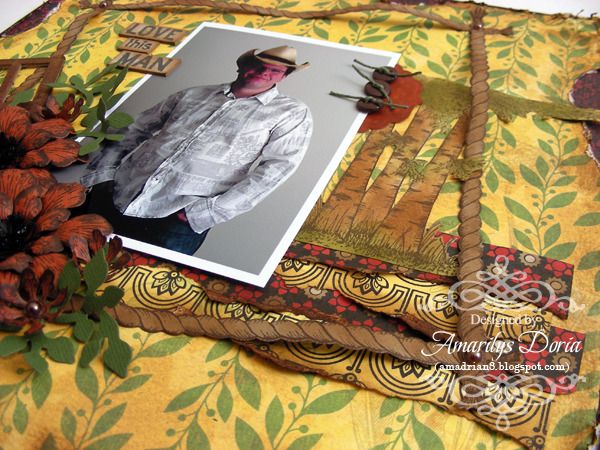
Of course, the eye-catcher on this layout (besides my husband!) is the framed square that I made out of ropes. I stamped the rope a few times and pieced them together to make a longer one (each side measures 8"). I then adhered the sides but didn't glue it all down and left some areas raised to add some depth. I also ripped different strips of paper and inked them to add some distressing to this masculine layout. I absolutely love how it turned out and the BoBunny papers were perfect to make this picture of my hubby pop!
Here is the step by step write-up for this layout:
Distress the yellow and green background paper with the
Distress-it All and randomly tear pieces from the edges. Adhere this layer over
a black cardstock and tuck in small pieces of a different colored pattern paper
under the peek a boo areas to give it some interest. Make sure you distress the
edges of these small pieces of papers as well. Ink all the edges for a rustic
look. Using about 4” of double sided pattern paper, rip small (about 1”) strips
of paper and layer them one side over the reverse side, changing the pattern.
Ink all the edges and adhere these strips of paper toward the bottom of the
layout. Adhere your photo over these strips of paper. Stamp, die cut and
randomly ink the rope from the HCPC 3463 Western Elements PreCut Set. You need
2 full images and half of another to make an 8” square. Add the sides over the
picture and off center it a bit. Only add adhesive in the edges and a random
spot somewhere in the middle so that the rope looks like it’s coming off the
page. Add pearls on the four corners. Stamp, color with distress ink and fuzzy
cut the birch tree and tuck in behind the picture on the right side and under
the rope. Add a die cut labels 4 under the right side of the picture and add
three brown buttons over the edge. Tie some twine on the buttons before
adhering them. For the cluster, stamp and die cut two different size flowers
from the Tattered Blossoms PreCut Set. Layer them, making sure to stagger the
petals, and add them to the bottom left side of the picture. For the center,
use 8 flower centers from the Delicate Asters Die. Layer them all and add to
flower center. Add stickles to finish the flowers. Stamp and die cut a few
small flowers as well and fill in the cluster. Die cut 3 greeneries from the
HCD 720 Western Broncos Die and tuck in under the flowers. Make a double loop
bow and add to the cluster as well. Ink the Maya Road door with Vintage Photo
distress Ink and tuck in the cluster. Finally, stamp the sentiment from the My
Guy PreCut Set on the leftover pieces of chipboard from the door. To do this,
ink one word at a time and press your chipboard down directly unto the rubber
stamp to get a good impression. Ink the edges slightly and add the finished
title to the left side of the picture.

Fantastic page!! All the western HC stamps are perfect to go with his cowboy hat pic! Happy Birthday to your DH! Know y'all are having fun at Disney!! Sorry the NYC trip didnt work out from all the damage from Hurricane Sandy, but if you were there, you'd be in another Nor'easter hitting there tomorrow.
ReplyDeleteSo beautiful page Amarilys. hugs
ReplyDeleteBeautiful page Amy!!! love the flowers.
ReplyDeletehugs!
Awesome page, Amarilys! Perfect masculine elements on this! So excited to be on the team again! Blessings! Kathy
ReplyDeleteMorning girl! Love this page! You used so many wonderful elements to complete this masculine layout and as always I love your flowers! I'm so happy to be back with friends!
ReplyDeleteSuch a gorgeous page! Fab colors and amazing dimension!!!
ReplyDelete