
Ok, let's get back on track since I have a lot to show you today!
AWDML's featured manufacturers this month are Pink Paislee (click here to see my projects featuring their products) and My Favorite Things and today, I'll be showing you a few layouts and a card that I made using their products.
Now, I have never heard of them before but as soon as I tried their dies I fell in love with the company! Their dies are made out of steel and are heavy duty yet thing and easily stored. I purchased the My Favorite Things Die-namics Flower & Leaf Trio from AWDML (remember that this month you get a 25% discount on all Pink Paislee and My Favorite Things products!) and quickly started making my own flowers. Well, let me tell you, they are addicting and so easy to make! Let's take a look at my first layout:

Supplies-cardstock: Bazzill, DCWV; patterned paper: Pink Paislee (Butterfly Garden); stickers: embellishments: Tim Holtz Ornate Plates; bling: Zva Creative, Stickles (Diamond), Robin's Nest Dew Drops (Mix Plumeria); ink: Tim Holtz (Vintage Photo); tools: Tim Holts Paper Distressor, Cuttlebug, My Favorite Things Die-namics (Flower & Leaf Trio), Fiskars Punch (sun), Martha Stewart Punch (Two Dot); other: 3D paint, thread
For my first layout I actually made a double pager, remember those? I wanted to display my flower pictures and what better way to do so than a double layout. I used the new Pink Paislee Butterfly collection and WOW I must say I'm in love all over again! This paper is absolutely gorgeous! I did some water distressing on the background paper and a little sewing on the green cardstock paper.
Here is the left page:
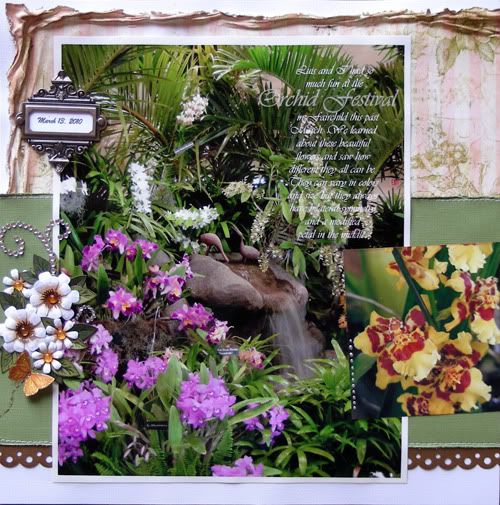
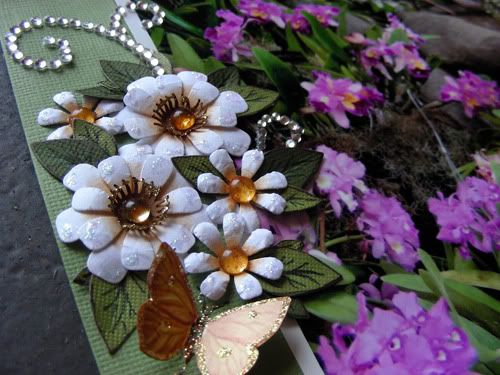
As I mentioned earlier, I made the flower cluster with the MFT's flower die cut. I added a sun punch by Fiskars and a dew drop in the center to finish it off.
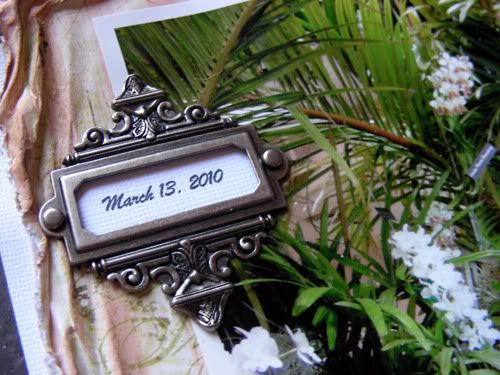
I added a Tim Holtz Ornate plates with the date the pictures were taken.
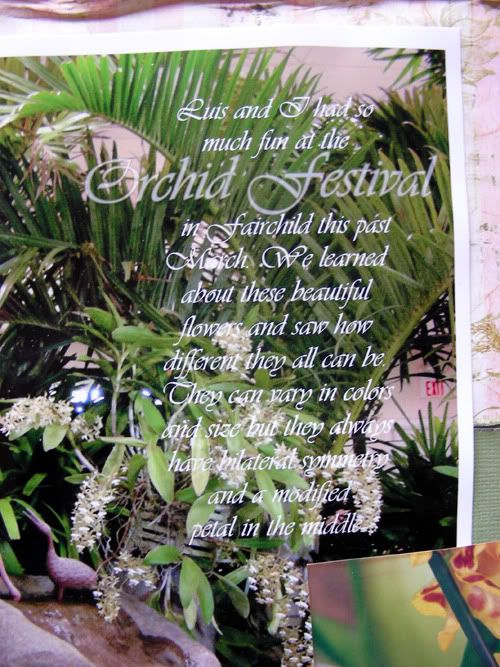
I printed a large picture and used it for my journaling and title. I did this in photoshop.
Here is the right side:
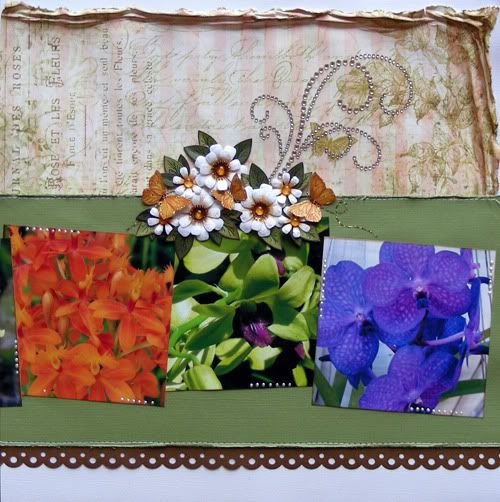
I kept the right side of the layout fairly simple. I just added another flower cluster in the middle along with some Zva bling and some butterflies.
Here is a close up of it:
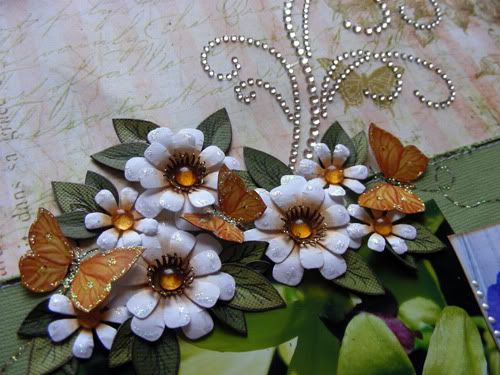
I drew in the leaf vines to give it more of a realistic look to them and inked their edges for a little contrast.
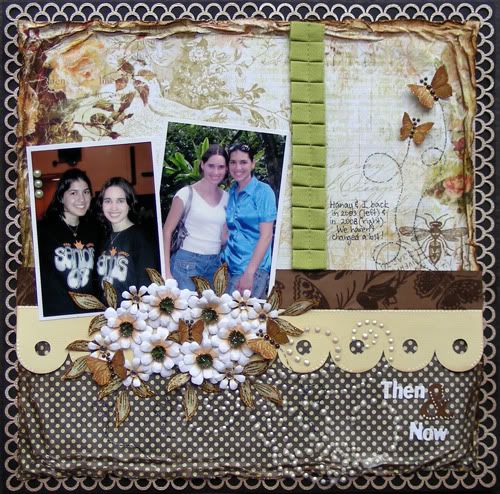
My next layout is very special to me. It is of my best friend and I back in 2003, the year we graduated from high school, and 2008, when she was helping me plan my wedding. We have known each other since 9th grade and we are really close friends.
Supplies-cardstock: Bazzill, Core-Dinations; patterned paper: Pink Paislee (Butterfly Garden, Queen Bee); letter sticker: Basic Grey Basics (cream), Fancy Pants (Rusted Sun); bling: Stickles (Diamond); ink: Tim Holtz (Vintage Photo); tools: Cuttlebug, My Favorite Things Die-namics (Flower & Leaf Trio), Fiskars Punch (sun), Martha Stewart Punch (Double Loop); other: 3D paint, brown pearls, rhinestones from Joann
I used my own card sketch for this layout. I'll be back tomorrow with some tips on how to turn a card sketch into a layout sketch.

Again, I made another flower cluster for this layout. Making these little flowers is so addictive! LOL
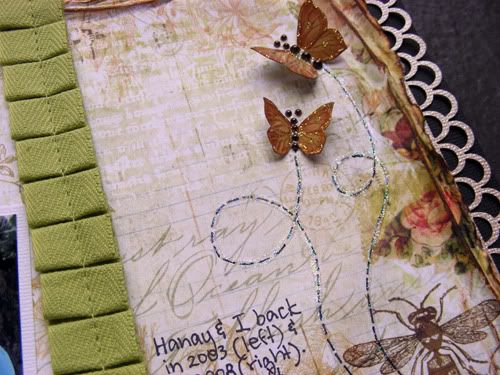
Here are a few more close ups of the layout:
My last project is a birthday card for my mom whose birthday is at the end of June.
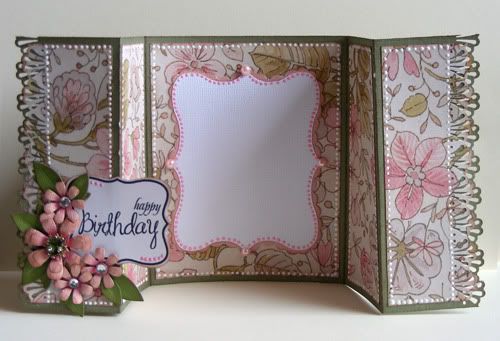
Supplies- cardstock: DCWV; patterned paper: Paper Adventures (Ivory Floral); bling: Stickles (Diamond); tools: Cuttlebug, My Favorite Things Die-namics (Flower & Leaf Trio), Fiskars Punch (sun), Pazzles, Martha STewart Punch (Deco Shells); other: 3D paint, rhinestones from Joann
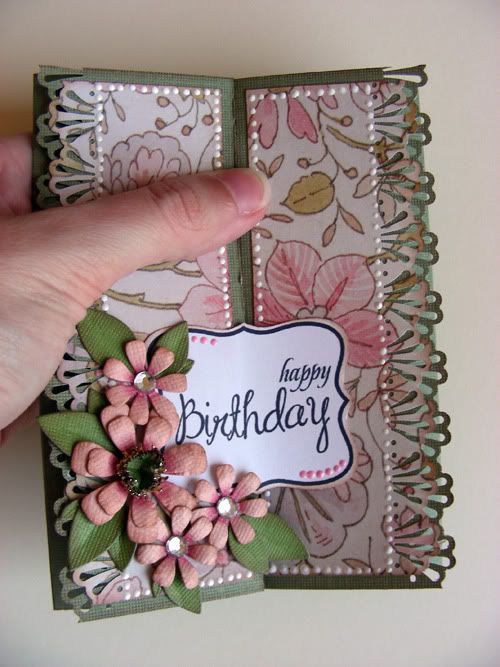
I printed my own sentiment that I designed in photoshop.
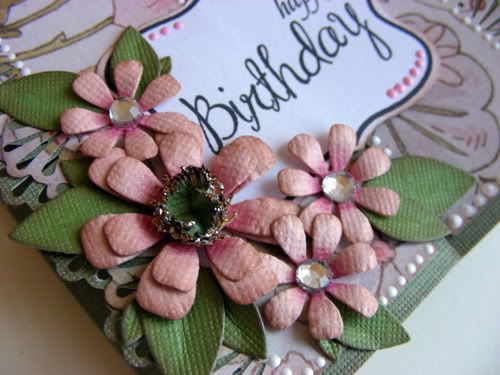
Again, I made more of those cute flowers in pink this time and added rhinestones to the center. The inside of the card I cut with my Pazzles and I punched the borders with a Martha Stewart border punch.
Here is a picture of the closed card:
Thanks for stopping by today! Have a great rest of the week!

No comments:
Post a Comment
Thank you for taking your time to comment on my blog!