Heartfelt Creations is pleased to present the Artistic Gatefold Collection. This collection, in simple terms is "stunning and genius". It features 6 new precut stamp sets that coordinate with existing Spellbinders dies and 2 new exclusive dies. This is another must have collection.
Don’t feel guilty for splurging on yourself!
Heartfelt Creations will be donating 10% of all Black Friday sales towards ChildCry, a non-profit feeding organization founded by Times Square Church. ChildCry feeds over 4159 kids in 22 different countries, including the United States. Every penny donated to ChildCry is used to buy food for hungry children so go ahead...feed your hobby, and a hungry child! You can view all the details by following this link.
Leave a comment on the Heartfelt Creations blog by Novenber 29 for a chance to win the entire release valued at $150. The winner will be announced on the HC blog on November 30.
Here is a layout that I made with The Artistic Gatefold Collection:
Supplies-
Heartfelt Creations :
HCPC 3312 Uplifting Scriptures Precut Set
HCPC 3312 Uplifting Scriptures Precut Set
HCPC 3437 Carnation Florals 1 PreCut Set
HCPC 3438 Carnation Florals 2 PreCut Set
HCPC 3439 Flirty Fleurs Precut Set
HCD 712 Belle RoseHCPC 3438 Carnation Florals 2 PreCut Set
HCPC 3439 Flirty Fleurs Precut Set
Other:
Kaisercraft, Tim Holtz Distress Inks (Vintage Photo), Ranger Stickles (Diamond), Ranger Liquid Peals (White Opal), Tattered Angels Glimmer Mist (Olive Vine, Pearl), StazOn Archival Ink (Timber Brown, Jet Black), Ranger Tim Holtz Paper Distresser, Ranger Perfect Pearls, Want to Scrap black pearls, sewing machine
I absolutely loved working with this collection and I know it will become one of my favorite ones since it is complete with flowers, leaves and doilies!
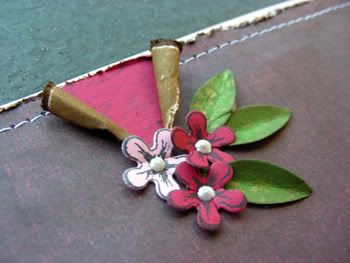
I distressed the Kaisercraft paper and randomly tore a few areas and rolled the paper back. I stamped using the Vintage Life Background stamp onto red cardstock and placed it behind the pattern paper for a peek a boo effect. I finished it off with a few stamped and die cut Flirty Fleurs flowers and leaves cluster to accent these random tears.
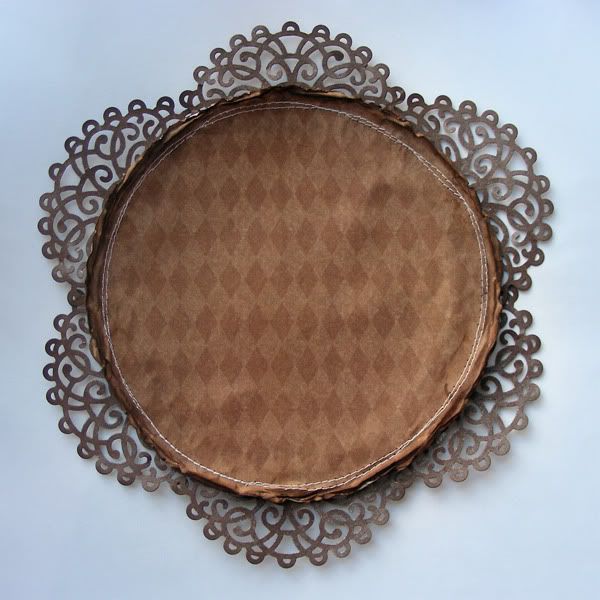
The half doily die is one of my favorite item in this collection. It's so versatile! I die cut 6 half doilies and layered them behind a 9" distressed and machine stitched circle like shown in the picture to make a larger scallop circle.
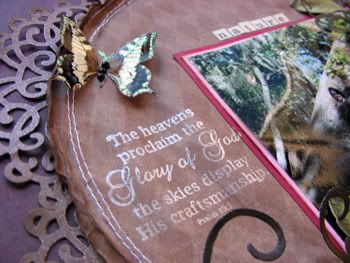
You can see a better close up here of the scallop circle. I stamped the sentiment directly onto the circle and used perfect pears on it to make it show through.
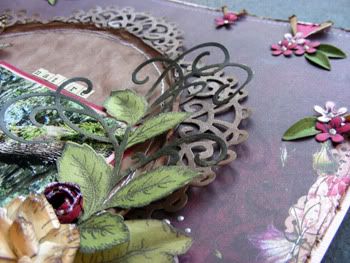
Here is another shot from a different angle of the scallop circle. You can see how dimensional it looks on the layout.
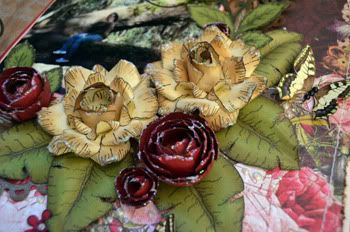
Of course, my favorite things to make are the flowers so I left these for last! The carnation stamps and dies are amazing! I will have a tutorial on how to make the cream colored roses up on my blog tomorrow. For the red larger buds, stamp 3-5 of the second largest stamp in brown. Using a stylus, mold all the petals upwards and layer the flowers to make a bud. For the smaller buds do the same as above but use the smallest flower stamp.
Here is the step by step write-up for this layout:
Cut down a sheet of pattern paper to fit inside a pink 12x12 cardstock. Using Tim Holtz paper distresser, distress all the edges and randomly make small breaks on the paper. Using your fingers, roll the torn edges away from each other to achieve a peek a boo area. Ink all edges with Vintage Photo distress ink. Stamp a red cardstock with the Vintage Life Background stamp and adhere behind the pattern paper. Adhere the background unto the pink cardstock and machine stitch everything together. Using the large scalloped edge die from the Layered Scalloped Posy die set, cut 6 half circles from brown cardstock and glimmer mist them with Pearl glimmer mist. Cut a 7.5” circle out of pattern paper, distress the edges and machine stitch around the edges. Adhere the semicircles behind the large circle as shown to make a scallop circle and add to the center of the layout. Trim your picture to 4”x4” and double mat it with pink and red cardstock. Adhere the picture a little off centered on top of the scallop circle. Stamp the sentiment using Ranger Perfect Medium on the left side of the picture and use a white Perfect Pearl powder on it to make it show through. For the large cream colored flowers, stamp the 2 largest flowers from the Carnation Florals 2 PreCut Set 2 times each using archival ink. Color the edges using Vintage Photo Distress Ink and die cut them. Mold the petals by slightly folding each petal to form a v shape. For the center, mold the petals to face inward into a bud. Glue the different die cut flowers (two large in the bottom and two smaller ones on top for each flower) to make the layered rose. For the red larger buds, stamp 3-5 of the second largest stamp in brown. Using a stylus, mold all the petals upwards and layer the flowers to make a bud. For the smaller buds do the same as above but use the smallest flower stamp. Add flower cluster to the right side of the layout as shown. For the leaves, stamp 2 Bella Rose Leaves flourishes and a few medium size leaves from the Distressed Leaves Set. Die cut them, use Olive Vine glimmer mist to color them, mold them with your fingers and add to the cluster. Stamp on pink and red cardstock, and die cut some tiny flowers from the Flirty Fleurs Set. Using the Perfect Petals smallest die, die cut a few leaves. Add the tiny flowers and leaves around the torn areas around the page. Add a title and add Diamond stickles to all the larger flowers. Finish by randomly placing butterflies and liquid pearl dots around the cluster.
Thank you for stopping by my blog today and for your kind comments! During this holidays, pamper and treat yourself to the new The Artistic Gatefold Collection from Heartfelt Collections-you wont be dissapointed! Don't forget to leave a comment on the Heartfelt Creations blog by Novenber 29 for a chance to win the entire release valued at $150. The winner will be announced on the HC blog on November 30.


Absolutely beautiful! And your step-by-step instructions are great.
ReplyDeleteAwesome LO Amarylis!! Those flowers are wonderful... they look like store bought ones! Can't wait to see your video tutorial.
ReplyDeletereally pretty, love the die cuts
ReplyDeleteWhat a gorgeous layout, Amarilys! Your blossoms are amazing!
ReplyDeletehugs,
Emmy
love the new die...and your flowers..beautiful :)
ReplyDeleteThis is so pretty!! Love all the gorgeous layers and the flowers! Just amazing!!
ReplyDeleteJust gorgeous. From the color to the attention to detail, this is spectacular. What a beautiful layout!
ReplyDeleteYour flowers are amazing!
ReplyDelete