

As I mentioned earlier, this kit is filled with Prima Almanac yummy pattern papers, luscious ribbons and gorgeous buttons! Go HERE to check it out and purchase before it's too late!
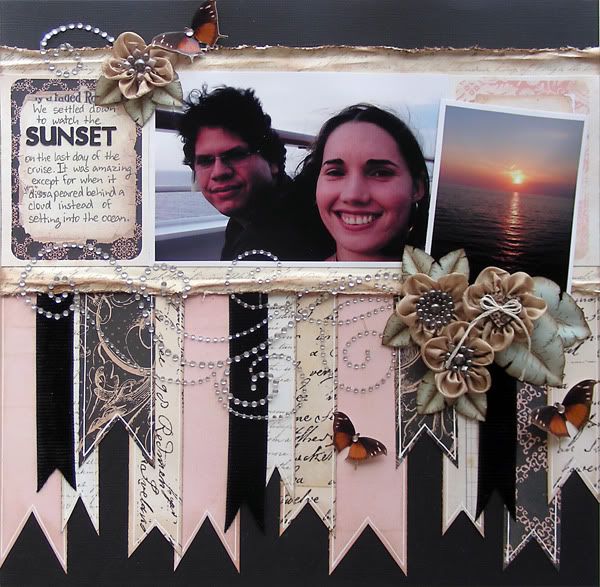
Here's my layout:
Supplies-
cardstock: Bazzill (Raven);
patterned paper: Prima Almanac Collection (Agenda, Shaffer, Wordsmith);
letter stickers: Prima Almanac Collection (8x10 Canvas Typography Alpha Stickers);
ribbon: May Arts (Silky Crushed Ribbon–Champagne, ¾” Velvet Corduroy-Black);
bling: Prima flower centers (Brown), Prima bling flourish;
buttons: Prima Almanac Wooden Buttons;
ink: Tim Holtz Vintage Photo, StazOn Archival Ink (Timber Brown);
stamps: Heartfelt Creations Vintage Life Background PreCut Set (HCPC 3367);
tools: Tim Holtz Paper Distressor, Spellbinders Rose Creations, Cuttlebug machine
other: handmade butterflies, rhinestones
***The BOLDED supplies are included in the Birds of a Feather April Kit or Extra Embellies Kit. Everything else is from my stash.
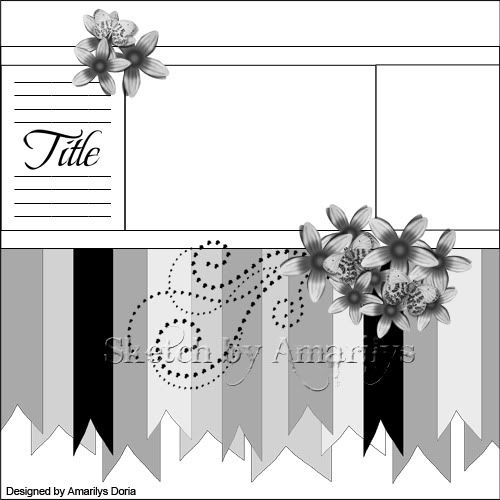
This layout is based on my newest sketch below:
I had so much fun with this layout! These pictures were the last ones taken from the honeymoon cruise so it will be the last page of the album.

I used up all the leftover scraps from the other two layouts to make the banner pendants running over the bottom of the layout. I inked all the edges and added faux stitching using my Signo white pen (my fav white gel pen!) to add some interest. I also added some pendants made out of the black ribbon and I feel this little touch 'makes' the layout! I love the texture it gives to the banner! I also added a huge Prima bling flourish that I've had for a while because it was so big that I didn't know what to do with it but this layout was perfect for it!
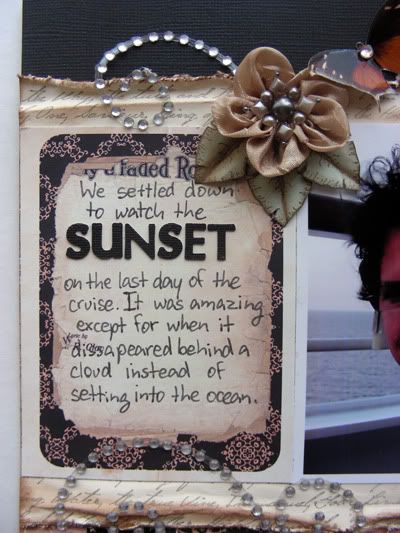
I used two of the journaling cards from the Agenda pattern paper to add to both sides of the pictures and journaled in one of them. I actually added an extra picture over the other one to show off the beautiful sunset.

Of course, I handmade my embellies. I used the 1.75" champagne ribbon to make my flowers for this layout. These are not original as I know many designers who have made them but I'll have my own version of the tutorial up tomorrow on my blog. I used Prima flower centers for their centers. I stamped, distressed and hand cut a few leaves as well. Finally, I added a few 'sunset colored' butterflies. I thought they added a nice contrast and brought in the sunset picture into the layout.
Thanks for stopping by and come back tomorrow to check out my tutorial on how to make these fabric/ribbon blooms!

beautiful love all the tags...gorgeous colors too
ReplyDelete