
The Garden Romance Collection is teeming with birdies, butterflies and blooming peonies. Fun bird houses, mailboxes, and trellises dot the landscape of this new set. Don't say you weren't warned- you may get butterflies in your stomach. There are 7 new PreCut Stamp Sets and one beautiful new exclusive Spellbinders die designed for Heartfelt Creations. Leave a comment on the HC blog by June 19th and you will be eligible to win the entire release valued at $141.99.
Here's what I did with it:
Supplies-
Heartfelt Creations:
HCPC 3323 Large Elegant Word Background Set HCPC 3406 Botanical Floral 1 Precut Set
HCPC 3407 Botanical Floral 2 Precut Set
HCPC 3477 Bird Haven Precut Set
HCPC 3478 Twining Roses Precut Set
HCPC 3479 Wings of Hope Precut Set
HCPC 3480 Brookside Manor Precut Set
HCPC 3481 Add-On Sentiments Precut Set
HCD 713 Decorative Lace Border
HCD 717 Layered Scalloped Posy Die Set
HCD 723 Garden Romance Die
452255 Grand Calibur
472186 Shapeabilities Rose Creations
Other:
Simple Stories Documented (Memories), Couture Creations
Embossing Folder (Renaissance), Tim Holtz Distress Inks (Vintage Photo, Walnut
Stain), StazOn Archival Ink (Jet Black, Timber Brown), Prismacolor Pencils (PC945,
PC947)), Ranger Distress Markers (Forrest Moss), Recollections White Pearls,
Rangers Liquid Pearls (White Opal),
Rangers Stickles (Diamond), Bazzill Cardstock (brown, black), DCWV
cardstock (white), white ribbon, sewing machine
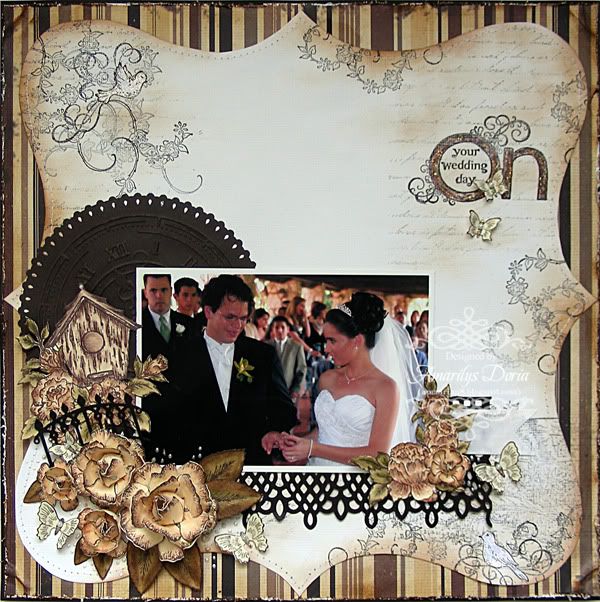
I just couldn't help making a wedding layout with this new collection! The doves, butterflies, blooms and swirls were just begging me for it-so I gave in! I definitely had a lot of fun working on this layout which I absolutely love how it turned out.
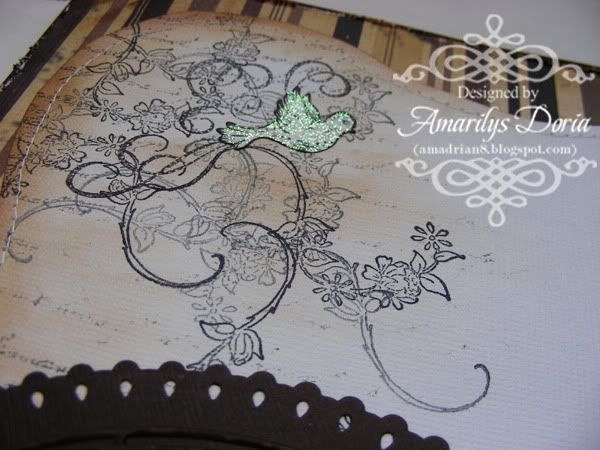
I went ahead and handmade my own die cut background paper, which is always so much fun to do! I stamped with black archival ink on white cardstock and then machine stitched the edges and inked them with Vintage Photo.
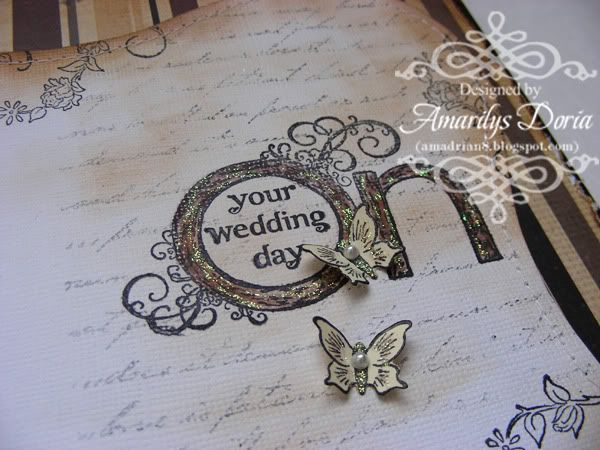
I also stamped the title directly unto the background paper. I colored the title with Prismacolor pencils and added stickles to make it pop. Of course, i added a few small butterflies around the title area.

I handmade some roses for my cluster. I actually added the color with Prismacolor pencils and finished by adding stickles to the edges.
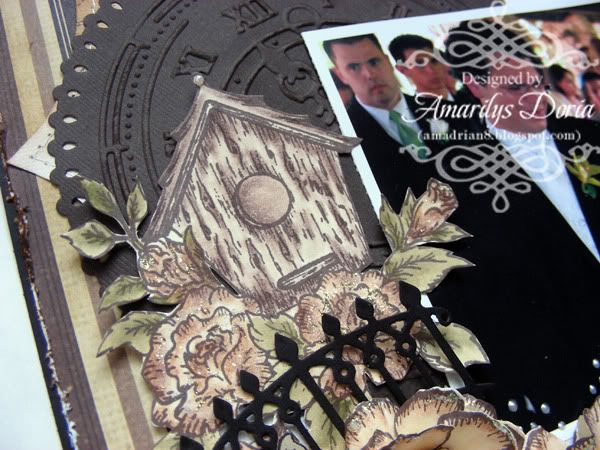
I die cut a doily in chocolate and embossed a clock on it. I LOVE how this piece turned out! I also added a fuzzy cut birdcage and blooms as well as a die cut fence.
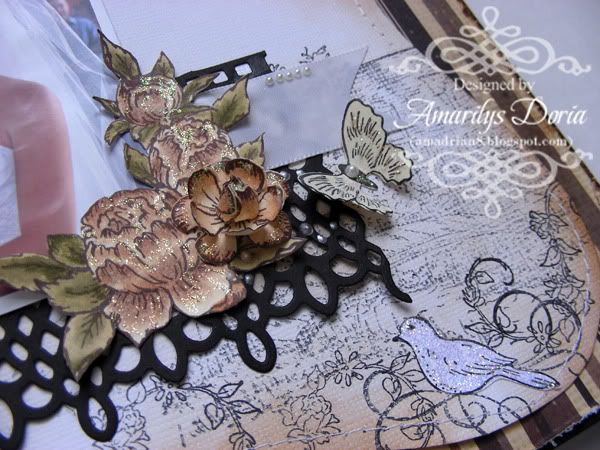
Another look at the layers and blooms!
Here is the step by step write-up for this layout:
Randomly stamp the following stamps using black archival
ink on white cardstock: Twining Roses Precut Set, Wings of Hope Precut Set, Brookside
Manor Precut Set and Large Elegant Word Background Set. On a separate paper, stamp and die cut one of
each of the doves on white cardstock. Add over the already stamped image on the
die cut pattern paper and add stickles to it. Stamp the title on top right side
of the die cut paper. Die cut the white cardstock, ink the edges with Vintage
Photo and machine stitch the edges. Distress the stripped pattern paper and
adhere over a black cardstock. Adhere the white die cut paper over the
background. Die cut the large doily circle from the Layered Scalloped Posy Die Set and emboss the clock. Add
to left and center side of the layout. Die cut a Decorative Lace Border
in black, cut the top off and add over the bottom center side of the page. Add
the photo over the doily and lace. Tuck in a white ribbon between the black die
cut border and photo. Stamp and color using Prismacolor pencils and distress markers
the birdcage and flowers from the Bird Haven Precut Set and the blooms from the
Twining Roses Precut Set. Fuzzy cut both images. Stamp, die cut and color using
Prismacolor pencils enough blooms to make 5 roses (you need 4 die cuts per
rose). Stamp and die cut some leaves and distress with Walnut Stain. Adhere the
roses, leaves, and stamped birdcage image over the left side of the photo. On
the right bottom corner of the photo, add the second stamped image and a small
rose. Tuck a black die cut fence in the cluster and randomly add butterflies
around the layout. To finish, apply stickles to roses, stamped blooms, title
and butterflies. Add pearls to butterflies’ centers and over the ribbon.
Thank you for stopping by my blog today! Remember to go to the Heartfelt Creations BLOG and check out what the other designers made this week with the new release!

beautiful love the colors too
ReplyDeleteThis would also be a great collection for my black and white pictures.
ReplyDeleteCinda
cindafarrell@yahoo.com
Love this layout and how you put everything together. And I like that you used an older die cut on the layout too. Beautiful as always.
ReplyDelete